Sunday, May 19, 2024

Last Fractures

I played two 50ss games of Malifaux on subsequent days, so they're both in this post. Both games took part in Fractured Futures global campaign. Likely the last campaign games I will be able to play.

Strategy: Wedge Cloak and Dagger

Schemes: Take Prisoner, Power Ritual, In Your Face, Death Beds, Hold Up Their Forces

My list:

Seamus with The Whisper & Copycat Killer
Madame Sybelle
Bete Noire
Corpse Curator
Gravedigger
Mourner
Dead Doxy
Mindless Zombie

Pool: 4
Schemes: Death Beds (Corpse), In Your Face
Wicked Whisper: two corpse markers

Opponent had:

Kaeris & Eternal Flame
Elijah Borgmann
Carlos Vasquez
Firestarter
Fire Golem
2x Firebrander
Fire Gamin

Pool: 0
Schemes: Death Beds (Pyre), In Your Face
Moonshine Madness: Condition on enemy model within 3" of Nia during friendly activation

Turn 1:

My grand plan for Nia was to activate Gravedigger first, go drop a corpse and then get pulled back to safety by Madame Sybelle. However! The plan was more efficient than I had planned by a factor of infinity. I didn't have to spend Madame Sybelle's action points at all, when Kaeris was able to kill Gravedigger in just two shots. Boom! Two corpses right next to Nia. 

Seamus was interrupted by Fire Golem, and I had to spend two soulstones to protect him. Copycat Killer still had not activated, and teleported him to centerline near strategy marker closest to bottom. From there he managed to claim intel and even shoot one of the Firebranded dead,

Mourner and Bete Noire were trying to approach from top, while center was held by superior tanks such as Copycat Killer and Mindless Zombie. Well, Madame Sybelle or Dead Doxy were not that far from action, and Corpse Curator was dangerously close to Fire Golem. 

However, the entirety of Wildifre were standing within about 6" of the center point, with three pyre markers to boot. 


Turn 2:

Three pyre markers, you say? Nah, make that seven!

It was a distressing turn for sure. Fire Golem dropped a scheme marker and charged Corpse Curator. One attack was not enough to kill the thing, so it made haste to drag a corpse marker along next to Nia while it still was able to do so. It also dropped a scheme marker for maybe some Death Beds one day.

And true enough, opponent poured everything they could at Corpse Curator. Kudos for it for surviving the torrent of attacks throughout the turn, until Carlos blew the out-of-keyword enforcer out of the board. 

However, Corpse Curator was not the only model to get beaten up. Seamus tried to shoot a Firebranded, but missed. He also picked up intel, and charged Firebranded, managing some random points of damage. But Kaeris and the minion himself kept attacking Seamus. They didn't even fail their Terrifying checks, so Seamus didn't heal. 

Copycat Killer had to bail Seamus out of there, and Mindless Zombie - who I had hired just for this purpose - was able to assist six points of burning off of Seamus. And yet, Redchapel master was still burning...

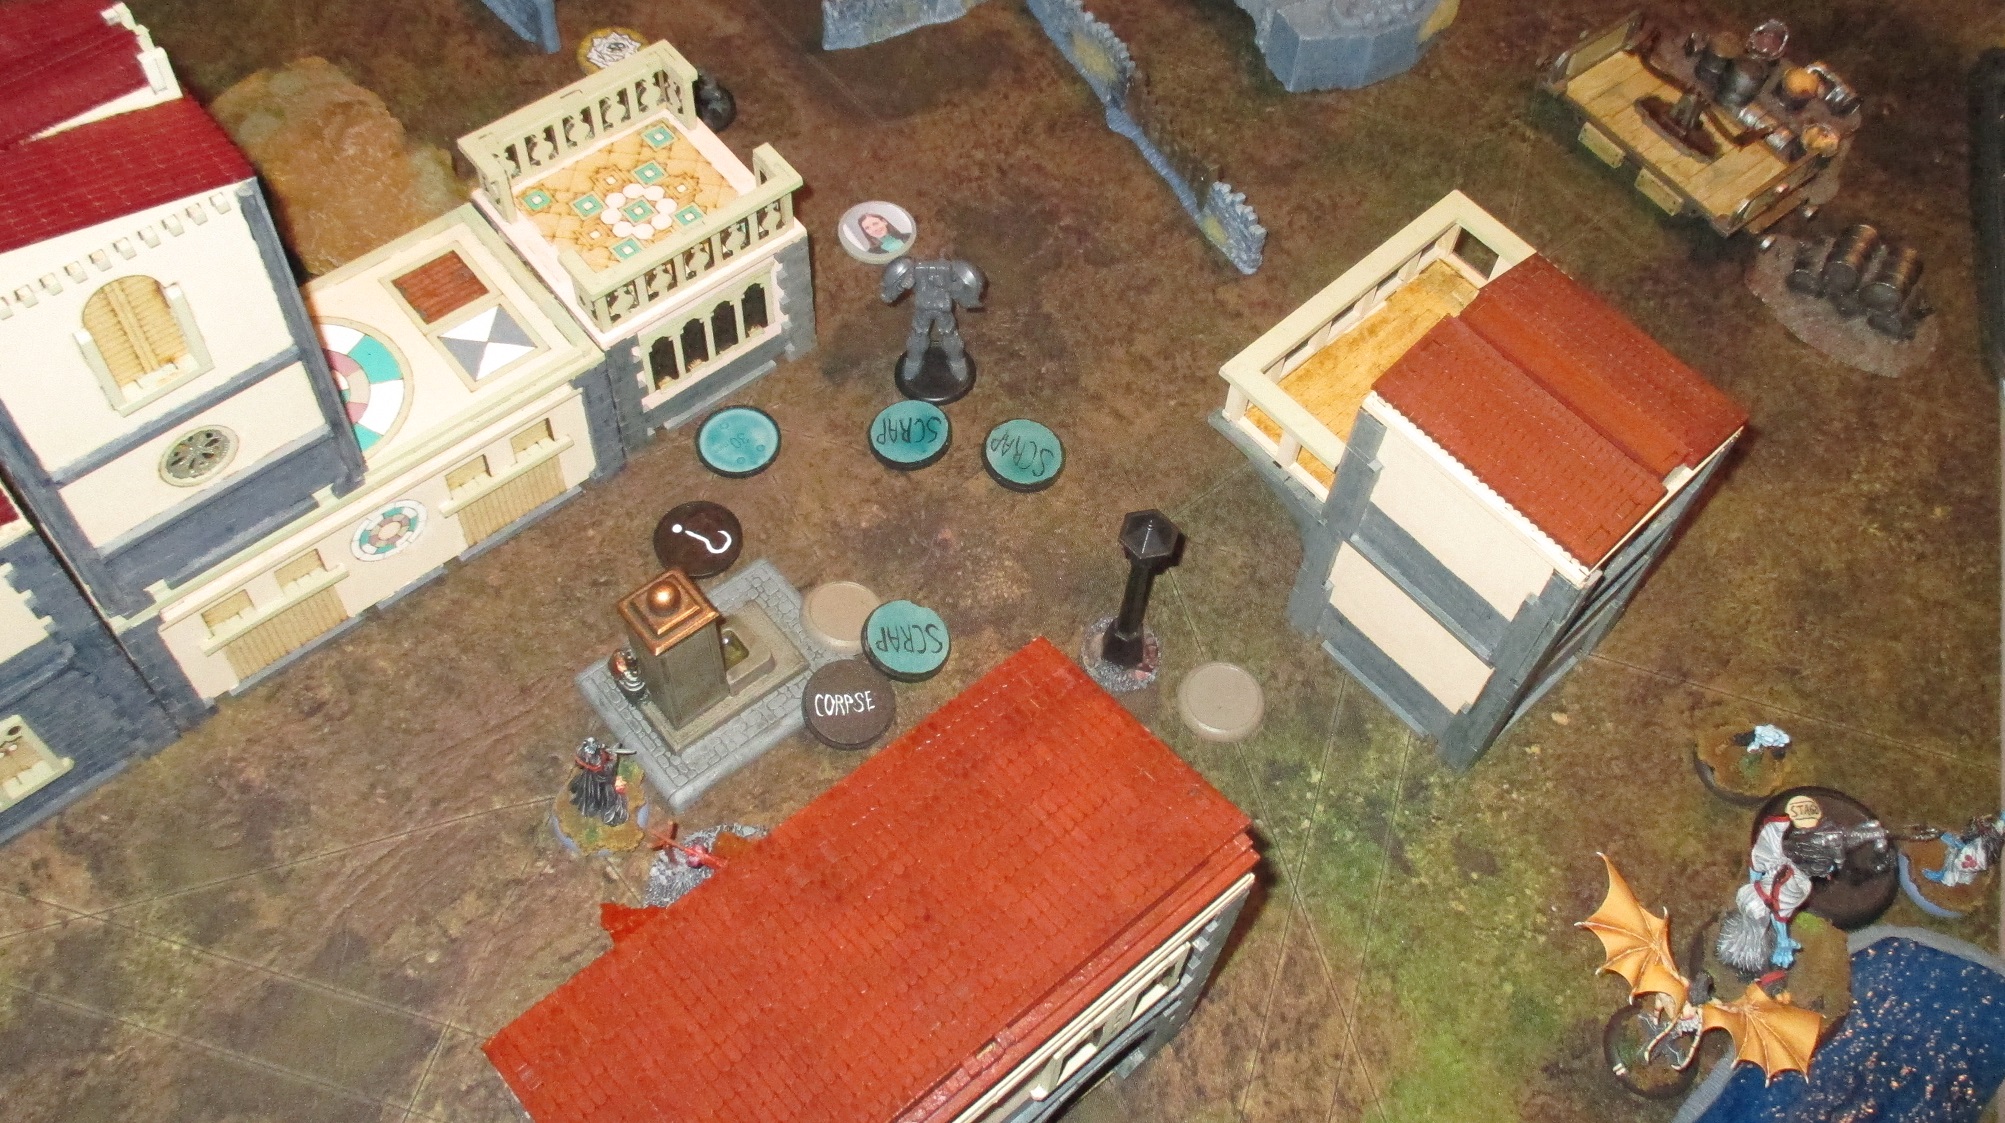
Seamus also had about five health remaining, so I decided to reposition Mourner and even Bete Noire closer to middle. Bete Noire tried to soften up Carlos, and did well enough. Mourner's role was to get rid of Elijah's Ruthless if he attempted to attack Seamus. In the picture he's behind Fire Golem. 

Both players scored Nia and strategy this turn, but Arcanists also received Death Beds from Corpse Curator for a lead of 3-2.


Turn 3:

Turn three things got a wee bit intense. 

Seamus was able to heal himself a bit with Terrorize. A moderate shot injured Fire Golem somewhat, but Seamus didn't dare to show his face any longer, escaping behind a house. 

Firebranded healed Fire Golem enough for me not to have any hope of killing it. 

Bete Noire tickled Carlos for a bit and charged Fire Gamin dead. Kaeris and Elijah charged Bete, managing to fade her away with enough burning to kill her while buried. Uh oh. 

Dead Doxy was able to remove Madame Sybelle from melee and pick up intel, but she had also received enough burning to die from it during end phase. 

Mourner and Mindless Zombie both tried to attack Carlos without much of an effect, but finally Madame Sybelle dealt the killing blow, thus scoring In Your Face. 

Eventually Copycat Killer repositioned Seamus back at strategy markers for upcoming turns.

Both players scored strategy, and Resurrectionists got In Your Face for a tie of 4-4.


Turn 4:

Except, uh, three of my models just burned dead. At least Wildfire had been losing models, too, but situation was grim nonetheless. I decided to go all-in. 

Seamus went to take two shots at Fire Golem, connecting both but scoring only a moderate and a weak damage. 

Firebranded healed the Golem again, and - well, I had made up my mind about going all in. Copycat Killer switched places with Seamus and started shooting the Golem. And finally it went down after it ran out of burning to block damage. 

Hooray! Death Beds!

However, before Kaeris went to pick up some intel, Elijah, Firebranded or whoever had killed Madame Sybelle, scoring In Your Face for Arcanists. 

It looked kind of a game over, until an unlikely hero appeared. Mourner shot unactivated Firestarter dead with a Feed on Grief by flipping Red Joker on damage. 

Unfortunately Eternal Flame extinguished Mourner's flame, and Copycat Killer just burned into crisp from conditions gathered throughout the game.

So, although points went to 5-5 tie, a lone Seamus would not be able to turn the tables around... or would he?


Turn 5:

Elijah was able to charge Seamus, but he flipped Red Joker on damage block. Seamus, however, was not in a position to teleport twice to place scheme markers next to corpse markers. Instead, he teleported to top-left corner to flee the scene with two health and three burning.

Kaeris was able to pick enough intel for third strategy point, and there were still enough models to place a couple of schemes next to pyre markers. So, it was a damn bloody 7-5 victory for Arcanists.


Game 2:

Strategy: Corner Plant Explosives

Schemes: Protected Territory, Hold Up Their Forces, Power Ritual, Espionage, Death Beds

My list:

Molly Squidpiddge & Necrotic Machine
Carrion Emissary
Noxious Nephilim
Forgotten Marshal with The Whisper
Rabble Riser
Night Terror
2x Crooligan

Pool: 3
Schemes: Espionage, Power Ritual
Wicked Whisper: Summon a model while within 3" of Nia

Opponent had:

Nekima, Broodmother & Blood Hunter
Hayreddin
Serena Bowman
Mature Nephilim
Young Nephilim
Black Blood Shaman
Terror Tot

Pool: 6
Schemes: Hold Up Their Forces, Death Beds (Corpse)
Parasitic Protection: Heal within 3" of Nia


Turn 1:

Both Crooligans were deployed with an explosive token to the farthest corners of the map and for the first turn, they only concentrated. While it certainly looked a bit like Power Ritual, it was still possible I had chosen Protected Territory or Espionage. 

However, after first turn had passed, a Young Nephilim was threatening both of them, despite opponent only having one of them in his list. Kids sure grow up so fast these days. 

Forgotten Marshal summoned a Night Terror that he launched to my deployment corner - I had messed up the deployment to easily place a scheme marker for Power Ritual. Noo, you wouldn't know, it might still be for Espionage! That's a perfectly reasonable investment in a bluff! Well, at least it served double duty.

Rabble Riser goes running towards top-right corner, with Noxious Nephilim flying about in a forest nearby. Both had explosive tokens, so they were a bit hesitant to enter middle melee that was bound to be saturated with Mature Nephilims and whatnot. 

Speaking of which, Mature took a double walk which prompted damage from Lethe's Caress. Serena later threw some bottles of painkillers down Mature's throat, claiming first fracture token that way. Thanks, Molly. 

Carrion Emissary went to summon zombies within 3" of Nia marker, thus also scoring fracture token for Resurrectionists. 

I had Molly, Emissary, hired Night Terror, Forgotten Marshal and Necrotic Machine contesting the middle along with two Mindless Zombies now. It felt awfully little against Hayreddin, Serena and Mature Nephilim, with Black Blood Shaman and Nekima not too far away. 


Turn 2:

Neverborn got the initiative, and started mauling Crooligans. The one at top-right corner died to three attacks by Young Nephilim. The other one at bottom-left corner was a little too far for another Young Nephilim to fly and charge, so he just needed to dodge one attack. But, he was engaged now, so bye bye Power Ritual for this turn at least.

Hayreddin went to place a strategy marker into outskirts of center forest. Forgotten Marshal disapproved and went to put the henchman in pine box. Later he also acted as a teleport beacon for surviving Crooligan, who jumped to him to pick up Hayreddin's bomb and to toss it to Neverborn side of table right away. 

Molly had activated to try to draw crows for Forgotten Marshal, but no such luck. She went closer to centerline and managed to slow Mature Nephilim as well as damaging it heavily. But then Serena activated, healed the Mature for a bit and removed slow with bottle of painkillers. Ah well, it was fun while it lasted. 

Mature killed a Mindless Zombie and charged Molly, dealing four damage back, which was reduced to two with a soulstone.

I wanted that Nia point this turn, so instead of Aura of Decay Carrion Emissary summoned even more zombies. It also killed a Terror Tot that Nekima had summoned. The Neverborn master charged in and killed a Mindless Zombie while Dark Bargaining a scheme marker nearby.  Black Blood Shaman took interest in Carrion Emissary and charged it. 

Rabble Riser was able to reach Young Nephilim with a charge & flurry attack, not even missing all of his attacks.

Necrotic Machine tried to heal a Night Terror that was hiding in ruins, but failed the target number. As opponent had no cards in control hand, Necrotic Machine took a 3" move in end phase and attacked Mature Nephilim, most importantly scoring two points of poison. 

So, the Crooligan had managed to rob Neverborn of their first strategy point. They did, however, reaveal Hold Up Their Forces. Resurrectionists got strategy and Nia point for a 2-1 lead.


Turn 3:

Carrion Emissary started the turn by slapping on Aura of Decay. It also pecked Black Blood Shaman for a bit. 

Next to activate had to be Rabble Riser. It took all of his actions and a flurry, but fortunately Young Nephilim went down. But he would not be able to power a ritual this turn.

I was indeed worrying about my Power Ritual and Espionage, so after Emissary and Rabble Riser I made it an imperative to deliver Crooligan to where it mattered. Noxious Nephilim dropped a scheme to centerline and walked forward for Crooligan to teleport. He did, and placed his explosive. Good, I guess, but no schemes. 

In the center, Nekima charged Carrion Emissary to block line of sight to Mature Nephilim, and kept healing it while I was busy hurrying up Crooligan. 

Serena had removed Poison from Mature Nephilim, so Necrotic Machine had to re-apply it. But attacking those Black Blood models is stressful with a health pool of four. The machine healed itself for a bit, but still succumbed to Mature's attacks. While it didn't seems such a big deal then, I sorely missed a healer when Black Blood Shaman somehow kept hitting Carrion Emissary, sometimes with moderate damage. After the turn Emissary had just three or so health points remaining. 

A stampeding Blood Hunter was able to wreck both Mindless Zombies, who until then had been quite resilient to Black Blood thanks to Nia's shieldings. Hired Night Terror committed to killing the Blood Hunter with one health remaining, but just couldn't do it. Forgotten Marshal had to summon a Rabble Riser that did a little better job, although only with flurry attack that had me discard black joker from my hand. 

By now summoned Night Terror had spawned two scheme markers on my deployment, and the Young Nephilim from bottom-left corner had dropped an explosive and flew closer to center melee. 

Molly managed to disturb Mature Nephilim dead with her story, walked and placed a scheme marker for Espionage. 

Both players scored strategy but nothing else, for a 3-2 lead for Resurrectionists.


Turn 4:

Nekima activated first, and got a bit greedy. She dropped a scheme marker with Dark Bargain, brought Carrion Emissary down to one health remaining and tried to finish it off with Blood Has Been Spilled. Emissary passed, and was able to disengage for a bit and shoot Nekima with Rot and Rend. It scored moderate damage, which also clipped Black Blood Shaman. As a last act of defiance it summoned two zombies more, as I doubted Aura of Decay would do anything.

But being at one health is... a bit of a hazard against Nekima2. What ultimately fell my ten point enforcer was the Terror Tot that had just been summoned. And it did so by failing terrifying check. It scored Death Beds, gained a grow token and ate the Emissary's corpse token. And 'lo, Young Nephilim. What did I say about kids growing fast, again? 

Young Nephilim from bottom-left picked up the strategy marker Crooligan had stolen on turn 2 and flew away from action. Forgotten Marshal pine boxed Hayreddin again, this time after it had activated. 

Hired Night Terror in the middle was able to kill Black Blood Shaman, and summoned Rabble Riser tried to do the same for terror tot Young Nephilim, but did a whole lot of worse than the hired counterpart top-right. Summoned Night Terror just tried to position itself so it might do something of consequence during last turn of game. 

Serena ran next to the forest in middle, carrying an explosive token. 

Rabble Riser top-right walked to corner and schemed, while Noxious Nephilim walked and schemed in enemy deployment. Crooligan took a double walk towards top-left corner. Molly had no time to search for lost knowledge, and had to do a double walk to place my third strategy marker.

Resurrectionists scored both schemes and strategy, and Neverborn got their Death Beds, strategy and Nia for a 6-5 lead for Resurrectionists.


Turn 5:

Rabble Riser, Noxious Nephilim and Crooligan were able to secure both schemes and fourth strategy point without much of a chance for Neverborns to react. 

They, however, were able to build three pairs of corpse + scheme marker, so it was impossible for Molly to go and discreetly remove a critical piece. 

Serena was able to drop her bomb, and summoned Night Terror just went to die to Young Nephilim left of the forest. 

There wasn't enough high cost models nearby for opponent to engage, so Hold Up Their Forces failed. Game ended in 9-7  victory for Resurrectionists.

Wednesday, May 15, 2024

Who's the Banest of Them All?

 A 50 point game of Warmachine over War Table.

My list:

Cryx Unlimited
Venethrax
- Desecrator
- Harrower
- Deathripper
Bane Warriors & Attachment
Scharde Ogrun Ironmongers
Warwitch Siren
Skarlock

Command cards: Gravedigger, Blessing of the Gods, Break Through, Old Faithful, Power Swell

Opponent had:

Cryx Dark Host
Bane Witch Agathia
- 3x Slayer
- Deathripper
2x Bane Warrior units
Pistol Wraith
Necrotech

Command cards: Infiltration, Power Swell, Old Faithful, Careful Reconnaissance, Break Through

Scenario was Payload.

First two turns Venethrax's army just ran forward, Desecrator and Banest on the left, with Venethrax and Ironmongers in the middle. Both solos and Deathripper were on the right, with Harrower repositioning there to help them for a bit. 

Opponent had launched his slayers against Desecrator and Banes. He wanted to make his warjacks incorporeal with Agathia's feat, but both Banes chosen for that managed to pass their Tough checks, and even Desecrator was left alive with a couple of damage points remaining. 

It looked pretty bad for Agathia, but somehow Cryx warjacks - no matter the side - were not living up to their damage potential standards. First Bane Warriors charged Slayer that had Hellwrought on, and while they managed to hit respectably - I think two out of three did that - their charge damage rolls were abysmal. Non-charging attacks versus another Slayer engaging Desecrator didn't do any better. 

Desecrator managed to bring Slayer down to a couple of damage boxes, but that just wasn't enough. Venethrax had to charge in and deliver the warjack from its misery. This left him in a subpar position... at least when there were opposing Bane Warriors involved! He kept a four focus in camp, just in case.

Harrower charged to Slayer on the right, and managed to take down two enemy Bane Warriors with a Thresher attack. Damage to the warjack was actually on the higher end, but Agathia was able to bring the thing fully functional with Old Faithful.

The now-repaired Slayer and remaining enemy Banes were able to wreck Harrower entirely. On the left, opponent wen all-in with assassination. Agathia landed Parasite on Venethrax, and the remaining Slayer trampled over a couple of my Warriors, not doing much. Five Bane Warriors charged, though. They needed 9's to hit, and two of them exceeded that roll. Damage rolls were stressful, and my warcaster was left with three health remaining after just two attacks. Fortunately nothing was able to score further hits, although Pistol Wraith certainly tried.

This left opponent dragging behind in scenario points - Venethrax now had a lead of two. 

It took combined efforts of Venethrax, Desecrator and Bane Warriors and even Scharde Ogrun Ironmongers to destroy Slayer and enemy banes from the right, but that was a devastating blow to Agathia. On the right, Warwitch Siren was able to spray one enemy flag terrain scoring Bane dead, and while Deathripper wasn't able to destroy Slayer there, the helljack no longer had functional cortex. 

In total, Venethrax took a four point lead on that turn, and Agathia didn't stand a chance to catch that. 

Venethrax had healed back to five health remaining, and Agathia's best shot was to throw a fully boosted Hellfire against him. First, Pistol Wraith tried to chill Venethrax, but trying to get a ten twice in a row was a tall order. Hellfire also missed, and we ended the game there in Venethrax's victory.


Monday, May 13, 2024

Second turn 4-4

 A 50ss game of Malifaux on Vassal. It was part of the Fractured Future global campaign.

Strategy: Wedge Plant Explosives

Schemes: Information Overload, Outflank, Sweating Bullets, Hold Up Their Forces, Ensnare

My list:

Dr. McMourning & Zombie Chihuahua
Sebastian
Corpse Curator
Kentauroi with Grave Spirit Touch
Nurse
Necropunk
Gravedigger
Little Gasser

Pool: 5
Schemes: Ensnare, Hold Up Their Forces
Thread: Wicked Whisper objective 1 (Two corpse markers within 3" of Nia)


Opponent had:

Youko Hamasaki, Unseen & Chiyo
Bill Algren
K.O.T.O
Shojo
2x Bunraku
Tanuki
2x Geisha

Pool: 4
Schemes: Outflank, Sweating Bullets (Bill Algren)
Thread: Moonshine Madness objective 1 (opponent within 3" of Nia gains a condition during a friendly model's activation)


Turn 1:

Sebastian started by making a Canine Remains out of Gravediggers deployment corpse. The dog proceeded to take a chunk out of Corpse Curator, and went to drop it near Nia. Gravedigger did also went to drop a corpse near enough Nia to score fracture point. With Wedge deployment, not too much effort required.

But then Shojo activated and did the most horrible thing imaginable to the dog. She called it a bad boy. What a biting insult. Canine Remains was distracted, and opponent got their first fracture point.

Corpse Curator did a sludge marker and went to place a scheme marker to drag along later. Geisha lured Corpse Curator forward, and since neither Youko nor Bill had activated, I was worried for its safety. Dr. McMourning activated and went to threaten the entire damn Qi and Gong crew. What an ego. He also gave doctor's orders for Corpse Curator to back off. 

Bill did manage to land a hit on McMourning, but doctor just healed all damage in the end phase. 

Opponent had a Bunraku going towards both points where center line met board edge, which looked a lit like Outflank. I had Little Gasser going far right, where Chiyo and Bunraku seemed to be going. On the left, Necropunk and Bunraku were nearing the outflank point.

Kentauroi was the only model dropping an explosive token during first round, and was free to go either towards the center clump or Bunraku to left. 

But the middle. Yeah. Only one piece of size 1 blocking terrain was between McMourning and KOTO, both Geishas, Shojo, Bill, Youko and Tanuki. And that terrain was destructible, too. Even for McMourning that was kind of worrying prospect. 


Turn 2:

The situation in the middle? It was most likely the messiest melee I've seen in a while. 

Shojo was able to activate Boring Conversation early on, which became quite the nuisance. I made a plan: Nurse removes the terrain and pushes McMourning here and there right to Shojo, so I can remove such a devastating aura for mainly Wp 4 crew. I wanted until McMourning had some damage. However, it seemed that the longer I wait, the more debuffs came stacking in. Youko and Bill actually killed Corpse Curator and the Zombie Chihuahua, who had heroically charged headlong into melee against models with Disguised. At least it stank a little.

Opponent didn't seem that keen on killing my slow, 4x Distracted Canine Remains which was engaging KOTO. I suppose McMourning and Sebastian were more of a concern. However, that was excellent news for my Hold Up Their Forces. 

Eventually I did bring McMourning into melee with Shojo, using Nurse. However, by then McMourning had a few stacks of Distracted and also Slow. And there were two Geishas with Distraction aura, and the Boring Conversation. Before getting to Shojo I'd have to deal with Geishas. 

Fortunately one of them had received poison from Zombie Chihuahua, and dealt 25% of her health as damage via Catalyst. I had a 13 of Rams in my hand, so I was planning on securing a kill on that Geisha to at least do something. It was hideously expensive to kill that Geisha. McMourning had to use two soulstones to get straight, cheatable flips. One for Boring Conversation, another for attacking while distracted. And of course I had to use the 13 of Rams from hand. For a single strike against a four point minion! And yet, there was still another one of them. 

Well, I got only myself to blame here. I didn't anticipate that the entire goddamn Qi and Gong crew would pile up in the middle like that. Don't they have schemes to run?! However, I had no critical reasons to engage the hellish blob of debuff auras like that.

But now that I were there, why not bring Kentauroi there, too! It failed its attacks obviously, but the thing was to get Bill Algren engaged for Hold Up Their Forces. 

Before Dying, Corpse Curator had hauled a scheme marker near Bill, and I think it was Canine Remains who put another before going to engage KOTO.

Thus, Resurrectionists managed to reveal both of their schemes, strategy AND thread objective for a whopping four points on turn two.

However, opponent didn't fare any worse. Bunrakus were easily able to get Outflank despite Necropunk trying to engage it, and Gasser bluffing Outflank on the other flank. Bill Algren, the centerpiece model for both of my schemes, was also able to score Sweating Bullets for Qi and Gong. 

First, and possibly only 4-4 on turn 2 game of my Malifaux career.


Turn 3:

Qi and Gong had only one unspent pass token from last turn, and I felt like I really, really needed the initiative. I cheated Red Joker on initiative, but opponent cheated a 13. After re-flips I had to cheat a 13 from my hand to secure initiative.

Reason was to get rid of Distraction aura once and for all. The way how boring conversations benefit from distractions is beyond horrifying. McMourning was first to activate and remove Geisha from board before Shojo would start her ramblings. PHEW.

That... was just about the only good news this turn, though. Bunraku on right killed a bomb carrying Little Gasser before it was able to activate, and same happened with Bill Algren and Kentauroi. 

Whatever damage I was able to do was mostly healed. KOTO and Bunraku on right dropped strategy markers. Necropunk wasn't able to do enough damage to deny Bunraku on left robbing me of a strategy marker. 

Even a freaking tanuki nearly killed Nurse. However, all hope was not lost as Sebastian was able to dislodge himself from melee to drop a strategy marker next turn.

As Ten Thunders were able to deny Resurrectionists a strategy point this turn, scores went 5-4 for Ten Thunders.


Turn 4:

Well, it was all downhill from here. 

While Sebastian managed to drop strategy marker and charge to Youko, and survived admirably. 

McMourning summoned a Flesh Construct, gave Doctor's Orders to himself and went to place strategy marker before charging to Bill Alrgen. He even managed to land a devastating severe, but the damage was healed throughout ongoing turn.

Necropunk failed it's jump later in the turn, and decided to go and deny opponent Outflank. But this lead Qi and Gong not to pursue it at all, so Bunraku from right was able to re-deploy against Sebastian. Other Bunraku ran into my deployment zone.

But the most devastating activation came from KOTO, when it was able to drain life away from Gravedigger with two strums from its koto, despite penalties to damage flips. Ah well. It's not like I needed Gravedigger to score Ensnare easily next turn.

Both players get a strategy point, so Ten Thunders lead with a one point margin of 6-5.


Turn 5:

Sebastian survived Youko's onslaught, but she also moved a Bunraku away from Sebastian's melee, which meant it would have a free pass at going to rob me a strategy point. 

Because of that McMourning had to make a sacrifice - and managed to Black Joker his disengage. Second one succeeded, though, and he was able to give Sebastian Doctor's Orders to go and engage Bunraku. But, that was essentially McMourning's contribution. In the hindsight, I should have walked to block Bill Algren's way to another strategy marker of mine that had been blocked by McMourning and Nia. I just didn't take into account KOTO's ability to move Bill out of melee. 

I also messed up with Canine Remains that could have given me Hold Up Their Forces along with Necropunk it had stayed in melee with Shojo. But no, it went to engage Bill Algren instead because of... reasons.

So losing two points last turn was totally poor play on my part. Fortunately it didn't cost me the entire game, as 8-7 would still have been a loss for Resurrectionists. But in the end we were looking at a 8-5 victory for Ten Thunders.


Tuesday, May 7, 2024

Stuff the Daggers

Two 50ss games of Malifaux

Strategy: Flank Cloak and Dagger

Schemes: Ensnare, Death Beds, Take Prisoner, Protected Territory, Outflank

My list:

Kirai & Ikiryo
Datsue Ba
Lost Love
2x Shikome
Gwisin
Drowned
Enslaved Spirit
Seishin

Pool: 5
Schemes: Protected Territory, Take Prisoner (Hunter!!!)
Thread: Wicked Whisper objective 2

Opponent had:

Hoffman & Mechanical Attendant
Joss
Melissa
Guardian
Hunter
Medical Automaton
2x Watcher

Pool: 3
Schemes: Take Prisoner (Shikome), Outflank
Thread: Badges and Blades objective 2


Turn 1:

There was a big enough building complex on Urami side to act as a dividing element even for incorporeal keyword. 

A Shikome was aided by Seishin to go and pick first intel in the bottom-right corner of board. A Hunter walked closer to the same strategy marker and attempted to shoot Drowned. A Watcher also took a double walk towards bottom-right corner.

Guardian had tossed another Watcher towards top-left corner, which certainly awoke a suspicion in me that opponent might be trying to outflank my crew. Before the Watcher had been able to activate, Shikome tried to walk and charge it without much of an effect. Watcher was able to disengage and approach top-left corner.

Melissa repositioned from right to left and run & gunned Gwisin, and did so hard. Lost Love had to teleport in for heals. Thus, Gwisin, Ikiryo, Lost Love and Enslaved Spirit were holding the center-left against Guardian, Melissa, Mechanical Attendant and Hoffman. 

Center-right, past the building and closes to Nia marker, was Seishin, Datsue Ba, Drowned, Kirai and even a summoned Goryo were holding the area against Joss and Medical Automaton. Drowned and Goryo managed to severely injure Joss. Red Joker on damage and Black Joker in damage block is... harsh.


Turn 2:

Well... that didn't go as planned. 

Melissa runned and gunned Shikome down to one health remaining. Fortunately there were not that many threats around for her if she stayed in place. So, she picked up intel and placed a scheme marker while being guarded by Gwisin. Had she charged Watcher in the corner, chances are she might have been taken down. 

Guardian beat Ikiryo down before she was able to activate, and Mechanical Attendant grabbed a point of intel. So, pretty much just like that my left side game collapsed. Sure, I brought Enslaved Spirit to engage Guardian, but, ech.

Another Shikome dropped a scheme marker and took a flight as far from Watcher and Hunter as possible. And fortunately enough, Hunter went to participate in the fight in the middle near Nia marker, and Watcher went to place scheme to bottom-right corner.

Medical Automaton healed Joss as much as possible. And with Joss's death now out of reach, Goryo that had been summoned last turn decided to rather take down Medical Automaton. 

Hoffman changed course and went to middle, and removed summoned Goryo from equation. However, soon enough another one was summoned. Drowned, the new Goryo, Kirai and even Datsue Ba's judgement tried to kill Joss, but they couldn't quite do it. At least it drained Guild's soulstones. 

Lost Love teleported to Datsue Ba and went to place a scheme marker for Protected Territory. 

This turn I realized what a grave mistake I had done when I picked Hunter as my Take Prisoner target. 

Points, however, went: Strategy, Nia and Protected Territory for Resurrectionists, strategy and Outflank for Guild for a 3-2 lead for Kirai.


Turn 3:

I lost initiative, and tried to place Nia so far from action that opponent would have to act suboptimally to score Nia this turn.

Hoffman had to waste an action to walk within 3" of Nia, and I was happy to see that Goryo wouldn't die just yet. However, Mechanical Automaton was able to score the kill with surprise shot. What a surprise!

Drowned died, but so did Joss. After various summons and turns spent next to Nia, Kirai had fallen down to five health remaining or so. So, after killing Joss and summoning Ikiryo, she went as far back as possible behind a fountain.

Hunter took an intel and backed off as far as possible. It would be annoying, difficult even, to catch Hunter as a prisoner with incorporeal models because of Deadly Pursuit.

So this is what it took: Datsue Ba ran and charged behind Hunter. Non-incorporeal Lost Love teleported in such a manner that opponent would have to pursuit into severe terrain. That, however, would still not be enough. I tried to move Shikome as close as possible, but I still thought opponent might be able to push over 1" away from Datsue Ba and not get within 1" of Shikome. Thus, summoned Ikiryo shrugged off slow and ran to block Hunter from moving at all. 

Sheesh. But a victory point is a victory point, I suppose.

Another Shikome eventually either died to Melissa or Watcher, and Guardian slapped Enslaved Spirit dead with just one hit as was expected. 

Guild received Nia point and strategy, and Resurrectionists got strategy and Take Prisoner for 5-4 lead for Kirai.


Turn 4:

As Hunter was already far away from my side of table, I decided to just kill the prisoner. Ikiryo was able to do that, freeing Datsue Ba and Lost Love to go to scheme Protected Territory end condition.

Hoffman managed to maul Kirai dead even when I tried to block Hoffman's move with Nia marker. 

Shikome went to pick intel, and Mechanical Attendant walked right next to strategy marker for upcoming turns.

Gwisin was miraculously able to survive Guardian and Melissa. Most likely because Melissa had slowly been scraped down to one hit point remaining, which is not good news against Vengeance +1. 

No points were scored this turn for either player.


Turn 5: 

Hoffman came to rob Shikome of her intel. However, Hoffman had been injured for quite a bit throughout beating various vengeful models. Ikiryo set her sight on Kirai's killer, walked and charged Hoffman dead. 

Gwisin was able to land a final hit on Melissa, which ruined Guild's chances to receive third intel. However, Guardian smacked Gwisin back which ruined any chance for Resurrectionists to use Lost Love to claim intel from, wherever. He was needed to score Protected Territory end condition.

So, both players gained end condition from one of their schemes for a narrow 6-5 victory for Kirai.


Game 2:

Strategy: Standard Stuff the Ballots

Schemes: Protected Territory, Deliver a Message, Outflank, Sweating Bullets, In Your Face

My list:

Molly, Chaotic Conductor & Necrotic Machine
Philip & Nanny
Archie
Noxious Nephilim
Carrion Effigy
Rabble Riser with Killer Instinct
2x Crooligan

Pool: 4
Schemes: Deliver a Message (Archie), In Your Face
Thread: Wicked Whispers

Opponent had:

Jakob Lynch & Hungering Darkness
Gwyneth Maddox
Mr. Graves
Mr. Tannen
Soul Battery
Tanuki
2x Illuminated

Pool:
Schemes: Sweating Bullets, In Yo Face
Thread: Adrenaline Rush


Turn 1:

A single Crooligan was deployed right next to both ballots at the table edges as you'd expect. However, Hungering Darkness charged the one on right, so she teleported back to my deployment to get some heals from Effigy.

The second Crooligan took some cover behind a wall, as he saw other enthusiastic voters coming to the same ballot. Mr. Tannen and Illuminated, to name a few. 

Molly shuffled Noxious Nephilim near Nia marker to throw up required corpses for fracture points. Lynch started shooting at it, but Necrotic Machine made good job at stitching the nephilim. Archie positioned to within easy message delivery range of Mr. Lynch. 

Rabble Riser took a full run way past centerline, maybe one day getting behind enemy lines to vote. 

Molly, Necrotic Machine, Philip & Nanny and both beaters were holding up the middle, while Ten Thunders had their master and Mr. Graves nearby, with Tanuki and Illuminated hanging around and Gwyneth failing to hit the jackpot and thus getting no fracture points just yet. I felt relatively confident at this set-up.


Turn 2:

... Except that Lynch used Looming Dark to pull Hungering Darkness into melee with all of my Df 4 beaters. This took my by surprise as I was sure Honeypot would plant a vote to the rightmost ballot. Nope, Noxious Nephilim nearly died. 

Since its demise looked imminent, I activated Nephilim only for it to throw up what it just had regenerated, thus scoring Nia point. 

I think it was Gwyneth who killed Noxious Nephilim next, again failing with jackpot. No fractures for Honeypot this turn. 

Lynch started shooting Archie, and did a horrifying job at that. He had, like, two or three health remaining after those derringer shots.,

But then Molly made a weird super activation. She healed Archie back to full with Deja Vu's and shenanigans, and encouraged Archie to boldly walk with pride to deliver a message for Mr. Lynch. Now, I don't know what written in the message, but Honeypot got furious. Or maybe it was just the way how Archie walked. I don't know. But Mr. Graves and Illuminated beat Archie back down to two health remaining.

Instead of scoring In Your Face with Archie, the poor guy had to leap away from action, and even cheat himself down to one health remaining to succeed at the leap. Two walks later he was getting patched up by Carrion Effigy.

It took three angry voters, Mr. Tannen, Soul Battery and Illuminated to scare away an underage voter, who teleported to center ballots and crammed it full illegal votes. Three, in fact, because of Nia's Adrenaline Rush. 

Philip & Nanny had succeeded in slowing down Hungering Darkness, but Tanuki was just as good lifting Lynch's totem's mood up from sluggishness. 

Suddenly situation looked a wee bit worrying, but at least Necrotic Machine landed double poison on Hungering Darkness, greatly reducing its survivability with neurotoxins. 

Since Hungering Darkness had left rightmost ballots empty, buffed up Rabble Riser ran there to place votes next turn.

Resurrectionists scored strategy and Deliver a Message. Opponent had received strategy and both schemes for a 2-3 lead for Honeypot.


Turn 3:

Resurrectionists got the initiative, and tried to ruin enemy plans with Boring Conversation. Philip and Nanny were able to slow Hungering Darkness again, and Tanuki did exactly same it did last turn.

Hungering Darkness was under neurotoxins and Carrion Effigy's no-heal aura. To relieve itself from the plethora of debuffs, Hungering Darkness activated and indeed managed to scrap Necrotic Machine. Gosh and darn. 

It was time to see what Molly's parade baton was all about, as Hungering Darkness only had five health remaining. I figured my best chance would be to do a singular, mighty hit. My hand was already running low, so Molly concentrated, positively reinforced herself and took a swing at the beast, using focus both on Terrifying and attack flip. Annoyingly it only resulted in a tie, so damage was flipped with negative modifier. Nonetheless, severe 6. 

Unfortunately situation in the middle still looked bleak. Mr. Graves exposed Crooligan for the fraud he was and punished the kid with a fencepost. Lethally. Fortunately opponent was rather busy with removing Crooligan's earlier votes and to stuff their own into center ballots. 

Archie took a crazy 19"+base size sprint behind enemy lines, with the remaining Crooligan teleporting to him and placing votes to enemy ballots. Rabble Riser secured another box, providing Resurrectionists with a victory point. Noxious Nephilim's and Crooligan's corpse in the middle also gave me a Nia point.

Ten Thunders received center and leftmost ballots, with an Illuminated already having ran within 1" of a ballot box on my side. 

Scores evened out to 4-4.


Turn 4:

Honeypot models were closing in the middle, so after Carrion Effigy had put up Aura of Decay Molly brandished her trusty baton again, and started to maul Mr. Graves. And look at that! Only Hard-to-kill saved the casino bouncer.

I worried that Mr. Graves would idolize Archie's retreat in similar situation, but Mr. Graves was of tougher determination. Instead, he managed to deal damage back to Molly.

Because of this my center pretty much collapsed. Fortunately Philip & Nanny was able to ask a tough question that killed Mr. Graves, giving Resurrectionists their In Your Face. And not a moment too soon, as a couple of next Honeypot activations were able to put an end to Molly's carnival.

Archie & Crooligan tag team secured third strategy point for the Forgotten, but Honeypot were just as effective voters. 

With Resurrectionists second scheme and both players scoring strategy, Forgotten claimed a tiny lead of 6-5.


Turn 5:

Last turn started with Philip & Nanny and Carrion Effigy surrounded by both Illuminated, Lynch, Tanuki, Mr. Tannen and even Gwyneth within derringer's reach. It certainly did not look good. 

I just had to hope for best that Philip & Nanny would survive the onslaught and back off with deadly pursuit to deny Ten Thunders Sweating Bullets end condition. And it almost worked - it was the very last activation's very last action that finally removed Philip & Nanny from board.

Archie scored In Your Face, but Ten Thunders got both of their schemes and even Nia point for a close victory of 8-7 for Honeypot.

Monday, May 6, 2024

Maurala Epilogue

During friend's visit we finished up our long standing Kingdom Death campaign.

Lantern Year 19 Nemesis Showdown - King's Man level 2 

We brought our A-team of Moldonial, Maxaria, Brix and blue savior Hopeanuoli to smash and blast King's Man beyond recognition.

The plan was executed flawlessly. After first two or three rounds King's Man was mercilessly beaten down to it's knees with over half of its health done as damage. 

But by then, King's Man was really, really pissed off by Moldonial's clumsy but deadly attacks. It decided to show some real skill to this annoying usurper and drew Perfect Thrust after players had got too confident and didn't bother with Rawhide Headband.

And, by chance, Moldonial was standing in just the right spot to receive three severe body injuries. So, our amazing flower powered zombie that had died during Gigalion to first severe roll he had had to make, repeated this pattern of behavior and went down with the first roll.

Oopsie.

Fortunately we still had fair chances, as Maxaria was able to wound with just 2+ even when attacking from King's Man's front. She also had Arithmophilia, so her movement would never drop to zero. Vespertine Bow had decent enough chances of wounding, too, and Hopeanuoli the blue savior had a total of six blue affinities, so had the possibility to inflict three criticals in a row. 

Maxaria, however, took her sweet time in acquiring King's Step and she was not impervious to King's Man's attacks with only total evasion of +2. There was time pressure for sure. 

Hopeanuoli wasted both of his Lucernae attacks. Well, first one did two wounds but didn't do any impactful criticals effects with those - and second Lucernae attack happened when King's Man had knocked Maxaria too far away to reach him even with dash, and with movement of one Brix would not be able to reach even aim range of 9 with Vespertine Bow. Hopeanuoli checked the battle tempo locations and disappeared.

In the end, Brix was not able to hand too many brain traumas from Hymn of Silence, and left Maxaria alone to duel King's Man. It went kind of fine, although Maxaria did get disemboweled after a while. She passed those severe injury rolls admirably, but without bandages there is a strict limit on how many of those you can take even if you somehow dodge rolling 1-2. In the end Maxaria succumbed to Bleed tokens after bringing King's Man down to zero AI cards remaining.


Lantern Year 20 - Clinging Mist

Wow! Clinging Mist! Time to start new settlement, hard mode? Nope, we rolled a seven and Pudge doused himself in urine. 

Just in time to attack the Watcher. We thought it best to end the campaign in style and challenge The Watcher right away, because two full party wipes seemed too much in the long run.

Lantern Year 20 nemesis showdown: The Watcher

Pudge, Oda, Ischmo and Scheppo were to save Maurala from the ultimate existential threat. 

... and were we surprised! We had no serious survivors or great equipment, no twilight sword, nothing. And yet, turn after turn, the four heroic survivors not only survived, but even put a dent in Watcher's lanterns here and there. Thanks to ghost citizens survivors were able to shave almost half of Watcher's health away before first survivor, Vespertine Bow using Scheppo died to blood clot.

Ischmo, who had Rib Blade, lost the will to live after losing Scheppo and was the next to go. But hot damn, The Watcher  had only five health remaining by then! And we still had Counter-weighed Axe online. 

Endless Inhalation had slowly been draining survival points from survivors, not to mention the "lose two survival or die" hit locations. With his last survival points Pudge did a heroic activation by rolling a natural ten with regular attack and natural ten with surge attack, right before Oda died.

Survival-less Pudge with only a few points of insanity against The Watcher who had only three wounds remaining. Stuff of legends! Time for wonders, miracles, even!

Well, it would have certainly been epic to win The Watcher with a population of -24 or so, but it was not to be. 

After six years of sporadic play, last lantern light of Maurala settlement disappeared in a wisp of smoke. 

Monsters slain fought:

Prologue: White Lion level 0
Lantern Year 1: White Lion level 1
Lantern Year 2: White Lion level 1
Lantern Year 3: Screaming Antelope level 1
Lantern Year 4: The Butcher
Lantern Year 5: Manhunter, Gorm level 1
Lantern Year 6: Flower Knight level 1
Lantern Year 7: Gorm level 1
Lantern Year 8: Gorm level 1
Lantern Year 9: King's Man level 1
Lantern Year 10: Manhunter level 2, Flower Knight level 2
Lantern Year 11: The Hand level 1, Sunstalker level 1
Lantern Year 12: Gorm level 1
Lantern Year 13: The Hand level 1
Lantern Year 14: Screaming Antelope level 2
Lantern Year 15: Lonely Tree level 2, Screaming Antelope level 2
Lantern Year 16: Manhunter level 3, Butcher level 2
Lantern Year 17: Screaming Antelope level 3
Lantern Year 18: Gigalion level 3
Lantern Year 19: King's Man level 2
Lantern Year 20: The Watcher

Sunday, April 28, 2024

Double Dealing Lovelace

 A 50ss game of Malifaux. We took part in the global Fractured Futures campaign.

Strategy: Wedge Plant Explosives

Schemes: Protected Territory, Take Prisoner, Let Them Bleed, Ensnare, Hold Up Their Forces

My list:

Jack Daw & Lady Ligeia
Montresor
Midnight Stalker
Catalan Brawler
Auguste Hart
Dead Outlaw
Guilty

Pool: 5
Schemes: Protected Territory, Hold Up Their Forces
Thread: Dead Shot objective 1

Opponent had:

Von Schill & Steam Trunk
Hannah Lovelace
Arik Schrötterdammerung
Drachen Trooper
Freikorps Librarian
Freikorps Engineer
Freikorpsmann

Pool: 5
Schemes: Protected Territory, Let Them Bleed
Thread: Dead Shot objective 2

Turn 1:

So, both players had picked Dead Shot as their thread thing. 

I was kind of worried about Arik and his Shockwave 3. Sure enough, that what Arik did right away and blasted Catalan Brawler, Jack and Lady Ligeia. Only Lady Ligeia got the damage and distraction after cheating with Jack. Why not? He'd have to discard anyway. Arik also took a walk closer to centerpoint.

Catalan Brawler went to place a scheme marker near Nia, both to protect and maybe score fractures. 

I was planning on cursing Arik next, but Freikorps Engineer came to strengthen Arik's armor - along with giving him concealment until the end of round. I supposed I was no longer in hurry, so Lady Ligeia went to reach Arik with betrayal aura. 

Freikorpsmann took a double walk forward, and was soon given Reinforced Shield by Steam Trunk. I had tried to remove some shielding from Arik with Dead Outlaw without much success. Jack said screw this, Curse of Injustice does not require damaging. So he just walked, concentrated and unsuppressed some of Arik's memories with the help of focus. No damage done. Montresor was pushed towards Auguste, who had been running alone along the rightmost flank. 

Von Schill tossed a rocket launcher for Drachen Trooper and went to flank from the right side. He tossed a bullet into Montresor, who had walked over a tine wall to place a scheme marker for my first fracture token. 

Someone managed to deal four points of damage in to Catalan Brawler, but I forget who. Drachen Trooper it wasn't, as I had been saving my high cards in hand to not get those double blasts in the face. 

Midnight Stalker was one of my last models to activate, and he managed to run past centerline from the left already. Guilty went to hide behind the shack in the middle. Hannah was just a tad too scary. 

Entirety oh enemy crew was, like, within 8" of the center point. I had a couple of stragglers to my flanks, so I was outnumbered in the middle.


Turn 2:

And then there was this Nia marker. Only Catalan Brawler, Lady Ligeia and Arik were stunned. I lost the initiative, so I placed Nia a couple of inches away from center point to block LoS and give cover for my crew, and of course to score fracture token. 

However, opponent gave me the start to achieve activation control. I had to use the chance ot heal up Catalan Brawler and place another scheme marker. 

Steam Trunk gave Freikorpsmann Rocket Boots, and my second activation was to drop a scheme marker and an explosive with Midnight Stalker, leap deeper into enemy territory and using his last action points to run behind a thicket in top-left corner. 

Arik went to place an explosive past centerline, so that was a relief. 

To lure out Hold Up Their Forces, Guilty went to place an explosive token, even managing to startle Freikorpsmann. The geared up minion was able to leap, but not walk far enough to to place a bomb. Instead, he shot Guilty in the back for two points of damage. 

Auguste went to place a scheme marker past centerline. And looked like my trap had succeeded magnificently! Hannah charged Guilty. She, however, bought Rams and extorted another from... someone? This meant a single strike would kill Guilty. I managed to save the minion by cheating a high card from hand. She struck again, but did not use a soulstone this time around. However, she either flipped a Rams or cheated one. As a result, Hannah now offered an extra card for hand size for both players. 

With Hannah and Arik now activated, Jack Daw was emboldened to charge Drachen Trooper so that it would not get its flamethrower to bear. Daw's damage was not... impressive, but at least he was able to land a curse on the Freikorps minion.

Von Schill walked within 3" of Nia and shot Catalan Brawler for some damage, scoring their first fracture point. Von Schill now locked in place, Montresor placed a second scheme for my second fracture point and charged Von Schill, not doing much. 

Freikorps Librarian kept healing Arik, while Drachen Trooper tried to poke a hole in Jack Daw. And did he, though! A Red Joker on damage. Jack Daw was quick to discard a card to... adjust the number slightly downwards to one. Dead Outlaw went to engage Arik.

Freikorps Engineer charged Catalan Brawler, who won the defense with Red Joker from deck. Cage Fighter resulted in maximum damage against the Engineer. Ouch.

Points went to 4-1 for Tormented with strategy for both, and Hold Up Their Forces and Dead Shot objective for global campaign.


Turn 3:

Von Schill. Jack Daw. Montresor. Lady Ligeia. Arik. Freikorps Engineer. What did all of them have in common at the start of turn 3? Yeah, stunned by Nia. 

At least Von Schill was able to shrug stun off. He gave Rocket Boots for Hannah with a free leap. He also did impressive damage on Montresor, who blocked those damages equally impressively with no net damage going in.

Same happened with Arik after Dead Outlaw had disengaged and started slogging through marshes.

Catalan Brawler had to heal himself again, and with the second remaining action point he tossed Jack Daw in the mud, removing Stunned from him.

This let Drachen Trooper free to shoot Lady Ligeia with flamethrower, killing her and setting Catalan Brawler on fire. He then proceeded to take cover inside a house with removable roof. 

Montresor just kept teasing people with ping damage. His own activations were rarely noteworthy, but that stagger sure kept buggering Freikorps.

On her own activation Hannah dropped a scheme and an explosive token, and after leaping Freikorpsmann did the same. 

Before Hannah had leaped, Jack Daw tried to do a clever activation - first by placing a scheme, the charging Librarian and finally doing a Careless Whisper imitation. It wasn't impressive I can tell - neither Hannah, Drachen Trooper, Librarian or Engineer were slowed by the disgraceful performance.

Auguste went to drop a bomb, while Midnight Stalker leaped and charged to murder Steam Trunk. Ahh, fine work of murderous art indeed. 

So, Montresor and Catalan Brawler had been blocking damage with soulstones or healing with Juggernaut way above expected curve. Of course I by then did not know what a double whammy it had on opponent's plan, as Let Them Bleed proved elusive.

Scores went 5-2 for Outcasts from strategies only.


Turn 4:

Freikorps finally tore through Tormented supply of soulstones, and was able to cut Montresor below half of his health remaining. 

Catalan Brawler, however, kept healing with severe results. But, Librarian and Hannah and who else were able to blast him below half of his health. 

Midnight Stalker took on bigger prey. After a trunk he found it appropriate to charge a Librarian, killing her. Jack Daw went to engage Drachen Trooper so that it would not cause trouble for my scheme markers. I considered trying to kill, but I was suspecting opponent had Let Them Bleed for their scheme. Killing a Demise burning +2 target was not ideal, so he tried to remove Engineer from board. Didn't happen, though. 

Auguste walks to place a scheme marker, while Dead Outlaw did the same with strategy marker. 

Both players got strategy, and Freikoprs took a leap in points, although still a 6-5 lead for Tormented.


Turn 5:

Von Schill had tried to shoot Midnight Stalker last turn, so to rob him of Let Them Bleed, Midnight Stalker leaped, walked and schemed its way to safety. 

I don't remember who opponent activated, but Auguste tried to follow Midnight Stalker as his crazed mirror image. He didn't want to move too far from Protected Territory scheme marker, so as a result he was not able to get past Von Schill's 14" range after all. However, it took most of Von Schill's activation to score a damage to Auguste, meaning I still had Dead Outlaw and Midnight Stalker completely uninjured, with Jack Daw a possibility to heal. Von Schill also gave Engineer a leap.

Montresor went back to engage Von Schill. Catalan Brawler and Montresor had been able to bring Engineer down to one health remaining, Thus he would die when he activates. Arik made a clever plan to get Charged Fists and try to push Montresor away from Engineer. Plan did not come into fruition because of cards. This meant no strategy point for Freikorps this turn. 

We ended game there, essentially in 9-6 victory for Tormented.

Saturday, April 20, 2024

And Trust Was Broken Forever

 A 50ss game of Malifaux on Vassal.

Strategy: Corner Cloak and Dagger

Schemes: In Your Face. Take Prisoner, Hold Up Their Forces, Ensnare, Death Beds

My list:

Pipering Hamelin & 3x Stolen
Nix
Benny Wolcomb
Disease Containment Unit
Midnight Stalker
Rat Catcher
2x Winged Plague

Pool: 5
Schemes: In Your Face, Ensnare

Opponent had:

Jakob Lynch & Hungering Darkness
Kitty Dumont
Mr. Graves
Mr. Tannen
2x Illuminated
Beckoner
Tanuki

Pool: 3
Schemes: In Your Face, Hold Up Their Forces

Turn 1:

So we got a rather challenging map for this strategy. We picked our masters before map, so I was stuck with slow Hamelin2 & Benny machine. But hey! One of the one occasions where two Winged Plagues might be a real option.

Well, Rat Catcher, Benny, Winged Plague and Nix managed to place the required scheme marker for Benny with the help from Hamelin's Obey. But that was for the next turn. 

Because the buildings were blocking such a part of my corner of the table, most of my crew was stuck inside the bottom-right quarter. Nix took the lead, with Hamelin nearby. The piper managed to stun an Illuminated, woohoo. 

One Winged Plague was going up towards second strategy marker from top, and Midnight Stalker did Midnight Stalker things and got within easy distance of top-right strategy marker. 

At least it wasn't any easier for Honeypot. 

Mr. Graves was going towards bottom-left strategy marker with both Illuminated, Mr. Tannen and Lynch nearby. Tanuki offered Mr. Graves some foul-mouthed motivation. 

Kitty had given most of Honeypot crew some extra brilliance  and went right from their top-left corner deployment. Beckoner was running towards rightmost marker, while Hungering Darkness was the last model to activate from Honeypot. The biggie didn't go too far to the right and was nearing the second strategy marker from top. 


Turn 2:

Benny did a bunch of rats. This was when I realized I would not be able to Obey rats to forming a Rat King. So the earliest turn to get a Rat King was... three. Uh oh. 

A Winged Plague in south walked for a bit in between two houses and placed a scheme for potential Ensnaring of, say, Mr. Graves. This might have been a possibility if it wasn't for Jakokb Lynch shooting Benny Wolcomb with a Hungering Darkness. A perfect target to ensnare!

Well, at least if the Winged Plague hadn't just placed a scheme marker tad too far from Hungering Darkness. Hamelin had to activate, remove the scheme, obey Disease Containment Unit to interact a scheme marker and obey Nix to disengage. Would opponent activate Hungering Darkness next, or would Nix have time to scheme?

Yeah, opponent did just that. Hungering Darkness had been stunned so it's activation was not all that impressive, but I missed my opportunity to Ensnare. Fun fact: had Benny not cooked up a bunch of rats, I would've got the scheme.

Nix placed a scheme anyway and attempted a Bleeding Disease on Jakob's totem, failing at that. 

Kitty Dumont went to pick intel, and Winged Plague was able to claim one, too. Midnight Stalker followed suite, leaping to strategy marker and retreating behind house. Beckoner was able to run unopposed within 1" of the top-right strategy marker. 

Below, Mr. Graves took the bait and attacked another Winged Plague. Bait was... effective. Too effective, in fact, when Mr. Graves was able to pin down the plague bat with his fencepost in one strike. That lead to gross explosion, which enabled the dreaded kids to target Mr. Graves. 

Surely enough the spitting kids wreaked havoc once again. One of the kids spat two points off of Hungering Darkness, and another did a severe on Mr. Graves. Unfortunately heal from Tanuki was severe, too. 

Illuminated were just running towards action or concentrating, except for the one that picked up intel. Mr. Tannen kept taking his short, gentlemanly Mv4 walks towards action, still not quite getting Plague within Betrayal and Delirium aura. 

Both players scored strategy for a 1-1 tie.


Turn 3:

Thanks to spawns from last turn, opponent started with eight pass tokens. Hamelin1 certainly manages this a lot better.

Hungering Darkness started beating Benny right off the bat. Damage was being done. Soulstones were being used. And yet, Benny fell down to one health remaining. But I got my Ensnare. Woo hoo.

Fortunately I had plenty of  tomes in my hand, so Disease Containment Unit was able to offer some field meds for Benny, getting him back to four health. Throwing flame at Mr. Graves was a useless affair. 

Beckoner snatched a point of intel and activated pleasant distractions. Which was troublesome, as Midnight Stalker had a point of Brilliance from start of game. 

Benny tried to save his butt just by activating, trying to poke Hungering Darkness with his rusty sword. He did a whole lot of nothing, but at least got two points of Shielded from ending his activation.

By now Hungering Darkness had accumulated seven points of Blight, and opponent realized the risks involved there. Lynch drew his derringer, loaded it up and shot Tanuki in the back, teleporting Hungering Darkness into safety. Remaining attacks went into shooting Benny with a modicum of success. 

Rat Catcher managed to give moldy cheese for the remaining Winged Plague, which prompted Kitty to pick up intel in haste. As this brought strategy marker within interaction distance of the Winged Plague, it did just that and flew to charge Beckoner. No hits.

Illuminated models started to activate. They walked and used Scintillating Clouds on my swarm of weak models. After surviving the first volley, I got scared for the safety of my rats and formed a Rat King in haste.

Surprisingly, Benny survived this turn. He only took two attacks from Hungering Darkness, two shots by Jakob, two Scintillating Clouds and some despicable promises to face. However, he was at one health remaining, so he couldn't have done it without four soulstones he had to use, and Shielded+2 he got. 

Mr. Graves killed a rat, and kids kept spitting at the burly bouncer. Tanuki ran to bottom-left strategy marker and healed Mr. Graves with well placed albeit foul words. 

Both players scored strategy, and Outcasts had also revealed Ensnare for a 3-2 lead.


Turn 4:

I had a suspicion Ten Thunders might have In Your Face, as they had been focusing so much on Benny. My plan was to activate Benny first and run like hell. 

Too bad Ten Thunders won the initiative, and Benny was in a precarious position. Cheat? Take a point of damage. Flip a one? Take a point of damage. Yeah, he didn't survive Lynch's activation and opponent was able to declare their In Your Face. 

But it got worse. Quickly. Remaining shots went to Nix, who was brought down to one health remaining. 

So it was time for emergency medikit. Disease Containment Unit activated, pushed a couple of rats, Nix as far from danger as possible while also healing the dog for two, plus Hamelin a little closer to Mr. Graves. She was also able to burn Mr. Graves for a bit. 

Grave mister didn't run away. He had had enough of this trenchcoat that had an uncanny resemblance to three kids on top of each other. He struck Rat King with fencepost and brought it down to one health remaining. Not good news with regards to Black Blood. But some sacrifices had to be made. That was my six action points standing there, having only contributed to game one action point away from Mr. Graves.

Hamelin activated and did two Bleeding Diseases on the bouncer, killing him and Rat King in the process. In Your Face, I guess. Last action was another Bleeding Disease on Tanuki, bringing it down to one health and even stunning the little... thing. 

Mr. Tannen got furious over the death of his accomplice, and decided to come and knife a puppy. If you can call Nix a puppy. And wow, look at that. Back to one health remaining. 

I figured Nix didn't have much to lose, so he walked past Mr. Tannen and attempted to Drink Spirit. It succeeded, but both Illuminated and Mr. Tannen passed those tests with impunity. There goes nothing, Nix thought and bit Mr. Tannen. No ones out of deck, and attack hit without boosts. Mr. Tannen had only two points left after some kids had shown their appreciation, so both of the undercover Neverborns went down in the same turn. 

Tanuki was horrified and shivered like only a tiny, drunken critter can shiver in terror. It picked up intel and ran as far as possible from anyone's line of sight.

Kitty picked another intel after Rat Catcher had already activated. Winged Plague and Midnight Stalker tried to tickle the Beckoner, but Beckoner survived. 

Soon enough it became apparent why Illuminated didn't kill Nix.

Ten Thunders scored strategy and all their schemes, Hold Up Their Forces included. Outcasts got only In Your Face, so tides had turned into 4-5 lead for Ten Thunders.


Turn 5:

There was some hope in Nix not dying, because opponent needed a few of my models alive for Hold Up Their Forces. 

However, Illuminated wanted to pet the dog and they petted it hard. Real hard. Nix died before he was able to activate.

My brain had an accidental moment of flatulence when Midnight Stalker had already leaped away from Beckoner's melee range last turn. I kept thinking that I needed a high enough Masks for a leap to leap away and get to Ten Thunders deployment zone for In Your Face end condition. 

My plan was to start sacrificing children. They ran and charged and did whatever to block Illuminated from moving to engage Disease Containment Unit and Hamelin. Waves after waves children were turned into rats. Rats kept dying both because of my own attempts and the enemy.

However... it wasn't Illuminated that went to engage Hamelin and D.C.U. It was Hungering Darkness. With Looming Darkness trigger. A continuous barrage of derringer shots kept raining on Disease Containment Unit, and without the armor she would have died. 

But Hungering Darkness needed to be dealt with as soon as possible. So, Hamelin activated. He failed to stun the totem because scaary, but then proceeded to use Bleeding Disease on Hungering Darkness three times. Three, because on failed.

This left me out of options to even try to get both Ensnare and third point of strategy. Strategy seemed like safer bet, and Winged Plague, Rat Catcher and Disease Containment Unit managed to claim the intel required. 

Midnight Stalker ran to Ten Thunders deployment effortlessly, but so did Kitty Dumont. 

Game ended in 6-6 draw, with Ten Thunders getting only In Your Face and Outcasts strategy and In Your Face.

Only Tanuki lost.

Having been shot in the back by its own master, trust was broken forever. 

Wednesday, April 10, 2024

Oriax vs Ilari

 A 50 point game of Warmachine over War Table website.

My list:

Orgoth Sea Raiders
Oriax the Soul Slaver
-Ravener
-Jackal with Arc Node, Hunter Rifle and Pneumatic Spike
-Jackal with Arc Node, Pole Arm and Assault Shield
Gnashers
Assault Reavers
Grhotten Keeper

Opponent had:

Khador Winter Korps
Ilari
-Dire Wolf with Evasive, Bombard and Plow Shield
-Great Bear with Reposition, Heavy Cannon and Blasting Fist
Shock Trooper Gunners
Winter Korps Infantry with 2x Auto Cannon & Standard
Winter Korps Infantry with 2x Rocket Launcher & Standard
2x Battle Mechanik

Scenario was Wolves at our heels.


Khador started game. They had autocannon Korps at the left objective, another going towards their cache and my 40mm objective. Warjacks and warjacks were lumbering through a forest next to Khador deployment, just about in the middle. Shock Trooper Gunners were sitting behind forest. 

Orgoth had low model count from the get go. Most numerous Assault Reavers were holding my 40mm objective - a choice I'd later regret.

Oriax kept went into hiding behind a house with Windstorm up. Shielded Jackal variant had a lot on its shoulders - it was the only non-warcaster model from Orgoth going towards center-right. Another Jackal, Ravener and Grhotten Keeper were diving past the building from left. Gnashers were hugging for concealment and cover in Tall Grass far-left.

Windstorm covered Orgoth forces rather nicely, but most Assault Reavers were outside of it. This gave an oppoerunity for Rocket Launcher Korps to snipe the unit. Three out of five, gone. 

Great Bear was able to dent shielded Jackal a little, but other than that there was no damage done. Dire Wolf went to contest both 50mm objectives with Great Bear behind a crater in the middle. Mechaniks and Shock Troopers were there as overseen by Ilari in the bushes. 

Auto Cannon Korps were happy just controlling their 40mm objective. 

It was time for Oriax to change into Star Crossed. 

Since Assault Reavers had made such a poor job at thinning down the Rocket Launcher Korps, Oriax tried to offer his help by taking at least one of them down with Icy Grip.

Grhotten Keeper and Ravener had to advance to contest one of center objectives. Ravener had gone within easy walking distance of Dire Wolf. I was more afraid of the thing than I should have, as its melee capabilities weren't that big of a deal. 

Rifle Jackal managed to shoot down one Mechanik, and Gnashers continued to find their way towards enemy 40mm marker.

My foresight had been way off, as Dire Wolf attempted to slam Oriax. While the Wolf had Superiority cast on it, hitting a Def 15 target behind an obstacle under Star Crossed wasn't easy. In fact, it failed. 

Unfortunately Rocket Launcher Korps were able to remove last two Assault Reavers, thus claiming my objective for themselves in the coming turns. 

Great Bear tried to take a shot at Oriax, although that shot was essentially impossible. 

While Gnashers had concealment, Auto Cannon Korps had aiming bonus. They managed to fell two of the berserkers, and Ilari came to snipe off the last one. Yay. I only had Oriax to control 40mm objectives now.

Jackal that had gone to contest center-right objective had to relocate to beat Rocket Launcher Korps. 

Oriax removed Superiority with Hex Blast and cast Star Crossed. Ravener walked to block LoS to Oriax as well as it could, and then wrecked Dire Wolf, even having focus to spare after that. 

Grhotten Keeper was able to run to contest opponent's 40mm marker, so at least Wolves at the Heels extra points were thus denied. Rifle Jackal failed to kill contesting Battle Mechanic from center-left objective, leaving Orgoth a point behind on scenario.

Great Bear attempter to slam rifle Jackal away from center-left objective, but again Star Crossed ruined the slam. 

Last remaining Rocket Launcher Korps ran to control my 40mm objective, after which Shock Trooper Gunners made their lethal debut in the battle. After six barrels, shielded Jackal was no more. 

Grhotten was far tougher nut to crack. Even after a 6,6 damage roll and a sniper shot from Ilari the thing was still contesting enemy objective, although with only five health remaining. 

Orgoth were struggling, as in scenario Khador had two points over Orgoth.

Oriax was able to kill the two Rocket Launcher Korps with a Hex Blast. However, Jackal and Ravener were not able to wreck Great Bear, which essentially dropped Orgoth out of the game.

Khador was able to secure three points next turn, so all I could attempt was a lucky shot against Ilari. Ilari was essentially Def 18, Arm 19 and sixteen health target for a meager Rat 5, Pow 13 Hunter Rifle meaning Jackal would need astronomical rolls to kill Ilari.

The shot barely hit - but it did hit. With critical brutal damage. And damage roll was, in fact, stellar! But, it was not astronomical. Ilari was left with four health remaining, and Orgoth lost to scenario.