Showing posts with label kirai. Show all posts

Sunday, March 30, 2025

Kari Why Won't You Die Already???

 A 50ss game of Malifaux

Strategy: Standard Raid the Vaults

Schemes: Outflank, Protected Territory, Espionage, Deliver a Message, Hold Up Their Forces

My list:

Kirai & Ikiryo
Datsue Ba
Kari Zotiko
Lost Love
Gwisin
Drowned
Gaki
Enslaved Spirit
Seishin

Pool: 7
Schemes: Hold Up Their Forces, Espionage

Opponent had:

Broodmother Nekima & Blood Hunter
Hayreddin
Hinamatsu
2x Young Nephilim
Black Blood Shaman
Terror Tot

Pool: 8
Schemes: Espionage, Protected Territory


Turn 1:

Nekima grew up a Terror Tot into a Young Nephilim that engaged to stall Datsue Ba, Lost Love and Gaki down the bottom-left quarter. This kind of worked, except that the Young Nephilim (or Elder Tot?) died to combined attacks of those three models. 

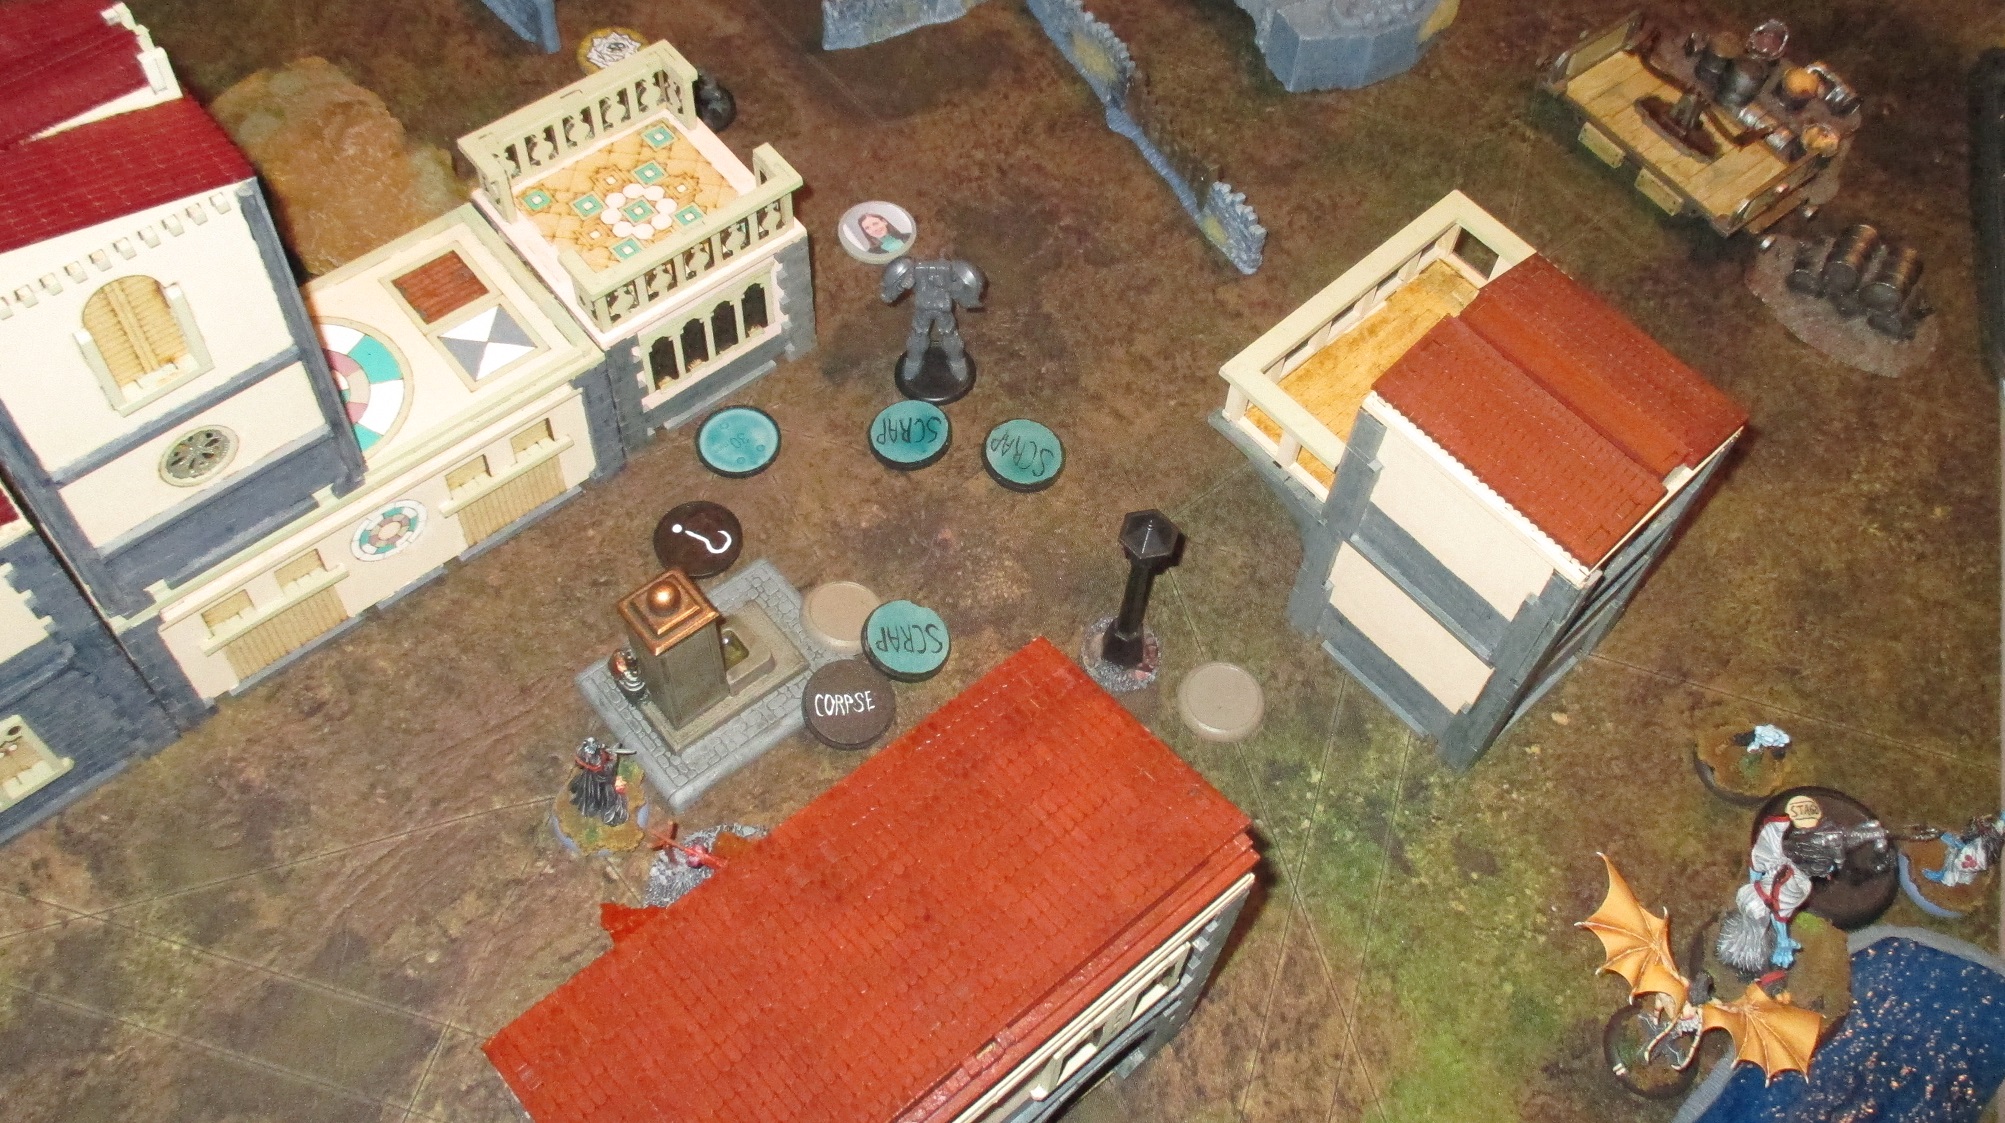
Drowned, Kari and Gwisin hid inside a tiny forest for whatever reason. After all, opponent didn't have any relevant ranged actions, let alone gun actions. But hey, concealment, yay!

Enslaved Spirit took a bold stance, standing alone within about 2.5" of the center point. 

Kirai had been chain-ganged further a little bit, and she summoned a Goryo on board that charged a Yonug Nephilim, delivering moderate damage. It was also engaging Nekima some 5" past the centerline.

A Seishin-walked Ikiryo charged managed to Black Joker her attack against Hinamatsu, so I just offered a Def 3 target to a Stat 6[+] combatant. Oh well.

Blood Hunter managed itself close to centerline to the left, and another Young Nephilim went to center-left strategy marker.


Turn 2:

Surely enough Ikiryo went down, but not without a fight. Hinamatsu slashed her half of her hit points until a new and improved Mature Nephilim removed Ikiryo. Nekima also left Goryo that had been summoned earlier with only two points remaining before blasting Datsue Ba, Gaki and Lost Love with Blood Has Been Spilled. 

Ikiryo's sacrifice was valiant enough, as this made it possible for the as-of-yet-not-killed Goryo to engage Nekima, and hired Enslaved Spirit to engage the emergent properties of Young Nephilim.

Kari got beaten up by Hayreddin - real bad. In fact it took a moderate damage block and a damage block over an instance of Black Blood to keep him alive. This forced both Kirai, Lost Love and Kari to patch the henchman up. 

A summoned Enslaved Spirit did free Kari from the melee against Hayreddin, and Seishin gave a free walk for my namesake so that Lost Love was eventually able to teleport to her and plant a scheme for Espionage.

Hayreddin had also engaged Drowned, who had his back taken by Kirai. Yeah, that's what the ability means, I assure no one. Drowned dropped a scheme marker on the centerline and charged back to Hayreddin.Witnessing all those weak damages by Drowned and Gwisin was painful because of Black Blood, but the minions endured. 

Black Blood Shaman didn't get close enough to center-left, so Datsue Ba was able to charge the Young Nephilim guarding the place, thus contesting it.

Kirai did have the center-right strategy marker as well as the top-right one, and managed to score both schemes for a 3-0 lead on turn two.


Turn 3:

Hoo boy. Was it a massacre.

Goryo, both Enslaved Spirits and Gaki - all gone, most before they got to activate. But Neverborn got casualties too - more important names at that, Hayreddin, Hinamatsu and a Young Nephilim. 

Enslaved Spirits bought time for Kari to patch herself up almost to full health, so a single strike from Mature Nephilim quite didn't make the sea captain go down.

At the end phase Datsue Ba was at one health remaining thanks to all the black blood that had been spilled in her proximity. But that was one point too many for Neverborn to score a point this turn, while Resurrectionists did gain their second.

Opponent wasn't able to get schemes this turn either, so we decided to end the game with 4-0 victory for Kirai. Three models to go around just didn't seem enough for Nekima to contest strategy. 

Saturday, December 14, 2024

Handshake Against Torment

 Two 50ss games of Malifaux. These were played over a week ago during my Kuhmo visit, so details are likely gone from my memory. Both players were slowly getting a tad tired of Gaining Grounds 4, so we shook things up a little by playing gg1 strategies.


Game 1:

Strategy: Corner Public Enemies

Schemes: Let Them Bleed, Research Mission, Breakthrough, Take Prisoner, Claim Jump

My list:

Kirai & Ikiryo
Kari Zotiko
Jaakuna Ubume
The Ferryman
Lost Love
2x Drowned
2x Seishin

Pool: 6
Schemes: Let Them Bleed, Breakthrough

Opponent had:

Charles Hoffman & Mechanical Attendant
Melissa K.
Peacekeeper
Guild Steward
Guardian
Hunter
Watcher

Pool: 5
Schemes: Take Prisoner (Ferryman), Claim Jump (Peacekeeper)


Turn 1:

Scenario was such a killy one, but corner deployment made the first round mostly about closing in. Early on Hoffman have Fast to Peacekeeper, which made me a cautious. I overdid my defenses, slapping Twisting Mist for Jaakuna Ubume. Concealed Serene Countenance model should survive most shooting opponent might have at me. 

Sure enough, round boiled down with Peacekeeper running so close to center point that I was kind of scared of next turn. Ferryman and Kari were near enough to charge.

Kirai tries to save the day by summoning a Goryo that manages to charge Peacekeeper and land Adversary on it. 

All of my crew was coming from bottom-left quarter except for Ikiryo, who was hiding behind a dwarven house to perhaps launch a Lost Love to enemy deployment zone next turn.

Entirety of Augmented pretty much mirrored my movements, too, when all but Hunter were closing in from top-right quarter, sans Hunter that was hiding from Ikiryo on the opposite side of dwarven house.


Turn 2:

Hoffman activates first, gives Fast to Peacekeeper and punches Goryo off the board while also getting bounty tokens. Perhaps Kirai would have to reconsider her summonings, as giving enemy free points like that hurts.

But something would have to hold up Fast Peacekeeper. Kirai summoned an Onryo for the job. However, she was dubious about a single five point minion holding up a buffed up 10 point enforcer, so Kirai went into hiding.

Fortunately Onryo gave hard time for Augmented. Melissa didn't land even a single hit, so Peacekeeper had to kill Onryo before moving suspiciously close to center point. 

One of the Drowned managed to distract and poison Peacekeeper a little, while the other charged at the thing. Would I have to rush my models against the thing piecemeal, one by one?  How about my bounty tokens?

Well, Jaakuna Ubume charged Hunter so that it wouldn't go to engage Ikiryo. She did the drowning aura. Hunter was in for some bad time, as every action it failed gave a point of damage, and every attack that actually hit would deal two. It nearly scrapped itself in trying to remove Jaakuna. It did well enough, so Kari had to heal Jaakuna with her entire activation.

And then Guardian came to swing the greatsword at Jaakuna. She survived, and had caused seven or eight points of damage via vengeance and drowning aura in total.

Desperately trying to get bounties to score, Ferryman tried to wreck the Hunter. Ferryman managed to claw only a couple of damage points, which left Hunter with two. Looked like Ikiryo would have to delay her proceedings to not lose points from this round.

Lost Love teleported to Ikiryo and gave her Fast with a trigger. He tried to heal the damage he had caused, but didn't get it quite right. 

Ikiryo projected voice over Hunter. She had Focus +1 from last turn, and used that to get through friendly fire - and scored a severe wound! Yay, two bounty tokens and two action points to get as far from the action as possible. 

Both players scored strategy, but no schemes were revealed. It was a 1-1 tie, but situation on board looked miserable from my point of view.


Turn 3:

Jaakuna was able to activate to put up her drowning aura. This combination continued to plink and plonk Guardian, until Guardian halved Jaakuna. Before opponent would bring in the heals, Kari charged Hoffman to get Peacekeeper and Guardian within no-heal aura. This was a high risk move so early in turn, but I might be able to score Let Them Bleed this way.

And surely enough, Kari spent most of my soulstones. Lost Love had to teleport in to double-heal Kari, and so did Kirai. Without the teleport, of course. But, in the end phase, Kari was all alive and well. Same could not be said about Guardian and Peacekeeper that had been hitting themselves for quite a while. 

As situation in the middle had devolved into a gigantic melee, Ikiryo was able to walk and plant a scheme for Breakthrough. Yay. Kari had survived to give me Let Them Bleed. But no robots were dismantled this turn, while opponent had plenty enough bounties. 

Opponent did no reveals, so Urami took the lead with 3-2.


Turn 4:

Ikiryo and Lost Love went to spam scheme markers to enemy corner, so they were out of action.

And in the middle... uh. Huh. 

Kari died, which put heals back on the menu for Augmented. I needed to hurry to get kills. Guardian went down easily enough, but unfortunately that meant that Hoffman and Tanuki doubled up on heals for Peacekeeper. 

Drowned kept putting dents into Peacekeeper, and another Drowned charged Melissa, who was also near the middle by now. 

Opponent needed four tokens for a victory point, which wasn't available. Kirai had managed to kill Guardian and Watcher, so that was the three bounties required for a point. Scores went 4-2 for Resurrectionists.


Turn 5:

Opponent had a chance for a difficult draw. We played until it became impossible to achieve.

And the only proper way to get at that was to punch some damage in to Tanuki after it had activated. Let Them Bleed was secured. Breakthrough was, too. 

Oh, but Guild can't have Tanuki's, you say? Okay, okay, Guild Steward, then. Anyway.

Opponent also got both of their scheme end conditions for a 6-4 victory for Kirai. 


Game 2:

Strategy: Wedge Symbols of Authority

Schemes: Sabotage, Spread Them Out, Vendetta, Take Prisoner, Runic Binding

My list:

Jack Daw & Lady Ligeia
Montresor
Ferryman
Malifaux Child
2x Hanged
2x Guilty

Pool: 5
Schemes: Spread Them Out, Runic Binding

Opponent had:

Jakob Lynch & Hungering Darkness
Kitty Dumont
Soul Battery
Mr. Graves
Mr. Tannen
Illuminated
Beckoner
Tanuki

Pool: 6
Schemes: Take Prisoner (Ferryman), Sabotage (Fallen arch in bottom-left quarter)


Turn 1:

We were playing Wedge from left to right. 

I had two strike teams of Guilty and Hanged attempting to flank. Oh, and Malifaux Child, too, was flanken' at the bottom. Oh yeah. All the kid did was to pull Kitty Dumont to center line. What's this? This is no McCabe? Surely Lynch would not take children as prisoners?

Montresor, Lady Ligeia and Jack Daw guard one symbol of authority near my wedge corner. Montresor gives Ferryman a walk, so it was able to either go charge Kitty Dumont, or place first marker for my schemes. It decided to interact while still able. 

I don't remember who or what shot a severe damage to Ferryman. It was probably Lynch with his derringer. Suddenly no access to Kari's heals... felt. 

Hungering Darkness went to harass my second Guilty/Hanged team on top, but there were no exchanges just yet. 


Turn 2:

Ferryman charged into the thick of Honeypot crew. It dropped a second scheme marker. However, that half of a boat had been adept with flipping ones, and had somehow ended up with at least five brilliance tokens. A couple of damage points here and there, and Ferryman was looking at a real possibility of developing a crippling drug habit.

And surely enough, Jakob Lynch offered the figurehead a free sample. The undead mermaid shook off the ropes, descended down from the front and started doing brilliance right there. Lynch had convinced her to become Honeypot's new Beckoner. 

Jack Daw goes to place a third scheme marker for Runic Binding, and charged Mr. Graves. As a move it was... less than ideal because of Black Blood. But I needed Jack to stand on top of the scheme marker so that the multitude of as of yet unactivated models would not just go and pick it up. 

Montresor was in range to perma-stagger Mr. Graves. Lady Ligeia made a shout at Mr. Tannen, bursting the little man's ears with a shriek. Shriek blasted a nearby Beckoner, staggering her too. 

Guilty and Hanged below tried to engage and hold up people near the wreckage of Ferryman.Before Soul Battery had activated, Hanged gave him the psychotic upgrade when opponent no longer had any cards in hand. That was a 3" push towards the triangle of Runic Binding.

Jack Daw's valiant sacrifice paid off, but he wasn't in a good shape at all. This lead to a weird move by me. Guilty on top had charged Hungering Darkness to tie it up. Hungering Darkness didn't do too much damage, so Hanged gave the Forbidden Knowledge for Guilty and teleported next to it. Then he hit Guilty with the noose and walked away, healing Jack Daw for one. 

Beckoner, Mr. Tannen and Jakob Lynch in close proximity are a terrible bubble for Jack to be in. 

But, at least I scored Runic Binding, while opponent got nothing. A 1-0 lead for Tormented.

Oh, Malifaux Child had disengaged from Kitty, hopefully activating soon enough next turn to drop a scheme marker, until Kitty comes to claim the prisoner.


Turn 3:

Shock! Taking kids as prisoners is McCabe's business indeed. Kitty just went to drop a scheme marker to sabotage target. Malifaux Child walked and dropped a scheme marker. 

Shock and awe! Illuminated kills Guilty, Hungering Darkness kills Guilty. I'm not sure if I have ever had eight card hand, but next turn I would.

Shock and horror! After draining pretty much every resource at my disposal, Lynch is able to give Jack Daw a firm handshake. I suppose that's what Jack Daw's tormented spirit was looking for, because he disappeared after the fact. 

Montresor and Lady Ligeia are able to finish off Mr. Graves. 

Hanged on top places a scheme and walks towards the unknown.

The ultimate shock!

At the end of turn three, scores were still 1-0. Has it ever been so before? Not going to check, but it must be about as rare as having scores of 4-4 at the end of second turn.


Turn 4:

Hungering Darkness goes to pick up first ever Symbol of Authority. 

Hanged on top and kid below continue to walk and drop schemes. 

Montresor could have dropped a scheme marker and charged on top of it, trying to kill Mr. Tannen. But instead I chose violence, trying to remove Mr. Tannen with two attacks. Reason was Hanged below that had managed to drop two scheme markers next to Illuminated with lucky triggers. 

Too bad that Lynch turned Hanged into another Beckoner. Thus, Illuminated had all the time in the world to remove both scheme markers with just one action.

What a mess. I didn't get a point this turn, but fortunately opponent wasn't going that strong either. Perhaps because they had already killed their chosen prisoner. But, Ten Thunders took the lead at 2-1, when they finally had enough markers for Sabotage.


Turn 5:

Hopeless turn. Hopeless game.

Somehow I had failed in my scheme marker placement in such a way that I had the capability to get Spread Them Out or a strategy marker, but not both.

Two points for me throughout the game. Woohoo.

Kitty was able to pick up a strategy marker, and also go to place the required scheme marker for sabotage end condition.

A clear 4-2 victory for Jakob Lynch. And let me say, he deserved it. He killed Ferryman, Jack Daw and Hanged, plus managed to summon ten stones worth of extra models.

Jakob Lynch 1 is my #1 opponent in play count, and out of all of my masters that has played a game against him, Jack Daw1 is the only one that hasn't scored even a single victory. And this was third such game. 

But I guess black blood and all those cheat auras count for something if I have to park Jack Daw in the range of every one of them.

Tuesday, May 7, 2024

Stuff the Daggers

Two 50ss games of Malifaux

Strategy: Flank Cloak and Dagger

Schemes: Ensnare, Death Beds, Take Prisoner, Protected Territory, Outflank

My list:

Kirai & Ikiryo
Datsue Ba
Lost Love
2x Shikome
Gwisin
Drowned
Enslaved Spirit
Seishin

Pool: 5
Schemes: Protected Territory, Take Prisoner (Hunter!!!)
Thread: Wicked Whisper objective 2

Opponent had:

Hoffman & Mechanical Attendant
Joss
Melissa
Guardian
Hunter
Medical Automaton
2x Watcher

Pool: 3
Schemes: Take Prisoner (Shikome), Outflank
Thread: Badges and Blades objective 2


Turn 1:

There was a big enough building complex on Urami side to act as a dividing element even for incorporeal keyword. 

A Shikome was aided by Seishin to go and pick first intel in the bottom-right corner of board. A Hunter walked closer to the same strategy marker and attempted to shoot Drowned. A Watcher also took a double walk towards bottom-right corner.

Guardian had tossed another Watcher towards top-left corner, which certainly awoke a suspicion in me that opponent might be trying to outflank my crew. Before the Watcher had been able to activate, Shikome tried to walk and charge it without much of an effect. Watcher was able to disengage and approach top-left corner.

Melissa repositioned from right to left and run & gunned Gwisin, and did so hard. Lost Love had to teleport in for heals. Thus, Gwisin, Ikiryo, Lost Love and Enslaved Spirit were holding the center-left against Guardian, Melissa, Mechanical Attendant and Hoffman. 

Center-right, past the building and closes to Nia marker, was Seishin, Datsue Ba, Drowned, Kirai and even a summoned Goryo were holding the area against Joss and Medical Automaton. Drowned and Goryo managed to severely injure Joss. Red Joker on damage and Black Joker in damage block is... harsh.


Turn 2:

Well... that didn't go as planned. 

Melissa runned and gunned Shikome down to one health remaining. Fortunately there were not that many threats around for her if she stayed in place. So, she picked up intel and placed a scheme marker while being guarded by Gwisin. Had she charged Watcher in the corner, chances are she might have been taken down. 

Guardian beat Ikiryo down before she was able to activate, and Mechanical Attendant grabbed a point of intel. So, pretty much just like that my left side game collapsed. Sure, I brought Enslaved Spirit to engage Guardian, but, ech.

Another Shikome dropped a scheme marker and took a flight as far from Watcher and Hunter as possible. And fortunately enough, Hunter went to participate in the fight in the middle near Nia marker, and Watcher went to place scheme to bottom-right corner.

Medical Automaton healed Joss as much as possible. And with Joss's death now out of reach, Goryo that had been summoned last turn decided to rather take down Medical Automaton. 

Hoffman changed course and went to middle, and removed summoned Goryo from equation. However, soon enough another one was summoned. Drowned, the new Goryo, Kirai and even Datsue Ba's judgement tried to kill Joss, but they couldn't quite do it. At least it drained Guild's soulstones. 

Lost Love teleported to Datsue Ba and went to place a scheme marker for Protected Territory. 

This turn I realized what a grave mistake I had done when I picked Hunter as my Take Prisoner target. 

Points, however, went: Strategy, Nia and Protected Territory for Resurrectionists, strategy and Outflank for Guild for a 3-2 lead for Kirai.


Turn 3:

I lost initiative, and tried to place Nia so far from action that opponent would have to act suboptimally to score Nia this turn.

Hoffman had to waste an action to walk within 3" of Nia, and I was happy to see that Goryo wouldn't die just yet. However, Mechanical Automaton was able to score the kill with surprise shot. What a surprise!

Drowned died, but so did Joss. After various summons and turns spent next to Nia, Kirai had fallen down to five health remaining or so. So, after killing Joss and summoning Ikiryo, she went as far back as possible behind a fountain.

Hunter took an intel and backed off as far as possible. It would be annoying, difficult even, to catch Hunter as a prisoner with incorporeal models because of Deadly Pursuit.

So this is what it took: Datsue Ba ran and charged behind Hunter. Non-incorporeal Lost Love teleported in such a manner that opponent would have to pursuit into severe terrain. That, however, would still not be enough. I tried to move Shikome as close as possible, but I still thought opponent might be able to push over 1" away from Datsue Ba and not get within 1" of Shikome. Thus, summoned Ikiryo shrugged off slow and ran to block Hunter from moving at all. 

Sheesh. But a victory point is a victory point, I suppose.

Another Shikome eventually either died to Melissa or Watcher, and Guardian slapped Enslaved Spirit dead with just one hit as was expected. 

Guild received Nia point and strategy, and Resurrectionists got strategy and Take Prisoner for 5-4 lead for Kirai.


Turn 4:

As Hunter was already far away from my side of table, I decided to just kill the prisoner. Ikiryo was able to do that, freeing Datsue Ba and Lost Love to go to scheme Protected Territory end condition.

Hoffman managed to maul Kirai dead even when I tried to block Hoffman's move with Nia marker. 

Shikome went to pick intel, and Mechanical Attendant walked right next to strategy marker for upcoming turns.

Gwisin was miraculously able to survive Guardian and Melissa. Most likely because Melissa had slowly been scraped down to one hit point remaining, which is not good news against Vengeance +1. 

No points were scored this turn for either player.


Turn 5: 

Hoffman came to rob Shikome of her intel. However, Hoffman had been injured for quite a bit throughout beating various vengeful models. Ikiryo set her sight on Kirai's killer, walked and charged Hoffman dead. 

Gwisin was able to land a final hit on Melissa, which ruined Guild's chances to receive third intel. However, Guardian smacked Gwisin back which ruined any chance for Resurrectionists to use Lost Love to claim intel from, wherever. He was needed to score Protected Territory end condition.

So, both players gained end condition from one of their schemes for a narrow 6-5 victory for Kirai.


Game 2:

Strategy: Standard Stuff the Ballots

Schemes: Protected Territory, Deliver a Message, Outflank, Sweating Bullets, In Your Face

My list:

Molly, Chaotic Conductor & Necrotic Machine
Philip & Nanny
Archie
Noxious Nephilim
Carrion Effigy
Rabble Riser with Killer Instinct
2x Crooligan

Pool: 4
Schemes: Deliver a Message (Archie), In Your Face
Thread: Wicked Whispers

Opponent had:

Jakob Lynch & Hungering Darkness
Gwyneth Maddox
Mr. Graves
Mr. Tannen
Soul Battery
Tanuki
2x Illuminated

Pool:
Schemes: Sweating Bullets, In Yo Face
Thread: Adrenaline Rush


Turn 1:

A single Crooligan was deployed right next to both ballots at the table edges as you'd expect. However, Hungering Darkness charged the one on right, so she teleported back to my deployment to get some heals from Effigy.

The second Crooligan took some cover behind a wall, as he saw other enthusiastic voters coming to the same ballot. Mr. Tannen and Illuminated, to name a few. 

Molly shuffled Noxious Nephilim near Nia marker to throw up required corpses for fracture points. Lynch started shooting at it, but Necrotic Machine made good job at stitching the nephilim. Archie positioned to within easy message delivery range of Mr. Lynch. 

Rabble Riser took a full run way past centerline, maybe one day getting behind enemy lines to vote. 

Molly, Necrotic Machine, Philip & Nanny and both beaters were holding up the middle, while Ten Thunders had their master and Mr. Graves nearby, with Tanuki and Illuminated hanging around and Gwyneth failing to hit the jackpot and thus getting no fracture points just yet. I felt relatively confident at this set-up.


Turn 2:

... Except that Lynch used Looming Dark to pull Hungering Darkness into melee with all of my Df 4 beaters. This took my by surprise as I was sure Honeypot would plant a vote to the rightmost ballot. Nope, Noxious Nephilim nearly died. 

Since its demise looked imminent, I activated Nephilim only for it to throw up what it just had regenerated, thus scoring Nia point. 

I think it was Gwyneth who killed Noxious Nephilim next, again failing with jackpot. No fractures for Honeypot this turn. 

Lynch started shooting Archie, and did a horrifying job at that. He had, like, two or three health remaining after those derringer shots.,

But then Molly made a weird super activation. She healed Archie back to full with Deja Vu's and shenanigans, and encouraged Archie to boldly walk with pride to deliver a message for Mr. Lynch. Now, I don't know what written in the message, but Honeypot got furious. Or maybe it was just the way how Archie walked. I don't know. But Mr. Graves and Illuminated beat Archie back down to two health remaining.

Instead of scoring In Your Face with Archie, the poor guy had to leap away from action, and even cheat himself down to one health remaining to succeed at the leap. Two walks later he was getting patched up by Carrion Effigy.

It took three angry voters, Mr. Tannen, Soul Battery and Illuminated to scare away an underage voter, who teleported to center ballots and crammed it full illegal votes. Three, in fact, because of Nia's Adrenaline Rush. 

Philip & Nanny had succeeded in slowing down Hungering Darkness, but Tanuki was just as good lifting Lynch's totem's mood up from sluggishness. 

Suddenly situation looked a wee bit worrying, but at least Necrotic Machine landed double poison on Hungering Darkness, greatly reducing its survivability with neurotoxins. 

Since Hungering Darkness had left rightmost ballots empty, buffed up Rabble Riser ran there to place votes next turn.

Resurrectionists scored strategy and Deliver a Message. Opponent had received strategy and both schemes for a 2-3 lead for Honeypot.


Turn 3:

Resurrectionists got the initiative, and tried to ruin enemy plans with Boring Conversation. Philip and Nanny were able to slow Hungering Darkness again, and Tanuki did exactly same it did last turn.

Hungering Darkness was under neurotoxins and Carrion Effigy's no-heal aura. To relieve itself from the plethora of debuffs, Hungering Darkness activated and indeed managed to scrap Necrotic Machine. Gosh and darn. 

It was time to see what Molly's parade baton was all about, as Hungering Darkness only had five health remaining. I figured my best chance would be to do a singular, mighty hit. My hand was already running low, so Molly concentrated, positively reinforced herself and took a swing at the beast, using focus both on Terrifying and attack flip. Annoyingly it only resulted in a tie, so damage was flipped with negative modifier. Nonetheless, severe 6. 

Unfortunately situation in the middle still looked bleak. Mr. Graves exposed Crooligan for the fraud he was and punished the kid with a fencepost. Lethally. Fortunately opponent was rather busy with removing Crooligan's earlier votes and to stuff their own into center ballots. 

Archie took a crazy 19"+base size sprint behind enemy lines, with the remaining Crooligan teleporting to him and placing votes to enemy ballots. Rabble Riser secured another box, providing Resurrectionists with a victory point. Noxious Nephilim's and Crooligan's corpse in the middle also gave me a Nia point.

Ten Thunders received center and leftmost ballots, with an Illuminated already having ran within 1" of a ballot box on my side. 

Scores evened out to 4-4.


Turn 4:

Honeypot models were closing in the middle, so after Carrion Effigy had put up Aura of Decay Molly brandished her trusty baton again, and started to maul Mr. Graves. And look at that! Only Hard-to-kill saved the casino bouncer.

I worried that Mr. Graves would idolize Archie's retreat in similar situation, but Mr. Graves was of tougher determination. Instead, he managed to deal damage back to Molly.

Because of this my center pretty much collapsed. Fortunately Philip & Nanny was able to ask a tough question that killed Mr. Graves, giving Resurrectionists their In Your Face. And not a moment too soon, as a couple of next Honeypot activations were able to put an end to Molly's carnival.

Archie & Crooligan tag team secured third strategy point for the Forgotten, but Honeypot were just as effective voters. 

With Resurrectionists second scheme and both players scoring strategy, Forgotten claimed a tiny lead of 6-5.


Turn 5:

Last turn started with Philip & Nanny and Carrion Effigy surrounded by both Illuminated, Lynch, Tanuki, Mr. Tannen and even Gwyneth within derringer's reach. It certainly did not look good. 

I just had to hope for best that Philip & Nanny would survive the onslaught and back off with deadly pursuit to deny Ten Thunders Sweating Bullets end condition. And it almost worked - it was the very last activation's very last action that finally removed Philip & Nanny from board.

Archie scored In Your Face, but Ten Thunders got both of their schemes and even Nia point for a close victory of 8-7 for Honeypot.

Saturday, November 11, 2023

Ghost's Horror Show

 A 50ss game of Malifaux.

Strategy: Corner Plant Explosives

Schemes: Take Prisoner, Information Overload, Hold Up Their Forces, Espionage, Ensnare

My list:

Kirai & Ikiryo
Datsue Ba
Lost Love
2x Shikome with Killer Instinct
Onryo
2x Enslaved Spirit

Pool: 7
Schemes: Espionage, Hold Up Their Forces

Opponent had:

Colette & 3x Mechanical Doves
Carlos Vasquez
Cassandra Felton
The Firestarter
Angelica Durand
Coryphee Duet
Showgirl

Pool: 2
Schemes: Espionage, Information Overload

Turn 1:

Both Shikomes were deployed to different table edges, but their activations were mirrored - place a scheme and walk, and later chain ganged even further and also deadly pursuit in the end phase.

Opponent was also spamming scheme markers to their deployment zone. I was waiting for opponent to activate the dreaded Coryphee Duet, but he just wouldn't do that. So, Kirai had to activate to summon an incentive for opponent to bring models to middle. Goryo did just that, and fortunately neither Carlos or Coryphees were able to kill it. Lost Love had to teleport to Kirai to heal it, though, so that it wouldn't burn off the board.

I had Kirai, Lost Love, Ikiryo and Onryo going to middle, with Datsue acting as a Lost Love beacon a little to the right.

Performers had Cassandra, Carlos and Coryphee there in the middle, iwth Colette a little behind them and Angelica Durand to the left. A Showgirl had been left behind, who was apparently going towards top-right corner. Firestarter was on top of a walkway, biding his time with two explosive tokens.

Turn 2:

Colette activated first and went to sword-trick Goryo off the board. So now there was Carlos and Coryphee Duet with only a little terrain between Kirai and Lost Love. Ikiryo went to sacrifice herself and even managed to deal four points of irreducible damage to Coryphee Duet.

Coryphee Duet healed a bunch of vengeance damage from various models nearby, took a swing at Ikiryo and danced apart to form two Coryphees with two health each. 

Both Shikomes went to place a strategy marker, and both Enslaved Spirits chain ganged Shikomes forward, and one of them even managed to place a scheme marker to center line. 

Angelica, Carlos and even a tiny little dove were beating Ikiryo and managed to bring her down to one health remaining. This was unfortunate, as I had been saving enough cards in my hand for a nasty double-summon this turn. So, Kirai healed Ikiryo a little instead, summoned a Drowned and launched a Spirit Barrage over the unactivated Coryphee. 

Cassandra went to breathe fire on Lost Love, who took one attack and and protected itself from one by redirecting the attack to Kirai. Reason for such over-protectiveness was the fact that I had placed two of my explosive tokens on him. 

Sword-tricked Goryo popped up from one of my scheme markers in my deployment zone and took a double walk. Lost Love was thus able to heal Goryo and Kirai a little. Onryo went to assist Burning away from Goryo. Datsue Ba gave a charge to summoned Drowned, who managed to stun a Coryphee, but not kill. Datsue Ba was able to startle the puppet before walking a little to perhaps become relevant for scenario next turn.

Firestarter flew recklessly into a position to place a strategy marker, so both players were able to score strategy this turn. No reveals.

Turn 3:

Board state looked really good for Urami. But... somehow... things change.

Angelica tried to cane down an Enslaved Spirit but failed to do so. However, she did drop a strategy. 

Datsue Ba and Onryo tried to kill Firestarter, but didn't do much else than receive Burning and giving Adversary to the wildfire henchman. Firestarter disengaged, took fast and went to place a strategy marker, which was an accidental misplay. No interact action after disengaging. 

Presto-Chango brought Lost Love to middle and Coryphee to Kirai.Center was not such a good position for Lost Love, so he had to be activated next, move to Datsue Ba and go place a strategy marker. 

A showgirl took a charge to Lost Love, and just like that poked a hairpin to Lost Love's brain, killing him instantly with a Red Joker on damage. Then she picked up my explosive marker. That was concerning, as I would have to steal one of opponent's markers now to score four from strategy. Maybe next time I shouldn't put 40% of my eggs to an easily killed basket. 

Shikomes continued closing in the enemy deployment zone, but the one one the left got bogged down by a Mechanical Pigeon and Mannequin that dealt four points of damage with just one moderate. Or, more accurately, that was before tits ransition from Coryphee that took a point of vengeance. Dove and Coryphee brought Shikome down to one health remaining. Yikes.

But, at least Hold Up Their Forces was looking good when Angelica Durand had not managed to kill an Enslaved Spirit, who then went to engage her. 

Goryo from first turn killed Coryphee and/or Mannequin that had Colette had shuffled around.

Kirai summoned a Goryo to middle, took a walk and tried to shoot Firestarter off the board, which just didn't happen. Goryo wanted to keep Carlos engaged, so it just walked and tried to use Violent Spirits for damage. Spirits were not so violent.

But Carlos... Carlos on the other hand was. 

He breathed fire on Goryo and scored severe damage, which meant that both Ikiryo and Drowned died. Goryo was beaten down to two health remaining, but had four points of burning. So yeah. Just like that. Twenty-two points worth of models, gone. And to make it a lot worse, I had been counting on Drowned continuing to engage Colette for Hold Up Their Forces. Nope. Not anymore.

Thankfully no-one scored schemes, so scores went 2-2.

Turn 4:

Kirai upkept Adversary on Firestarter, and so Onryo was able to kill the henchman with a charge attack. 

Colette walked, dropped explosive and used Presto-Chango to switch Kirai and Carlos. Or at least their places on board. There was then a brief comical moment when Goryo tried to land Mark of Vengeance on Carlos, which missed and triggered Butterfly Jump. Then it charged Carlos and missed, which triggered Butterfly Jump. Then it charged Carlos and missed, which triggered Butterfly Jump. I hope Carlos appreciated 9" free movement. 

Mechanical Dove failed to kill the Shikome with one health remaining, but Mannequin didn't. 

Kirai was able to summon Ikiryo back, and with a soulstone even an Enslaved Spirit to engage Colette.

Ikiryo shrugged off her slow and charged Angelica Durand that had already killed another Enslaved Spirit. Damage was too weak to affect the last one and a half turn.

Showgirl had walked and charged Enslaved Spirit on top-right, but this was still not enough for Hold Up Their Forces, because the Enslaved Spirit to Colette had been summoned this turn. I had the difficult choice of going to plant a strategy marker with Datsue Ba, or run to engage Colette. Datsue placed explosive, as I might not have the chance to do that next turn.

Then a Goryo and Onryo burned into crisp sheets. 

Both players scored strategy and Espionage for an excruciating 3-3 situation.

Turn 5:

Murder Dove was not able to kill Enslaved Spirit at top-right, and Showgirl went to place a scheme marker instead of poking holes into ghosts with hairpin. Enslaved Spirit walked to engage her.

Colette used Sword Trick on Enslaved Spirit next to her and went to place a scheme marker. I was worried Cassandra and Carlos might remove both of my scheme markers in my deployment zone, Kirai had to walk and charge to summon third Goryo to engage Carlos.

Fortunately Carlos was more into spamming scheme markers to my deployment zones, and Cassandra came to help him.

Ikiryo didn't bother to attack Angelica and went to sit over one of my scheme markers instead. Angelica? Scheme markers!

Datsue Ba and Enslaved Spirit gave me Hold Up Their Forces, and Shikome had prepared Espionage end condition.

Performers managed to overload Urami with information and still get Espionage, too. They had also enough strategy markers to cleave a one point victor, 6-7 for Arcanists.


Sunday, June 25, 2023

Ngaatoro's contacts

 A 50ss game of Malifaux on Vassal.

Strategy: Corner Cursed Objects

Schemes: Assassinate, Load 'Em Up, Secret Meetup, Hidden Martyrs, Sabotage

My list:

Kirai & Ikiryo
Datsue Ba with Grave Spirit Touch
Jaakuna Ubume
Lost Love
Shikome with Killer Instinct
Gwisin
2x Seishin

Pool: 7
Schemes: Secret Meetup (Shikome and Mr. Ngaatoro), Hidden Martyrs (Lost Love & Gwisin)

Opponent had:

Lucas McCabe, Tomb Delver & Luna
Sidir Alchibal
Jessie Halliway
Mr. Ngaatoro
Rough Rider
Cryptologist
Ruffian
Hopeful Prospect

Pool: 3
Schemes: Secret Meetup (Mr. Ngaatoro & Gwisin), Hidden Martyrs (Rough Rider & Ruffian)

Turn 1:

Well, uh. I had originally planned to walk Shikome and Ikiryo a bit forward with Seishins and whatnot, but somewhere along the way both Seishins gave Kirai a walk. She walked into safety behind the Secret Meetup building in the middle, summoned a Goryo and tried focus it, but shielded it instead. 

Idea was to delay Explorers' movements and give an incentive for Mr. Ngaatoro to step forward. 

Goryo didn't do much except soak up damage and deal like two points to Rough Rider.. Lost Love had to teleport to heal Goryo.

Gwisin ran to take the hit for Lost Love and Kirai. Datsue Ba gave a walk for Shikome, who walked and charged Rough Rider for a couple points of damage more. Perfectly softened up roughness.

Remainder of my crew wasn't set up as perfectly. Because my Seishins had gone wild with Kirai, Ikiryo, Jaakuna and Datsue Ba were walking so, so slowly towards action. Well, as slowly as Movement 6 incorporeal models in severe terrain can move. 

In fact, looking at the picture it's almost as if McCabe made much faster progress despite messing up Ride With Me shenanigans. 

Sidir and Mr. Ngaatoro brought Goryo down to three health remaining. McCabe dug up a Timeworn Blade and it kept getting tossed around Explorers, finally landing on Jessie. 

All the explorers were in a blob, which is usually nice when you got blasts around, but this time a size 3 overwalk was dividing the crew more than horizontal distance. 

Mr. Ngaatoro was exactly where I wanted with the wounded Rough Rider nearby. Jessie was also there, making Urami attack actions less effective with McCabe's aura. That was the first wave, second wave was everything else that was gravitating toward bottom-right quarter.

Turn 2:

Nearly dead Rough Rider rode away from the melee, healing himself for three. He then started taking shots at Goryo. Not ideal, but at least the horse did not run completely away from action - I was planning on getting my curse token discarded from it.

Everything was fine and dandy until Jaakuna Ubume went into full Karen-mode and asked for the manager after screaming out her lungs. She didn't actually manage anything, but the manager McCabe took a walk and sprayed her twice with pepper spray. 

Lost Love teleported to heal Jaakuna, and she admitted that maybe she overreacted a bit. Seishin gave her a walk action to move outside of Sidir's machine gun range. 

After some artifact juggling Sidir moved and shot Jaakuna with a machine gun, making exemplary work on how to deal with frustrating customers. Fortunately Jaakuna did not die.

Goryo that had been summoned last turn was shot off the board by Jessie. I could not take the risk of Mr. Ngaatoro charging Shikome, perhaps in an odd angle and getting away from secret meetup. Gwisin walked and charged the big bully. 

Ruffian, Mr. Ngaatoro himself and Cryptologist eventually remove the second Goryo. I had poured everything I could at the wounded Rough Rider, but only managed to bring it down to three health remaining. 

I had to make my gambit - Datsue Ba walked forward and bought masks and extra card to try and give Shikome a free charge at Rough Rider. Things went unexpectedly well and the rider died instantly, leaving my Secret Meetup model to get back to within 3" of Mr. Ngaatoro and the house. 

Which she did. 

Then came the surprise - both players revealed Secret Meetup. Mr. Ngaatoro had double booked a meetup with Gwisin and Shikome.

Explorers also revealed Hidden Martyrs, which gave them a 2-3 lead. 

Turn 3:

And then we get a messy, messy turn. 

Sidir shoots Jaakuna dead and scores a blast that damages Ikiryo and Lost Love.

I set my aim on Ruffian and charge it with Shikome. Attacks don't do much because the swagger had stacked some focus. 

I try to bring Ikiryo to charge Ruffian, but mess up a few things and end up in melee with Mr. Ngaatoro. Lucas charges Ikiryo back and a weird dance ensues where Gwisin is placed here and there with Take the Hit. In the end it doesn't help much as McCabe scores ample supply of rams, dealing some automatic points of damage with the trigger. 

But the jumping around opened up line of sight for Kirai to shoot Ruffian. She managed to kill Ruffian with two action points, so she planted a scheme for Secret Meetup end condition. Jessie, however, avenges Ruffian in a terrifying way. I had ran out of cards in my hand, so Kirai was vulnerable. Jessie scored a harpoon hit against her and drags my master into melee with unactivated Mr. Ngaatoro.

I had wanted to give a walk for Datsue Ba with Seishins, but I didn't feel like I got the time for that. Datsue walked and weighed Mr. Ngaatoro's sins - and they were grave indeed. Red Joker brought Mr. Ngaatoro to one health point remaining, which combined rather nicely with Kirai's life leech. Disaster averted.

Lost Love heals Kirai for a bit and Seishins walk forwards.

Mr. Ngaatoro has to activate and die.

Both players get strategy for scores of 3-4. 

Turn 4:

Carnage just continues. 

Lucas places a scheme to secret meetup building and charges Kirai. Gwisin obviously takes those hits, because Kirai was at four health remaining. Gwisin dies to the attacks, and even Kirai takes a point from rams. Finally McCabe tosses Phantasmal Mask for Jessie. 

I expected Kirai to die this round, so she went all-in and summoned both a Goryo to center and Ikiryo to Cryptologist, whom I had to kill this turn for strategy point. 

Lastly she walked a little to get Datsue Ba to protected range. And protects the granny did! Both harpoon attacks hit Datsue instead of Kirai. 

Shikome tried to kill Cryptologist. She chose tomes from pale hunger to ignore armor and started flailing at Cryptologist. Both melee attacks missed, though. Challenge gave an extra melee attack, but that missed too. Yaaaaaaaay.

Sidir, on the other hand, makes a brutal activation. He disengages from Goryo and shoots Kirai dead, hits Ikiryo for five points of damage and then kills her with an extra shot - all of this with negative fate modifier from friendly fire. 

Situation looked grim, but I still had plans to get my point from Cryptologist. Fortunately Cryptologist score only a weak damage to Shikome, bringing her down to one health remaining. 

Seishin succeeded in giving a walk for Datsue Ba, who then charged Cryptologist. I needed a moderate or two weaks to kill him. And again. All attacks missed despite me having stat lead this time around. Even startling Cryptologist failed! 

Well, I still had a chance - to give a walk for Goryo with Seishin and then charge Cryptologist. But Hopeful Prospect completely ruined that by engaging the ghost in melee. It tried to launch itself to Cryptologist by getting On Your Heels with the bonus action... but got tomes instead. Hooray, adversary. Frustrated, Goryo punched Hopeful Prospect with moderate damage, but thanks to hard-to-kill didn't even kill Hopeful Prospect.

What a horrible turn. Seishin ran to engage Sidir, and Lost Love went to place second scheme for Secret Meetup.

Explorers score strategy, Resurrectionists Hidden Martyrs for a 4-5 lead for Explorers.

Turn 5:

Despite my grievances, there was still an opportunity to win. Cryptologist started the turn by killing Shikome, so winning became that much harder. Fortunately Datsue Ba managed to kill Cryptologist with one attack. She charged Luna, missing the attack again, but staggered McCabe.

Jessie activated, disengaged from Datsue Ba and tossed Phantasmal Mask for McCabe. 

Seishin walked to engage Luna and McCabe, hoping to block possible scheming attempts. Luna, however, tore Seishin to shreds. 

Goryo failed to kill Hopeful Prospect with Violent Ghosts, so it had to use a real action point for that. Thus, it not longer was able threaten McCabe. But, at least it could walk to engage.

Lucas single-handedly killed Goryo and also Seishin engaging Sidir. 

That sealed the game.

Lost Love was able to teleport to Datsue Ba and go and get engaged by Lucas to score Hidden Martyrs. Sidir Alchibal then had the option to take a double walk and plant a scheme for secret meetup or deny me secret meetup. 

So, it was a closely fought 7-7 or 6-6 draw, depending how Sidir would have chosen. 

Saturday, February 25, 2023

Blessed of February

 A 50ss game of Malifaux.

Strategy: Wedge Cursed Objects

Schemes: Set the Trap, Assassinate, Hidden Martyrs, Spread Them Out, In Your Face

My list:

Kirai with The Whisper & Ikiryo
Datsue Ba
Lost Love
Carrion Effigy
Shikome
Bone Pile with Grave Spirit Touch
Drowned
Seishin

Pool: 7
Schemes: Hidden Martyrs (Carrion Effigy & Bone Pile), Spread Them Out

Opponent had:

Rasputina & Wendigo
Snow Storm
Blessed of December
2x December Acolyte
Silent One
Ice Dancer
Hoardcat

Pool: 2
Schemes: Hidden Martyrs (Hoarcat & Silent One), In Your Face

Turn 1:

Well, that was one of the more brutal turn ones in recent memory.

At one point we counted almost a total of forty points of damage having been done in total, and yet there were models left to activate.

December Acolytes started the slaughter with shooting Ikiryo down to one health remaining, and scoring some odd points to Drowned. 

Lost Love healed Ikiryo back to four, and Ikiryo launched herself at an Acolyte in an attempt to soften one up for Cursed Object points.

Rasputina placed some pillars and shot a blast at Carrion Effigy, clipping Kirai and Lost Love in the process. She pushed Blessed of December and Silent One with her bonus a bit forward. 

Kirai summoned a Goryo and barraged Silent One with spirits. Goryo was able to charge Silent One and kill her, not knowing I had just killed one of Rasputina's hidden martyrs. 

Hoarcat and Blessed of December maul at the Goryo, leaving the angry ghost at one health remaining or so. 

I had brought Drowned into melee with Ice Dancer, which might have been a reasonable match-up, but then the dancer was joined by Snow Storm. Drowned didn't die, but there wasn't much left to drown any more either.

Seishin gave a walk for Shikome, and then Datsue Ba gave walk for Seishin. Shikome went to place my first scheme marker for Spread Them Out.

Turn 2:

Rasputina was quick to activate after winning initiative. She walked forward and killed the Goryo, securing Cursed Objects for Arcanists. She also placed additional ice pillars as you'd expect.

Ikiryo manages to do the same against Acolyte of December when she scores onslaught from her first melee attack. She even has the activation point to place a scheme marker. 

Wendigo copied Rasputina's healing shockwave, which was annoying since I had already planned to move Carrion Effigy forward to deny heals. Well, it did that anyway but without much of an effect. Even trying to lure somebody to kill it failed when Blessed of December was not able to kill Carrion Effigy for my Hidden Martyrs.

Seishin managed to give an extra walk for Shikome, who was then able to go and place a scheme marker close to opponents table edge. 

Datsue Ba was trying to weigh Blessed of December's sins, and when I take a look at the pictures I'm not sure if I even activated Lost Love that turn. If I did, it probably just tried to heal Kirai.

Kirai summoned a Goryo, who then tried to kill a Hoarcat, failing at that.  Ice Dancer and Wendigo had beaten this additional Goryo within easy kill range for next turn.

Bone Pile took a double walk, trying to figure out what to do other than to leave Carrion Effigy to martyrdom.

Points go 2-2 when both players get strategy, Resurrectionists had Spread Them Out and Arcanists In Your Face. 

Turn 3:

Seems like I have forgotten to take a picture from this round. 

Blessed of December is finally able to kill Carrion Effigy, and uses pouncing strike to engage Datsue Ba. Bone Pile needed only to survive now, so it just walked a bit further away from action and placed a scheme marker. 

Hoarcat charged back into melee with Goryo, and I don't quite remember who killed what, but the end result was at least Ice Dancer and Wendigo dead, Goryo gone and a re-summoned Ikiryo engaging Hoarcat. 

Datsue Ba and Seishin were able to almost kill Blessed of December - in fact Datsue Ba could have probably done it, but I wanted to save the kill for next turn. 

Lost Love moved closer to melee between Datsue Ba and Blessed of December. 

But when it came to end phase, Blessed used deadly pursuit to push into melee with Lost Love.

Scores go 3-4 for Resurrectionists when both get strategy and Resurrectionists also Hidden Martyrs.

Turn 4:

Blessed of December starts the turn, kills Lost Love with one strike, eats his corpse to heal and then charges Seishin dead, essentially healing back to full. That just happened. At least this maneuver spent most of opponent's hand, so remainder of the turn I had easier time with connecting my attacks. 

Ikiryo was able to kill Hoarcat for Cursed Objects points and charged to engage Rasputina.

Rasputina starts spamming Ice Pillars to no end. Snow Storm can't quite finish Ikiryo.

I realized I had ran out of easy kills for last Cursed Objects points, so I tried to soften up Blessed of December as much as I could. But neither a summoned Goryo or Datsue Ba did enough. 

Bone Pile and Shikome had placed ample supply of scheme markers on the opponent's table half. 

Scores go 5-5 when opponent reveals he had Hoarcat as a martyr, and both players got strategy.

Turn 5:

Opponent won the initiative and pushed Snow Storm to my deployment zone with Rasputina and killed Ikiryo. 

I had my chance to kill Blessed of December and charged with Goryo. Blessed of December had Adversary so I thought I had a pretty good chance of scoring last Cursed Object point. But it turns out opponent had two 13's and Red Joker in hand.  /table flip

Blessed of December then ran to farthest corner where was no way I could reach... unless I summoned a Goryo at maximum distance and landed Mark of Vengeance with masks on it.

But, when Kirai activated, The Whisper revealed two sixes and Black Joker coming up. 

Datsue Ba almost killed Snow Storm, although she mostly just wanted to keep Snow Storm in place so Bone Pile would be able to run to get engaged. 

So, it was a closely fought 7-7 draw when opponent got Cursed Objects and In Your Face with Snowstorm, and Resurrectionists received end condition of both schemes. 

Sunday, October 30, 2022

Casual Eighteen

A friend visited my place for a few days. It's been a few days since these games were played so details have been lost from memory.

 A 50ss game of Malifaux.

Strategy: Standard Carve a Path

Scheme pool: Spread them out, Set the trap, Breakthrough, Public demonstration, Hidden martyrs

My list:

Jack Daw & Lady Ligeia
Montresor
Jaakuna Ubume
Hanged with Servant of Dark Powers
Crooked Man
Dead Outlaw
Guilty

Stones: 5
Schemes:

Opponent had:

Jakob Lynch & Hungering Darkness
Kitty Dumont
Mr. Graves
Mr. Tannen
2x Illuminated
2x Tanuki

Stones: 3
Schemes: Hidden Martyrs, Breakthrough

Turn 1:

For some reason I placed Hanged way top behind a large factory building to push a strategy marker. Well, there was a reason, though... I wanted to make staggering machine as efficient as possible and the only model I could part seemed to me to be Hanged. I also wanted both martyrs as far from each other as possible.

In the middle two bubbles were nearing each other with Jaakuna Ubume in the front of Jack Daw's side. Mr. Graves attempted to punish Jaakuna for being almost at the center point, but succeeded only in dealing damage to himself via hazardous terrain.

Turn 2:

Outcasts win initiative, and Jaakuna punts a marker even further and puts up drowning aura and lures an Illuminated into it. 

Mr. Graves then hits Jaakuna twice and she dies, just like that. I had hoped for a little more value out of her. At least Jack Daw managed to land Curse of Injustice on a few models, most notably Hungering Darkness.

Hanged continues to push one of my strategy markers far up while Kitty does the same in the middle. Hanged also managed to land its curse on her.

An Illuminated kills Guilty, thus giving me a point from Hidden Martyrs.

Hungering Darkness and a few other models try to break Jack Daw, but don't really do much with actual attacks. The real damage was this pulse that gave slow for Jack and Montresor.

Dead Outlaw gives fast for Crooked Man from a scheme marker I had planted last turn for movement shenanigans. As a last model to activate, he took a double walk and put a scheme marker close to Mr. Graves and Illuminated, while one of the earlier schemes was still close enough to Hungering Darkness.

Jack Daw reveals both schemes, and both players get strategy for a total of 1-3 for Outcasts.

Turn 3:

Well it was an intense turn.

Montresor opens by making a devastating activation, blasting two points of damage for a Tanuki, Illuminated, Mr. Graves and Hungering Darkness - and then a little more for Tanuki and Illuminated (and himself) from black blood. Attack with noose brought Mr. Graves and Tanuki down to one health remaining. 

It was certainly not to be, because then Tanuki just healed him back over hard-to-kill threshold.

Opponent really puts everything to killing Montresor - and, for the first game ever, Montresor actually dies even after triggering his demise. But at least Mr. Graves and Tanuki behind him finally die when Crooked Man makes a proper earthquake. Or, well, Mr. Graves doesn't die just yet - it takes Dead Outlaw to finalize him. 

Hanged and Kitty do their thing with strategy markers. Crooked Man also kicked one of my markers to opponent's deployment area. A Tanuki struggles with one of the Ten Thunders strategies, but unfortunately I don't have the model count to intervene.

Both players score strategy, and opponent reveals Hidden Martyrs on a Tanuki and an Illuminated. Scores go 3-4 for Outcasts.

Turn 4:

Hanged kick strategy to enemy deployment and lands in the thick of action with On Your Heels. Crooked Man and Dead Outlaw manage to kill Mr. Tannen and the Illuminated for enemy Hidden Martyrs, and killing that Illuminated brought back Guilty.

Jack Daw charges Tanuki that was delivering strategy marker, but fails to do anything important.

Then, to my horror Kitty starts spamming scheme markers on my deployment zone and thus Ten Thunders is able to reveal Breakthrough.

Scores go even 5-5. 

Turn 5:

Jack Daw gets a second try at Tanuki, but the furry little bugger just doesn't die or even get staggered. It manages to disengage, and Hungering Darkness obeys it to push last Ten Thunders strategy marker to my deployment zone. 

In the middle my useless minions fail at trying to injure Lynch enough to make Set the Trap end condition a possibility, and even worse - Hanged dies, too. I'm left with just strategy points, while Ten Thunders get their Breakthrough for a score of 7-6 for Ten Thunders.

Game 2:

Strategy: Flank Guard the Stash

Schemes: Load 'Em Up, Secret Meetup, In Your Face, Vendetta, Catch & Release

My list:

Kirai & Ikiryo
Datsue Ba
Grave Golem
Noxious Nephilim
Lost Love
Shikome
Seishin

Stones: 7
Schemes: In Your Face, Secret Meetup (3x3 building, Noxious Nephilim and Gwyneth)

Opponent had:

Jakob Lynch & Hungering Darkness
Gwyneth Maddox
Kitty Dumont
Mr. Graves
Mr. Tannen
Illuminated
2x Tanuki

Stones: 1
Schemes: In Your Face, Load 'Em Up (scheme)

Turn 1:

Well, look at that pretty picture. From my side you can see Grave Golem, some swirly parts of a Goryo and half of Noxious Nephilim!

Well, that's because Kirai is hiding under the rectangular red roofed building, and most of my other models (Ikiryo, Datsue Ba, even Lost Love) were behind the stone wall, just behind the building.

Shikome could have been seen on the roof with Hungering Darkness if that thing didn't kill it with one hit!

Opponent knew I had blast, but apparently he did not consider it much of a threat. Truth be told - neither did I. I haven't had much of a success with blasts earlier. But I wanted to still threaten opponent a bit, give him a lesson not to bunch up like that.

Ikiryo, who had been walked into position with either Datsue Ba or Seishin, concentrated and projected her voice at Mr. Graves who was in cover. Hits. Red Joker comes up for damage. 

Ouchie. Losing Shikome to one hit suddenly didn't bother that much when that attack dealt in total eighteen points of damage if we count the two points from Mr. Graves' black blood ability! Eighteen!

Yeah, nobody died and opponent had quite a bit of healing available but still...

Turn 2:

Ten Thunders wins initiative, and goes straight into trying to save Mr. Graves with foul-mouthed motivation. First model I activate is however Goryo, who lands Mark of Vengeance on Mr. Graves. Goryo then walks and charges into the fray and promptly dies there, splashing adversary all over the place. Goryo died within 3" of Lynch, so it was In Your Face for Ten Thunders.

Another aimed blast from Kirai kills Mr. Graves and Tanuki and has Mr. Tannen reeling with one health and Jakob with not enough. Mr. Graves, however, was within 3" of Jakob Lynch, so it was In Your Face for Resurrectionists.

Situation could have been utterly hopeless for Ten Thunders if it wasn't for Hungering Darkness who harassed Kirai and tied her resources. She had tried to summon a Drowned for a bodyguard but that bodyguard wasn't very impressive. Keeping Kirai alive took just about every resource I had at my disposal.

When Noxious Nephilim went to the secret meetup building to contest the strategy marker from opponent, it was no strategy points for Ten Thunders and one for Resurrectionists. Scores went 1-2 for Kirai.

Turn 3:

Illuminated and Tanuki try to wrangle a strategy marker from Noxious Nephilim, but the beast is able to even the model count by smashing Tanuki into bits. 

Datsue Ba just endures and endures, although it takes all of my remaining soulstones and forces Lost Love to tellyport next to the granny for some spiritual healing. I was also planning to use Lost Love to plant some schemes to the secret meetup building because Gwyneth didn't seem too keen on coming there.

Even Grave Golem tried to heal Datsue Ba, but failed the bonus action with black joker. But now it was in position to run to enemy deployment for end condition of In Your Face.

My melee capabilities in the middle were also a bit of a farce, although something seems to have killed Mr. Tannen - I just don't remember what. It may have been Kirai who disengaged from Hungering Darkness after being mauled by the monstrosity. 

Drowned manages to stun-slam Hungering Darkness and took a flight to aid in the Nephilim's fight against Illuminated. Curiously enough this turn nobody scored additional points. Because of this we decided to continue play since there was a chance for draw for Ten Thunders.

Turn 4:

Well, that chance went soon down the drain when Datsue Ba continued to defy death and Noxious Nephilim finally killed the Illuminated.

What a weird game, but a victory for Kirai.

Tuesday, August 30, 2022

Life Leeching Like a Pro

Had a 50ss game of Malifaux on Vassal.

Strategy: Wedge Guard the Stash

Scheme pool: Sabotage, Assassinate, Breakthrough, Public Demonstration, In Your Face

My list:

Kirai & Ikiryo
Datsue Ba
Lost Love
Jaakuna Ubume
Shikome
Gwisin
Onryo
Seishin

Stones: 8
Schemes: Sabotage, Breakthrough

Opponent had:

Titania2 & Gorar
Malisaurus Rex
2x Autumn Knight with Inhuman Reflexes
2x Waldgeist with Ancient Pact

Stones: 6
Schemes: In Your Face, Breakthrough

Turn 1:

For a wedge, first round was surprisingly peaceful. I brought Jaakuna Ubume, Grisin and Ikiryo to hang around the lower middle marker with Datsue Ba behind a wall, ready to go where needed. An Autumn Knight and Waldgeist were within a single walk distance of lower marker. Gorar was sitting in deployment zone.

Kirai summoned an Onryo that was nearly killed by another Autumn Knight. I thought it would be safe to place Lost Love with By Your Side to heal that Onryo, but I completely forgot how Malisaurus tramples over people. Saving Lost Love cost me Red Joker from my hand. Last Malisaurus uses tendrils to push the enforcer away from Protected range.

Upper middle marker had Autumn Knight contesting it, with Malisaurus and Titania close enough, so situation there was alarming.

Hired Onryo was going north, and Shikome went around 21" with the help of Seishin, high up on the board to close in with Sabotage target. A Waldgeist managed to charge Shikome and deal in a few points of damage.

Turn 2:

Neverborn gets Black Joker on initiative. The only way for me to win initiative in this matchup. 

Onryo manages to land no-heals on Malisaurus Rex and I vow to remove the thing this turn. And I did this via two attacks from Onryo, three attacks from Ikiryo, two spirit barrages from Kirai and a balanced sword and violent ghosts attack from Goryo. 

Or at least in my fantasies I did that. No, after all of that, the thing was still sitting with nine health remaining. There is a smiley for this somewhere. Oh yeah, here it is: 

(ノಠ益ಠ)ノ彡┻━┻

If we discount the Shielded+2 that was given to Malisaurus, five points of damage in total still was not impressive. Malisaurus kills Lost Love with two swings, and upper Autumn Knight kills the summoned Onryo.

Shikome disengages from Waldgeist and moves inside the building, but the thing just climbs over size 1 obstacle and continues to beat my minion. Hired Onryo disengages from Malisaurus and is trying to come to aid, but is still way too far to be of any help. 

Jaakuna Ubume had charged a championed Autumn Knight, and nearly killed herself. Datsue Ba also charges the knight, also getting her knife parried back. 

The Autumn Knight concentrates and tries to kill Jaakuna Ubume. She has focus from first turn, and I have two cards left in my deck. I suddenly realize I still got Red Joker coming, so she uses focus for defense. 

Gwisin had charged the lower Waldgeist to offer Take the Hit for Jaakuna, but I completely forgot about that ability until it was too late.

Both players score strategy for 1-1.

Turn 3:

Titania heals Malisaurus and lower Autumn Knight. Goryo tries to deny heals for the rex but fails. Malisaurus kills Ikiryo before she gets to activate and after rampage even manages to land a hit on Kirai.

 Situation in the middle was unbearable, but at least I lucked out with Shikome - she flipped Red Joker for damage on Waldgeist, and was able to interact a scheme marker with her second action. 

Onryo takes a double walk to control enemy top strategy marker. This probably triggered Gorar to come upwards, yet not close enough to deny Onryo's control. Lower Waldgeist disengages and runs past center line to my side. 

Gwisin was now free to advance and interact a scheme marker to enemy deployment zone.

Datsue Ba wastes her entire activation against Autumn Knight. Autumn Knight manages to land one hit against Jaakuna Ubume, and fortunately leaves her alive with one health. 

Seishin moves Kirai to contest my top marker from Malisaurus, and then Urami master uses shears on the beast rather effectively. At the end of the turn Malisaurus is down to four health.

Upper Autumn Knight tosses Goryo away and tries to challenge Kirai with proper suit, but since challenging is an attack action, it was transferred to Seishin instead. 

Opponent scores In Your Face from killing Ikiryo, and I get Breakthrough and strategy for 3-2 for Resurrectionists.

Turn 4:

Titania started by healing stuff, but at least there was so much stuff that needed healing that all of them didn't pile up on Malisaurus Rex. Goryo puts no-heal on Malisaurus and charges in for a few points of damage. Autumn Knight charges Kirai who now had seven health. Kirai puts both attacks and challenge on Goryo although this empties my entire hand.

Kirai then manages to shear Malisaurus down to one health. One health! With Kirai having Life Leech, that was a death sentence that came to fruition as one of the last activations. Phew! Was this the first time I succeeded to kill Malisaurus? (Well, yes it was, but I've faced it only thrice)

Gorar tries to kill Onryo but fails while Onryo succeeds to remove Titania's totem.

Jaakuna has the time to use Drowning Aura, but since both Autumn Knights had Inhuman Reflexes this didn't help much - it just charged over Jaakuna and she died to Blade Rush. 

Datsue Ba... yeah. This was the second turn in a row when she failed every single action, and the round before that she managed to take a few points of damage in herself while not dishing out any herself. 

Shikome goes to place a scheme marker close enough my selected sabotage building and within enemy deployment zone. Gwisin interacts a marker to enemy deployment and walks to contest lower middle marker. So it was no strategy points for anyone. However, Breakthrough for me put the game 4-2 for Resurrectionists.

Turn 5:

Titania kills Onryo from enemy top marker and probably caused the death of summoned Goryo. Datsue Ba manages to kill the damnable Autumn Knight, finally!

Waldgeist below comes and takes a charge at Kirai, landing her away from contesting strategy.

Gwisin removes enemy scheme marker and runs to contest bottom-right marker. We did not continue beyond this since it was clear that Kirai would go to contest strategy marker and Shikome would do the same and spawn a scheme marker in enemy deployment zone, getting final score to whopping 6-2. 

But yeah, the game was way tougher than score indicates. When turn three was starting I was sure I'd lose.