Saturday, January 28, 2023

Hemophobia

 A 50ss game of Malifaux. 

Strategy: Wedge Covert Operation

Schemes: Catch and Release, Leave Your Mark, Sabotage, Set the Trap, Spread Them Out

My list:

Jack Daw & Lady Ligeia
Montresor
Jaakuna Ubume
Johan Creedy
Hanged
Crooked Man with Servant of Dark Powers
Prospector

Pool: 3
Schemes: Spread Them Out, Set the Trap

Opponent had:

Nekima, Broodmother & Blood Hunter
Hayreddin
Mature Nephilim
2x Young Nephilim
Black Blood Shaman
Terror Tot

Pool: 7
Schemes: Sabotage, Leave Your Mark

Turn 1:

Somehow it just seems that Jaakuna Ubume is destined for turn 1 alpha strikes for me. Fortunately this time around she was still alive after turn ended. She didn't take damage, but gave three points to Mature Nephilim from just standing there. 

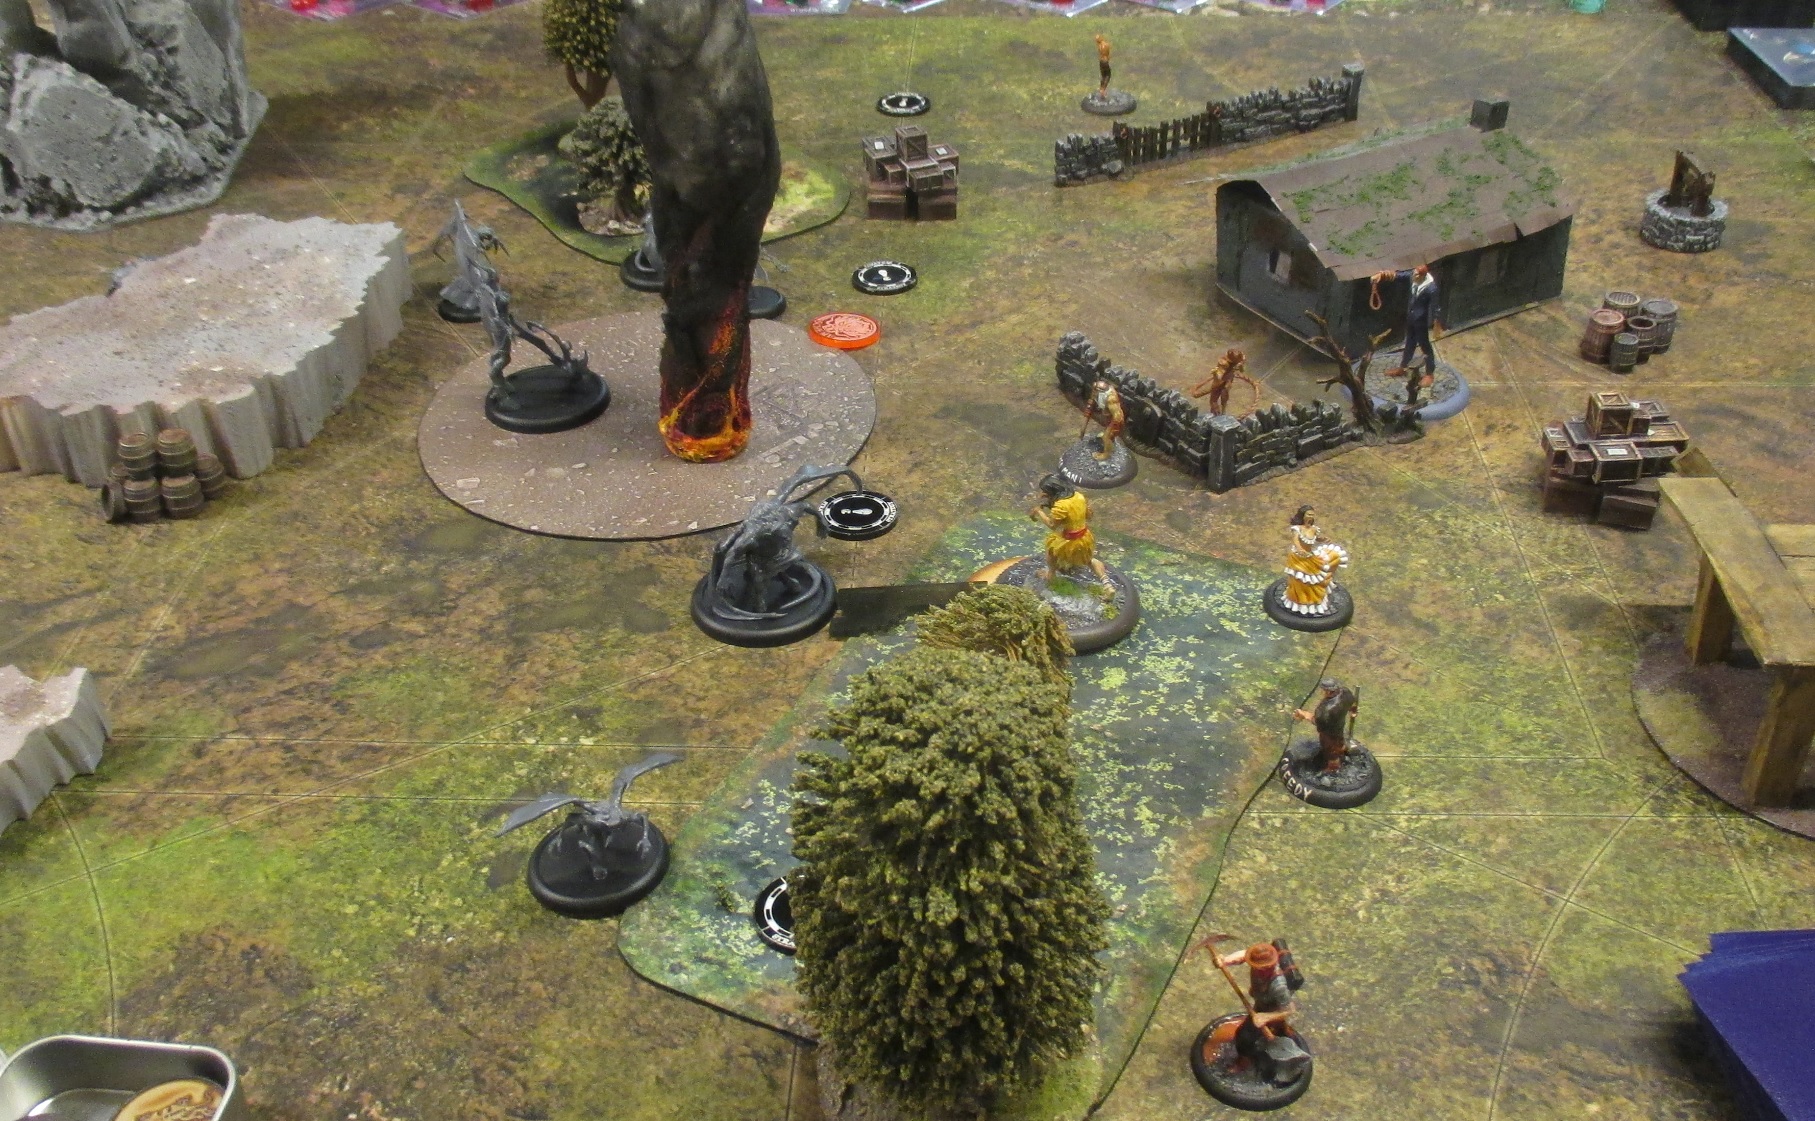
Main body of both crews were closing in the middle. I had Jaakuna, Crooked Man, Lady Ligeia, Montresor and Jack Daw there, with Hanged going north and Prospector south. Johan Creedy was just trying to stay relevant whether he was needed south or in the middle.

Jack Daw managed to land his curse on Mature Nephilim.

One Young Nephilim was going to south marker, the Mature was engaging Jaakuna Ubume and remaining Neverborn crew was near the middle with a suspicious lookin scheme marker within 1" of the centerpoint already. Terror Tot had grown to become a Lilitu. 

Turn 2:

Montresor makes a sub-par activation by walking twice to get Mature Nephilim within 6". At least he scored crows for his bonus and dealt a couple of points more to Mature. 

Mature then activates, charges and scores shove aside attack from Crooked Man. Other attacks went into beating Montresor.

Crooked Man was now pretty much facing Nekima, Black Blood Shaman, Lilitu and Young Nephilim all alone while already injured, so he activated to at least get an activation. Earthquake didn't roll out, but Malifaux Mining Law got the trigger to remove enemy schemes within 3" and place one of his own.

I have to tip my hat to Crooked Man's survivability, though. Lilitu, Nekima, Hayreddin and Young Nephilim all spent a good portion of their action points to remove him. Rest in peace, Crooky. 

Things didn't turn out that well for me with Mature Nephilim, though, who had been healed a little by Nekima and his own regeneration.

Jack Daw tried to shoot some curse upgrades to enemy models in the middle, but used remaining attacks on Mature, missing his big attack with Rams bought in with a stone. One attack dealt a bit damage, but so it did to Jack and Montresor, too. 

Johan Creedy just kept missing, and the only additional damage that turn came from Jaakuna managing to lure Mature Nephilim into her drowning aura. 

Hanged scored north marker and planted a scheme. Prospector had placed a scheme marker also, but wasn't able to claim because Young Nephilim charged and dealt some four damage to him.

Both players get strategy and Outcasts also manage Spread Them Out, for 1-2 lead.

Turn 3:

Montresor managed to kill Mature Nephilim which was a little surprising, and Young Nephilim killed Prospector which wasn't all that surprising. It essentially needed to fail its actions twice. 

Johan was sacrificed for some distraction, charging to Black Blood Shaman that had five boxes remaining, engaging Nekima in the process. Didn't kill, though. Black Blood Shaman failed its attacks back, which still meant some damage.

Nekima walks and kills poor Johan with blade and a black blood from a friendly model. Then she charges Montresor, engaging both Jaakuna and him. 

In the middle there was nice blob of enemy models for a devious trap that I had set. To discourage enemy models from leaving, Hanged placed a scheme up north, walked and launched itself to middle with Horrifying Whispers and proper triggers. 

Lilitu disengaged and tried to lure Hanged away but failed. I was planning to put a scheme near Nekima with Jaakuna and a few nephilim in the middle with Jack. But first Lady Ligeia had to position herself for Drawn to Betrayal. 

GASP -moment was when Young Nephilim in melee with Hanged slapped a Red Joker in Hanged's face on damage. Damage block was a healthy "1". 

I was spending all my soulstones to save him from black bloods and whatnot. I was thinking that if he'd still be at two health remaining when Blood Hunter activates, he'd be safe.

Well, not. Because of stampede. 

So that was Hanged and Johan down the very same turn. Not ideal, but at least Jack Daw moved Jaakuna and succeeded to place a scheme marker to catch Lilitu, Black Blood Shaman and Young Nephilim within 2" for Set the Trap. Jaakuna was then able to move to claim southern strategy marker and concentrate.

Hayreddin had moved close to the building, so that was sabotage all but confirmed there.

Both players scored strategy and Outcasts their second scheme for 2-4 lead.

Turn 4:

Jaakuna Ubume places a scheme marker and charges Young Nephilim. It is left with one or two health remaining and skips its activation because of that.

Jack Daw is able to charge Black Blood Shaman and kill it with two strikes, and is then free to interact a scheme marker over 10" from Jaakuna's scheme. 

Young Nephilim in the middle and Blood Hunter kills Jack Daw by failing at everything. To add insult to injury, the killing blow was dealt by Blood Hunter, the insignificant totem. 

Nekima savagely mauls Montresor and procs his Demise, but doesn't kill. Lady Ligeia tries to blast Blood Hunter and Young Nephilim first with focus, and later again with Montresor's help. But Black Joker, that had been popping up every turn for me foiled one Cursed To Watch action, so she didn't have focus to yell real loud. 

Hayreddin secures Sabotage, and Outcasts no longer had a deny-able scheme marker in the middle, so Neverborn also got Leave Your Mark. Neither player got strategy this round, so scores went even 4-4.

Turn 5:

Outcasts had +3 to their initiative flips from pass tokens, so Lady Ligeia was able to activate first and quickly run to engage Blood Hunter and Young Nephilim.

I started using pass tokens. Nekima procs Montresor's demise once more, and still doesn't kill. 

However, I didn't dare to just empty my tokens because I was afraid that Young Nephilim below might kill Jaakuna Ubume. Hayreddin had ran to northern strategy marker. Young Nephilim and Hayreddin had only been able to secure Sabotage end condition, so I made a gambit to pull Montresor out of melee with Nekima.

Blood Hunter immediately attacked him, dealing a point of damage.

Whatever the case, I needed to wait Young Nephilim's at Jaakuna's activation first so that it wouldn't just come and engage Montresor. 

Well, it did and blocked Montresor's path to the strategy marker and managed to deal one point of damage - now Montresor was at one health remaining, with demise procced twice during game. 

Since Montresor can't ignore severe terrain and he couldn't kill anything (he'd die even if he managed it) so it was game over.

Outcasts got Spread Them Out end condition, Neverborn Sabotage end and strategy for 5-6 win for Neverborn.

Monday, January 23, 2023

5-6-7-7

 A 50ss game of Malifaux.

Strategy: Flank Covert Operations

Schemes: Public Demonstration, Vendetta, Sabotage, Set the Trap, Catch and Release

My list:

Hamelin & 3x Stolen
Benny Wolcomb
Nix
Catalan Brawler
Midnight Stalker
Malifaux Child
Rat Catcher
Catalan Rifleman

Stones: 4
Schemes: Vendetta (Benny on Cassandra), Sabotage (building in enemy deployment zone)

Colette Dubois & 3x Mechanical Doves
Cassandra Felton
Carlos Vasquez
Angelica Durand
Coryphee Duet
2x Showgirl
Mannequin

Stones: 1
Schemes: Sabotage, (middle shack type building) Catch and Release (one of the showgirls)

Turn 1:

I start to build up the rat factory with Rat Catcher, Malifaux Child, Catalan Rifleman and Nix. Benny manages to turn the tokens into rats just fine and walks for a bit - but too much of a bit already. Colette walks close enough to Presto-Chango Benny inside the industrial ramshackle building for some fun and games with Carlos Vasquez.

And Coryphee Duet was the model that was Presto-Changoed to my front line. That just happened too early to ignore the duet, so Catalan Brawler and Hamelin charged the duo. Hamelin also created a Rat King from Benny's rats. 

While Hamelin wasn't much of a performer (hah), Catalan Brawler punched Coryphees right in the face with severe damage while on negatives modifiers. 

Arcanists had their Catch and Releasing Showgirl coming from the left, and top-right they had Angelica Durand, Showgirl and a couple of birds. 

Midnight Stalker leaped on Showgirl, but apparently it stalks exclusively midnights only and failed to do any damage.

Turn 2:

It appears I have forgotten to take picture from second round. 

But for me Rat Catcher went to claim bottom-left marker while for opponent Angelica scored top-right. 

Nix charged Coryphee Duet and nibbled in some damage, although spreading cruel disappointment was the actual reason.

Carlos beats the heck out of Benny, who burns through my stash of soulstones in an attempt to block damage. After all two of my victory points were tied to Benny. Benny spawned only one rat, though, because soulstone managed to block all received damage.

It was rough turn for Coryphee Duet. Swinging at Catalan Brawler was reduced to moderate damage only thanks to Nix, and cage fighter landed a severe back at the duet. Another attack did respectable damage to Rat King, and then the duet split. 

Rat King killed the un-activated Coryphee and Stolen killed the original model. But then there were additional mannequins that needed to be taken care of. Hamelin and Catalan Brawler did just that. 

While it was likely that Coryphees would die this round, it should not have been this easy. I had a lot of luck when it came to damage flips against the Duet. Because of this I was also able to deal with actually recruited Mannequin, too. 

Cassandra and Colette are able to kill Rat King and profilerate Burning all over my crew. 

On top-right, Showgirl disengages and walks towards Arcanist sabotage building. Two Mechanical Doves don't do much to Midnight Stalker, but Midnight Stalker kills both instead, leaps away and plants a scheme marker for sabotage. 

Last remaining Mechanical Dove was killed by Benny after it had charged in to kill a rat. 

What a turn! Eight models killed from Arcanists. Though they still had six left. However, I still didn't dare to feel confident because Benny was in such a horrible position. 

Both players score strategy for 1-1.

Turn 3:

Midnight Stalker goes to place second sabotage marker. 

Carlos and Cassandra set the world ablaze. Arcanist blast marker and two cobblestone bases are pyre markers. There were two Malifaux rats inside the pyre marker close to strategy marker middle-left that had been scurried forth from the wrecked mannequins. I sacrificed a Stolen for two rats more and created one more Rat King after Colette failed to impress one rat with her illusions.

Where Colette did not fail, however, was pulling off a sword trick on Hamelin, so he was kind of off for a turn.

Rat King brought itself into contact with Cassandra in an attempt to slow her down. Angelica ran towards enemy sabotage building, and Showgirl started to spew out scheme markers for sabotage.

I don't quite remember what models softened up Cassandra so that she had only four health remaining. Possibly Nix with bleeding disease and Stolen with vomit. 

Benny survived his ordeal with Carlos, but he had Burning +4 with four or so health remaining. To keep him alive for a bit longer, Hamelin ran with all three action points to get to do some Unclean Influence. Rat King moved out of melee with Cassandra and assisted three points of burning off. This was a mistake, as Cassandra was a claiming model for opponent. Oh well.

Malifaux Child had to run through a pyre marker to get within claiming range of the very same strategy marker Cassandra was now free to claim. 

Scores go 2-3 for Outcasts when both players get strategy and Hamelin gets Sabotage reveal.

Turn 4:

Cassandra breathed fire over both Catalans and killed one of the Stolen. Rifleman was also now at one health remaining and burning +gazillion since he had been sitting in the pyre marker since turn one. Although doing only one action per turn thanks to getting slowed over and over again.

One Stolen walks and charges Angelica Durand but is promptly caned off the board.

Later, Malifaux Child tries to do the same but this time it is caned off the stage via Angelica's defensive trigger. Fortunately it was of no consequence, as opponent claimed bottom-left corner marker.

Colette Presto-Changoes Nix and Carlos and buries Catalan Brawler with sword trick. I don't actually remember what Carlos did. Did he miss all of his attacks? Maybe, maybe not, but at least he succeeded in placing pyre marker over Benny after Rat King had painstakingly removed distracted and burning from him.

Midnight Stalker placed a scheme marker in contact with Outcasts sabotage target, took a run and leaped to top-right strategy marker. Nix went to drop a scheme marker near Benny. Hamelin lured Benny out of the building, moved Rat King out of Benny's way with unclean influence and went within claim range of middle-right strategy marker. 

Benny took Fast from Nix's scheme marker, concentrated and took a focused shot at Cassandra. And I have to cheat damage down not to kill her. Villainy like this is enough for Benny, who starts tip-toeing away from all action. 

Hamelin took middle-right marker and Vendetta, opponent bottom-left and Sabotage for a score of 4-5.

Turn 5:

Angelica Durand moves with nimble, walks and places a scheme to deny me end condition of sabotage. Nix kills Cassandra to enable Vendetta end condition. Benny runs off into wilderness, and Catalan Brawler walks to place a scheme marker within 2" of Benny. 

Colette kind of ruined all my plans, but isn't that kind of her thing? She used Presto-Chango to switch Hamelin into melee with herself and Carlos up there somewhere. Sword trick buries my scheme-marker eating Rat King.

Carlos then somehow manages to score a severe blast damage to Catalan Brawler with fatal consequences to Benny.

Showgirl plants a scheme for arcanist sabotage end condition and goes to contest middle-right strategy marker. Another Showgirl runs to engage Nix and Hamelin. 

Rat King emerged from my scheme and gnawed away Angelica's denial scheme. 

And well, then I guess the term "throw a game" refers to what happens next. 

It looked like a clean 5-7 victory for me so I did a lazy activation with Hamelin. He disengaged, and as I was taking second move I realized Hamelin had Distracted. My plan had been to move twice and lure Malifaux Child closer to enemy strategy marker to remove the marker. 

Well, I was already doing my second move already and I didn't consider luring Malifaux Child critical enough to ask for a slight backtrack and concentrate distracted away. So Hamelin just did a distracted lure and failed to pass target number. 

The reason I thought it didn't matter was because I could always just run the child to engage Showgirl at middle-right marker. Game ended 5-7 for Outcasts.

Except for when I extracted these pictures and started writing this, I realized that since it was fifth turn, we didn't properly resolve the end phase because it seemed like it didn't matter. Sure, often it doesn't but the kid was burning and at one health. So the showgirl could claim middle-right marker after all.

So it was a tough 6-7 in the end.

Yet now that I reached the last picture I also had the realization that Showgirl is engaging Nix. Opponent had told me that he had Catch and Release and that after Hamelin had disengaged it became impossible to fulfill. 

Yet it avoided both of our attention that there she was, engaging Nix even as we're speaking about the very thing.

So in the endest of all ended ends, game was 7-7 draw. 

Only because of things that didn't matter.

Tuesday, January 17, 2023

Doggo knows some tricks

 Had a 35ss game of Malifaux over Vassal.

Strategy: Wedge Corrupted Idols

Schemes: Breakthrough, Assassinate, Claim Jump, Take Prisoner, Dig Their Graves

My list was:

Dr McMourning & Zombie Chihuahua
Sebastian
Corpse Curator
Flesh Construct + Killer Instinct
Guild Autopsy
Little Gasser

Stones: 3
Schemes: Dig Their Graves, Assassinate

Opponent had:

Youko Hamasaki & Chiyo Hamasaki
Bill Algren
Kabuki Warrior
2x Bunraku
Tanuki

 Stones: 1
Schemes: Take Prisoner (Corpse Curator), Breakthrough

Turn 1:

The map was... quite something for Corrupted Idols! First idol came to being from bottom table edge, which was kind of out of my reach as I had deployed in a nicely poisonable little clump in the middle. 

Sebastian did the Sebastian thing and spent 60% of my hand in the first activation. 

Chiyo and Bunraku were moving on top of the map and had two idol spawn location all for themselves when Youko owned a well-riddled Corpse Curator that I had brought on train within killing distance of Bill and Kabuki Warrior and Tanuki. 

McMourning had to activate and give Doctor's Orders for the Curator. Bill tried to challenge it and Kabuki Warrior lured it back into melee with Youko. 

One Bunraku was running to Corrupted Idol below, and remainder of my crew were crawling in forests and train platforms in the middle.

Turn 2:

Idol dropped in the middle.

Corpse Curator activated first and tried to plant a hazardous terrain over Youko, Bill and Tanuki but even with soulstone I had not been able to get a crows into my hand. And yes, it failed to do that naturally.

Kabuki Warrior surprisingly took a walk back and lured Corpse Curator past hazardous razor wire. Smells like prisoner.

I figured I would be able to try to start softening up Youko with Flesh Construct and afterwards heal with Blood Poisoning... but turned out that Bill Algren took the thing down with just two attacks. And even challenged Dr. McMourning when I was low on cards in my hand.

Feeling the need to keep Bill and Youko engaged, McMourning then charged Bill, scored three points in and would have killed Bill if it wasn't for the only soulstone Ten Thunders had available. I suppose Dr. McMourning didn't have proper yellow overalls and a katana. He also gave doctor's orders for Corpse Curator, because I suspected Take Prisoner. 

Bunraku on top came over train carriage platform and lured Corpse Curator next to it, so there was little I could do to stop Take Prisoner now.

Zombie Chihuahua ran next to Youko and unleashed its horrific odor. 

Youko did what you usually do when you're confronted by a mad doctor with bonesaw and an aggressive chihuahua chewing at your feet. She told the dog to play dead with her cutting words, and did the doggo know this trick! Proudly it demonstrated its skills for. All. Eternity. Next she starts asking riddles from Dr. McMourning. I guess along the lines of "Your dog just died but did I kill it?" 

Sebastian walks so so slooooowly on top of train carriage, and Bunraku below throws a Corrupted Idol to my side. Little Gasser charges Bill in hopes of trickling in some damage. Well, it failed, but at least there was now another source of horrific odor.

Chiyo cautiously walks towards my deployment zone, well past the center line. Deployment zones in the image are shown as flank, because the corners tell nicely where to put the strategy marker. Guild Autopsy goes to guard middle-down strategy spawn point.

Scarily enough, points go 0-2 for Ten Thunders and Resurrectionists are already down two models.

Turn 3:

Corrupted Idol enters play middle-down.

Because of number disparity, I really needed to start thinning down the Ten Thunders model count. McMourning managed to kill Bill after transplanting his distractions away to Little Gasser. 

Bunraku on top starts swinging at Corpse Curator and managed to stun it and shove it to the other side of the train. My plan had been to move it to cover Kabuki, Tanuki and Youko with Cursed Sludge. Then Little Gasser would have been able to place a scheme marker in anticipation of Dig Their Graves.

So, instead I secured my first strategy point with Guild Autopsy. 

Kabuki Warrior then comes and kills Little Gasser. I start spending my pass tokens, and Bunraku comes and kills Guild Autopsy. Chiyo runs to my deployment zone, and Sebastian lobs a flask of formaldehyde into the brawl in the middle.

Tanuki tries to heal Youko, and secretly I pray to whatever tyrant that is looking favorably over Dr. McMourning's ordeals - and yes, Tanuki heals only for one point. This meant that poison condition would bring Youko to assassination threshold. Then Tanuki charged McMourning and even did some damage before disengaging.

Scores even out to 2-2.

Turn 4:

Ten Thunders wins initiative, so Youko took a run away from the action. 

Sebastian charged Bunraku below, but caused only one wound in - but with poison. With catalyst, Bunraku would not be able to use risky manouvers to get out and toss my idol away. 

Kabuki Warrior did some impressive damage to Dr. McMourning.

Corpse Curator disengaged and charged Youko, no succeeding and once again I had no crows in my starting hand for hazardous terrain. At least one additional poison was caused.

Tanuki activated next to heal Youko, and doctor was not far away, swinging his bone saw. But Tanuki was able to dodge the attack.

Remaining Bunraku committed suicide by jumping off the train, running through razor wire, doing some risky maneuvers and finally tossing corrupted idol in the middle to my side. 

Scores go 2-4 when opponent gets Corrupted Idols and Breakthrough.

Turn 5:

Resurrectionists win initiative. I was pondering if I should activate Corpse Curator or McMourning first. I picked the wrong one, Corpse Curator. It finally places its first sludge marker during game, woohoo! Then it places scheme marker and tries to attack Youko. Looking back at the picture now at the time of writing I realize what I should have done instead - instead of useless attack at Serene Countenance model, it should have taken a little walk to block off Youko's escape. 

Now, she just ran away full speed nonstop. 

Sebastian tossed an Idol to Ten Thunders side and walked for a bit to deny Kabuki Warrior from running to deny him. Instead, Kabuki Warrior ran to engage Corpse Curator. 

McMourning disengages and of course that ABOMINABLE FREAKING FURRY COSPLAY UGLY HAT MONSTER shaves off two inches off of Dr. McMourning's movement. That was exactly enough to make it really difficult to get within clear 8" of Youko for a Focused Blood Poisoning.

Instead I resorted to moving away from Kabuki Warrior with Doctor's Orders and trying to transfer seven poison to her for a grand total of twelve, but it was not to be. 

Game ends 3-5 when opponent gets a point from Take Prisoner, and I get the strategy point.

All in all, I think Youko teaches an important lesson here. Remember kids, if you encounter a manic looking twitchy doctor in dark alley who wants to give you a new transplants free of charge, run. Each step is crucial. At most you'll have time for some backroom dealings along the way.

Monday, January 16, 2023

Just Walk It Off

 Had a 50 point game of Warmachine Mk4.


My list:

Goreshade the Bastad & Deathwalker
-Corruptor
-Reaper
-Slayer
Bane Warriors & Command attachment
Bane Lord Tartarus
Necrotech

Opponent had:

Wurmwood & Cassius the Oathkeeper
-Feral Warpwolf
-Gnarlhorn Satyr
-Wild Argus
2x Tharn Bloodweaver units
Lord of the Feast
2x Gallows Grove


Scenario was rectangular zone with two objectives and two flags for a compact 50pts game.

Circle started and had warbeasts in the center of their formation, flanks protected by Bloodweaver units. Wurmwood was hanging around behind the buildings.

Bane Warriors and Tartarus seized my flag, and warjacks went into trench on the right. Goreshade crept slowly with Lamentation and Shadowmancer on.

Tharn Bloodweavers charged Bane Warriors, and this is when I learned about their Burster attacks. What an insane ability on infantry models. Fortunately only five Bane Warriors died to two successful Bloodweaver attacks...

One Bloodweaver unit took the enemy flag on the right, and warbeasts positioned themselves to protect enemy objective. Wurmwood grew a feated forest. 

The forest LoS penalty messed up my turn big time. I just was not able to get LoS to anything of importance. Corruptor tried to shoot into concealment and melee to have an arc node, but Def 20 is a bit of a challenge for RAT 5 model. 

Tartarus was able to bring back only one Bane Warrior because Tharn Bloodweaver passed tough check. Bane Officer brought the minimum of two. Atrocious attack rolls ensured that I was not able to score point this turn, but Slayer ran to contest enemy flag so opponent wouldn't score either.

Goreshade used feat and tried to remove my flag contesting Bloodweavers and tie up enemy warbeasts.

I had brought Goreshade to a relatively vulnerable position. Opponent was able to clear a lane for Primaled Gnarlhorn to slam Corruptor over Goreshade and dealt massive collateral damage - seven points in even after reducing the damage with one of Goreshade's four focus points. At least the remainder of attacks weren't so successful.

But then Primaled Warpwolf took a trample next to knocked down Goreshade who had only two focus points left by now. First damage roll against Cryxian warcaster was only moderate at best, so Deathwalker had what it takes to have Goreshade survive.

I had one unengaged Bane Warrior with LoS to Wurmwood and the Unstoppable command card. Bane axes started chopping the tree, and thanks to multiple terrible damage rolls it was the very last Bane Warrior that able to score the killing blow.

Sunday, January 8, 2023

Phantasmal Faded Timeworn Sidir

 A 50ss game of Malifaux on Vassal.

Strategy: Corner Carve a Path

Schemes: Load 'Em Up, Public Demonstration, Vendetta, In Your Face, Secret Meetup

My list:

Molly Squidpiddge & Necrotic Machine
Noxious Nephilim
Archie
The Forgotten Marshal with The Whisper
Bone Pile
3x Crooligan

Pool: 5
Schemes: Public Demonstration (Crooligans & Bone Pile), Vendetta (Bone Pile on Tannenbaum)

Opponent had:

Explorer's Society
Lucas McCabe Relic Hunter &  Luna
Sidir Alchibal
Jessie Halliday
Tannenbaum
Rough Rider
Cryptologist
Hopeful Prospect
Ruffian

Pool: 4
Schemes: Vendetta, In Your Face

Turn 1:

First round Noxious Nephilim walked to right from my top corner and kicked strategy. Crooligan was hiding behind top hill waiting for Nephilim to pass the ball. 

Archie was somewhere in the middle, ready to go where required.

And everything else was going down, left from the train. One Crooligan in the middle was taking some random fire from Explorer Society, but that didn't amount to much. A Night Terror had been summoned to the gathering, too. Fortunately Jessie and McCabe had blocked Sidir's 40mm base to get to perfect shooting positions.

Ruffian and Rough Rider were taking a strategy marker top, where Crooligan and Nephilim were going. Cryptologist and Hopeful Prosepct hanged about middle, and the remaining Explorers were coming at my Molly's throng.

Turn 2:

Resurrectionists win initiative, and Archie launches itself at Rough Rider and Ruffian. Two attacks, however, were not enough to remove either model. In fact, no damage was done at all at least to health. Opponent did at least burn multiple severes from his hand.

First turn Sidir had been given Timeworn Blade, and now it was time for Phantasmal Mask. I guess I was fortunate that he only killed summoned Night Terror. After his activation Sidir was back to eight health despite getting a severes and whatnot from Forgotten Marshal.

Who summoned Rabble Riser, by the way.

After Sidir activated Crooligan came to steal one soulstone. Then, Bone Pile healed Rabble Riser with bonus, walked and removed Night Terror's corpse for heals and then it charged Lucas McCabe. I thought it would be better in safety there than sitting at Df 4 against a stat 6 model who ignores Hard-to-Wound. But  still within 3" of Sidir for Public Demonstration. 

Rough Rider and Ruffian did their thing with strategy marker on top, and even brought Archie down to six health remaining. Noxious Nephilim and Crooligan did the same for my strategy marker. 

Below, Jessie was guarding Explorer's strategy marker. Crooligan, however, pushed my strategy marker past center line, just behind Bone Pile.

Both players scored strategym while Resurrectionists had their demonstration for 2-1 lead.

Turn 3:

Necrotic Machine activates and plants poison to Sidir. Opponent started to play the long game with Luna digging up treasures, so Crooligan in melee with Sidir teleports to Archie and kicks strategy marker even deeper. 

Lucas tosses Faded Mirror for Sidir and tries to kill Bone Pile. 

Molly activates for some fresh cards, and uses bonus to get Necrotic Machine away from melee and engage Sidir with some Rabble. She also manages to land Slow on the scary henchman. Sidir butchers unactivated Rabble Riser and again heals back to almost full.

Archie finally smooshes Rough Rider and heals a bit in the process. The heal is negated by Ruffian's gang weapons, however. Ruffian also kicked the strategy marker further to my side, but Crooligan re-located it towards top-right corner. 

Hopeful Prospect shoots a kid dead and cheers himself for a job well done.

Forgotten Marshal deals four points of damage to Tannenbaum, so Bone Pile is able to disengage and shoot Tannenbaum for Vendetta. Crooligan and Jessie kick strategy markers around while Cryptologist takes a run towards my strategy marker that's coming from the top.

Both players get strategy and Resurrectionists score Vendetta for 4-2.

Turn 4:

We didn't continue as opponent had wrong schemes for the situation - In Your Face was next to impossible. I don't know what scheme opponent originally had, but he changed it to Vendetta with Tannenbaum, which might be doable since Archie was at six health. 

It was very unlikely for opponent to get any more strategy points, while I at least had a chance for one more. Opponent could have denied my Vendetta by killing Bone Pile, although if it would have had time to activate, it would have buried itself.