Showing posts with label asami. Show all posts

Tuesday, September 20, 2022

Loyal Hats with No Rats

A 50ss game of Malifaux.

Strategy:  Flank Carve a Path

Schemes: Breakthrough, Leave Your Mark, Sabotage, Public Demonstration, In Your Face

My list:

Hamelin & Stolen
Nix
Benny Wolcomb
Disease Containment Unit
Obedient Wretch
Rat Catcher
Catalan Rifleman
2x Malifaux Rat

Stones: 7

Schemes: Leave Your Mark, Public Demonstration (Wretch, Catcher, Rifleman)

Opponent had:

Asami & Amanjaku
Ama No Zako
Shadow Emissary
Wanyudo
Obsidian Oni
Yokai
Katashiro

Stones: 5

Schemes: Leave Your Mark, Breakthrough

Turn 1:

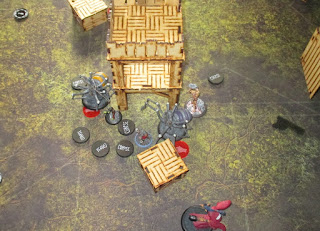
First round Ten Thunders came in aggressively kicking the path carvers - so much so that both were on my table side at the end of turn. 

This was bad news for the plague models that were figuring out scheme markers for Benny. In the end I messed up my plans and activation orders and got only two rats of of my scheme markers. I also didn't have time for crew rats to concentrate before forming Rat King because there was a threat of Wanyudo shooting rats.

As is customary for me, I had made a huge bottleneck of my models in the middle. I was also worrying a bit of Asami summoning Obsidian Oni, so to do at least something productive Hamelin walked to kick one strategy marker which Nix continued to push forward. 

At the end of turn one my positioning was terrible. Nix was far away from anything to offer his sweet auras, Catalan Rifleman was in the frontline and Stolen were on the other side of continent from Hamelin.

That Rat King better be worth it.

Turn 2:

Wanyudo charges in to further bottleneck my crew, blocking the easy advance of Benny, Rat Catcher and Rat King as well as dropping a Pyre marker. Consequences could have been disastrous but fortunately I was able to remove the wheel from the board.

Disease Containment Unit and Obedient Wretch were not enough of a resistance against Shadow Emissary and Katashiro, but at least there were no casualties other than Ten Thunders getting both of their strategy markers like 2" away from being on my deployment zone.

Catalan Rifleman went to place a scheme marker in the middle for Leave Your Mark, but Asami came to bully him by eating his scheme marker and then placing her own. She also summoned two Tengus whose dark bargains were put to good use.

Ama No Zako came to play football with my strategy marker that Hamelin and Nix had been pushing around. This forced Hamelin to get away from the central action (and Stolen, by the way) to score me strategy for this round.

Scores go 1-2 for Ten Thunders when opponent reveals Leave Your Mark of his own.

Turn 3:

Unfortunately I have missed taking a picture of turn three so details might be off. 

But what I do remember is that I got Nix and his Loose Bowels aura to a nasty position even after messing up his placement last round. This could have been super impactful, but Asami's hair couldn't bear the stench and pushed the dog some 12" away from everything and summoned more Tengus. 

Already weakened Obsidian Oni places scorches the earth around it so that Rat King, Rat Catcher, Benny and a couple of Malifaux Rats would be having painful activations if I wasn't able to destroy the Oni.

I don't remember what actually killed Obsidian Oni, but at least Catalan Rifleman was shooting it, bringing it down to one health remaining. That isn't so impressive as it only had two health remaining at that point. It was either Benny or vomiting Stolen.

Ama No Zako and Hamelin quarrel the entire round, which in itself was bad trade for Hamelin.

Rat King nibbled Asami away one tiny bite at a time, and both Obedient Wretch and Rat Catcher parked themselves in near vicinity of enemy master for Public Demonstration.

Disease Containment Unit and dragon were duking it out, and while the unit proved itself resilient, it didn't matter much when there was a Yokai jumping around trashing the place and bringing enemy strategy markers to my deployment zone.

A super accurate vomit made by one of the Stolen denies Ten Thunders what looked like trying to score Breakthrough.

But since Ama No Zako had tied up Hamelin and dragon made my other flank kind of busy, outcasts scored only Public Demonstration this round, while Ten Thunders easily got strategy, getting scores to 2-3.

Turn 4:

Fourth turn there is a plague onslaught.

Tengus start disappearing. Ama No Zako dies. Katashiro dies (or maybe that was last round?) Amanjaku dies. Even Asami dies. So it's easy game for Hamelin now, right? Right?

Well, at least scoring last point from Public Demonstration was now impossible, and I had already missed one strategy point.

Outcasts still can't get access to the important bits to limit opponent's points. Nothing I can do to enemy strategy markers, but at least finally both of my strategy markers are on the opponent's table side. Scheme marker in middle also secures me Leave Your Mark.

Outcasts get strategy and Leave Your Mark, getting to 4 points. But this doesn't even the score when Ten Thunders also get strategy and reveal Breakthrough.

4-5 it is.

Turn 5:

Nix gets one strategy marker to Ten Thunders deployment, and planting scheme markers near center point isn't problematic.

Yokai spams scheme markers to my deployment zone before disappearing. Tengu tries to give Slow to Obedient Wretch but fails to do so.

This made it possible for Wretch to walk to remove one scheme marker.

So it was a tough game, and illustrates one thing I particularly enjoy in Malifaux: last round opponent has one model remaining while I have more models on board than at the start of game. But that tells nothing of how the game was played or who won.


Saturday, July 9, 2022

Remember Dismember


A 50ss game of Malifaux.

Strategy: Flank Symbols of Authority

Scheme pool: Breakthrough, Vendetta, Claim Jump, Hidden Martyrs, Let Them Bleed

My list:

Dr. McMourning & Zombie Chihuahua Mortimer (Vendetta on Samurai) Rogue Necromancy Rafkin (Martyr) Kentauroi 3x Canine Remains (one of them martyr)

Stones: 7

Schemes: Vendetta, Hidden Martyrs

Opponent had:

Asami Tanaka & Amanjaku Ama No Zako Fuhatsu (Martyr) Jorogumo (Claim Jump) Samurai Tengu (Martyr) Akaname

Stones: 6

Schemes: Claim Jump, Hidden Martyrs


Turn 1:

When deploying, I kind of noticed how most of my models were tied to each other somehow. All perverse metabolists obviously wanted to be near Rafkin except perhaps for the Canine Remains, but they on the other hand were required to move corpse tokens around. So, I had one giant blob of Resurrectionists on a strategy where objectives were spread near and far.

In addition, the start was real slow for my crew. First, Rafkin had to activate and spam Poison around.

Next Mortimer activated and did a corpse, and I erroneously beat Rogue Necromancy with dismember, which is enemy only trigger. I blame amputation trigger for this, which is fairly similar but works on friendlies too. After these two activations I had used over half of my deck, and had two cards in hand remaining. Must be some kind of a record here.

Asami had summoned an Obsidian Oni, and I was all too familiar with what they could do to a tight formation. Thus, I took care of it with

Kentauroi and Rogue Necromancy, the latter of which got a lucky Pouncing Strike and went to engage Jorogumo and Asami.

But, as Mortimer had already beaten up Rogue Necromancy, and there was an Oni explosion and even a dark bargained attack against my 10-point beater, I was suddenly looking at two of my 50mm based models in middle of board nearing death, with Rogue Necromancy at one health.

My plan of getting Dr. McMourning in some relevant place and summoning a Flesh Construct there would just work even if it had been legal. Fortunately this mistake at least had McMourning entirely waste two of his action points in moving forth, then healing Rogue Necromancy with blood poisoning, moving back to summon a Flesh Construct, which also failed to accomplish anything.

Kentauroi was blasted away by either Samurai or Fuhatsu, which was unfortunate as the mobility of my list just went down a few notches too many. I had considered keeping McMourning as a sort of cruise missile to anywhere needed, and Ride With Me would've been a necessity for that.

Canine Remains tried to keep their heads low from enemy shooting, except for the hidden martyr that was reasonably visible to perhaps eat away an enemy activation while giving me a point.

Turn 2:

Since Ten Thunders won initiative, I lost Rogue Necromancy without a fight.

Amanjaku had blocked the strategy marker I had been aiming to get this turn. Flesh Construct tried to take care of that, but failed while a Canine Remains succeeded. But then Asami just summoned a Jorogumo to block that place, like, forever, for at least this turn.

The Jorogumo kills the wrong puppy for me.

Zombie Chihuahua had tried to go and hopefully delay enemy models from scoring strategies. That didn't work out when Ama No Zako killed it with one strike, walked and took a strategy marker anyway.

Rafkin doesn't do anything useful, and while Dr. McMourning did summon additional Flesh Construct, it took once more two action points to even get into position. That Flesh Construct was of exceptional quality, however, when it took down what was left of Jorogumo in the middle with one strike, charged Akaname and killed that too. Little did I know it back then, but Jorogumo had been the Claim Jumper.

Scores go 1-0 for Ten Thunders.

Turn 3:

Samurai charges my hidden martyr dog and kills it. Then I spend quite a few activations in grinding through Samurai's ungodly Armor +2, and get within threshold for Mortimer to get his vendetta. Which he did.

Dr. McMourning took a strategy marker and charged into melee with both Asami and Fuhatsu. This didn't work as planned when Fuhatsu managed to stun Dr. McMourning and push him away from catalyst range.

Flesh Construct tried to attack Asami, and she did get to around two health remaining. Then she just left the melee, ate three markers to heal for six and walked to middle. ThereAsami summoned... was it Akaname? And Tengu to engage Rafkin and last remaining Remains. Canine Remains surprised everyone when it took Akaname down with just one critical striking bite. Tengu flew away from the scene, and Rafkin was free to try to come and kill Samurai, failing at that.

So I had Mortimer and Rafkin almost in base contact with each other and Samurai there with like two hit points or so. Two strategy markers too in the close vicinity of the melee.

Ama No Zako took a strategy marker, and scores went 2-3 for Resurrectionists.

Turn 4:

I think it was Resurrectionists that won the initiative, because taking down Samurai succeeded without that much of a hassle.

Dr. McMourning chooses to take strategy marker instead of contributing to fight. Being stunned ain't nice with such a damage track that relies on critical strike to deal with the likes of Fuhatsu.

Ama No Zako and summoned Tengu go and take third strategy marker. Asami summons a Jorogumo that kills Rafkin.

Flesh Construct finishes Asami and comes to engage the summoned Jorogumo.

Turn 5:

Last turn Dr. McMourning went and scored third Symbol, and remainder of my resources went into keeping Mortimer alive.

One of the Jorogumos also failed to kill a Mindless Zombie that was summoned last turn with one strike, so it couldn't lend its spear to damaging Mortimer.

Fate was on my side this time, when I ran Flesh Construct to engage Ama No Zako. Fuhatsu then shot the Construct, who flipped black joker. This was second time when I black jokered an action that opponent wanted to fail. Second try worked better, and Ama No Zako was free to remove my Vendetta model. But it was not to be.

Tengu took last strategy marker from my side, and scores went 4-6 for Resurrectionists.

Saturday, February 5, 2022

Assassination Doubles

A 50ss game of Malifaux.

Strategy: Break the Line with Standard Deployment.
Scheme pool: Assassinate, Outflank, Claim Jump, Research Mission, Breakthrough

 My list:

Hamelin the Piper & 3x Stolen
Benny Wolcomb
Nix
Mad Dog Brackett
Midnight Stalker
Rat Catcher
Prospector
Malifaux Rat

Pool: 1
Schemes: Outflank, Research Mission

Opponent Had:

Asami Tanaka & Amanjaku
Ama No Zako
Fuhatsu
Samurai
Charm Warder (Claim jumper)
Obsidian Oni

Pool: 7
Schemes: Outflank, Claim Jump

Turn 1:

I placed my scheme duo of Midnight Stalker and Mad Dog Brackett far-left to do a strategy, score Research Mission and half of Outflank. They were directly opposed only by Amanjaku, so I had already secured billions of victory points by then. Or so it felt at the time. Then Amanjaku randomly tore half of Mad Dog's health away with just one strike. Bothersome, yes, but it still was only a pesky little insignificant totem. Or so it felt at the time.

Continuing from left to right I had Hamelin hiding behind the forest with kids a little further back. Hamelin didn't do much else than get a summoned Obsidian Oni Stunned. Behind the forest there was Fuhatsu, and and a little closer to middle Obsidian Oni and Asami.

Past midpoint after Hamelin I had a blob of Prospector, Rat Catcher, Benny Wolcomb and a turn 1 created Rat King engaged by the aforementioned Obsidian Oni. Ama No Zako and, less surprisingly, Charm Warder were nearing on them.

Next to this rat machine was Nix, and Samurai was guarding over the rightmost table edge.


Turn 2:

Midnight Stalker moves strategy marker, leaps along with it and interacts a scheme marker.

Amanjaku doesn't do anything useful, but neither is Mad Dog able to remove it from board with just a cigar. But at least he gets the third required marker for Midnight Stalker.

Ama No Zako comes to beat the Piper, and Obsidian Oni has set the ground on fire near the middle, and has placed itself next to strategy marker in the Hamelin's forest. 

Hamelin Obeys the Obsidian Oni back to middle of the board within 4" of unactivated Asami, Charm Warder and Fuhatsu. Then he uses Piper's Influence to stun Fuhatsu in an attempt to minimize possible damage on Midnight Stalker.

Plan was cute, but Fuhatsu just shoots the vampire wannabe dead despite not hitting with every attack. 

Asami pushes Obsidian Oni back to strategy marker and summons a Tengu. 

The turn 1 summoned Obsidian Oni delays Rat Catcher, Rat King and Benny to a troublesome degree - Rat Catcher disengages and interacts a scheme nearby. My plan was to wait until Oni explodes to gnaw Rat King to scheme marker and toss one of the strategy markers. Had I succeeded this earlier, I could have seized the control of playing football with the marker, Charm Warder needing to throw it back to middle line. Had I succeeded later, Rat King could have started throwing the marker back at middle line. But as it turned out, I didn't succeed at all. Obsidian Oni didn't die until the very last action point of Rat King, thus leaving the strategy marker on my side.

Nix tossed rightmost strategy marker to Ten Thunders side while Samurai shot the dog with everything it got. Prospector was nearing right-side Outflank area.

Neither player reveals schemes, but both score strategy.


Turn 3:

Nix charges Samurai and looses bowels to keep that strategy marker on enemy side. 

Charm Warder manages to draw LoS to Nix and blasts it with four damage from chaos theory action thing. This leaves Nix with just one health remaining. Prospector had come to interact a scheme marker for Outflank, but suddenly felt rather vulnerable when Samurai kicked the rotting ghost puppy dead.

Benny Wolcomb charges Charm Warder, not doing much, but at least opening way for this gnaw-walk-interact shenanigan for Rat King. Although now I wonder if the summon token from Benny's rats would have been inherited by the Rat King after it had been tangled together by the one Malifaux Rat I had bought with soulstones? (answer: yes, they would)

Ama No Zako and Obsidian Oni go full-ape on Hamelin, actually removing not one but two of his Stolen. Such power came with a cost: by now Asami had fallen to three health remaining. 

While Hamelin was still alive, he activated and Obeyed Fuhatsu to shoot Asami. She didn't quite die thanks to soulstones - she was left with one health remaining. Next Hamelin Obeys Rat King, who deals the killing blow. What a shame I had not picked Assassinate. 

However... a lot of my game winning potential was resting on the shoulders of Mad Dog Brackett. And now the blue guy right in front of him received a level up. Soon enough Mad Dog Brackett is sitting with just one health box.

At least Fuhatsu botches his activation, and there is enough of Mad Dog left to disengage and run next to scheme marker, blow-it-to-hell marker, strategy marker and Midnight Stalker's corpse marker.

Tengu takes a double walk and dark bargain to remove my scheme marker, so at least Midnight Stalker had done something useful by dying so embarrassingly - I still had three different types of markers within 4" of Mad Dog Brackett for Research Mission.

Outcasts get Research Mission and Strategy, while Ten Thunders receive no points. Scores go 3-1 for Outcasts.


Turn 4:

While I do my best to damage Charm Warder, it seems impervious to any damage. The Warder, though... With a single of Chaos Theory, the last remaining Stolen and Benny dies, and Rat King is dispatched by melee attack. And the thing also has enough action points to Concentrate on top of that.

Hamelin was at four health points, and after Obsidian Oni had activated he was still going strong at one or two points. But the thing is... Obsidian Oni had counted on killing Outcast master to remove its third flicker token. And as this kind of didn't happen, there may have been a sort of an explosion there. 

Somehow ironic that neither of us had picked Assassinate as their scheme.

My rats were annoying the heck out of opponent by tying up Ama No Zako and Amanjaku, but I suppose those health 2, defense 3, willpower 2 models can only go so far as meatshields. Amanjaku was able to charge Mad Dog Brackett, who had skulked towards Outflank area on left. Fortunately the attack missed.

Samurai fails spectacularly against Prospector. 

Eventhough I had received a crippling blow this turn, I still had plenty of points ahead of Ten Thunders. At least until they revealed Claim Jump on a model I couldn't realistically get to.

But still game was 3-2 in my favor!


Turn 5


Well... still it was me struggling for a draw.

Amanjaku wasn't in base contact with Brackett, and in such a scenario you won't make miracles with a cigar butt against essentially a 10-12 health model. Outflank was out of question.

Only way to get a draw seemed to be to disengage with a single Malifaux Rat from Ama No Zako so that the oni henchman doesn't flip higher than Weak for movement reduction and charge Charm Warder, flipping Red Joker for damage.

Guess what?

That just didn't happen.

Game ended 4-3 for Ten Thunders.


Monday, December 6, 2021

Fine Art of Deployment

 Had a 50ss game of Malifaux. Here I have almost no pictures since my earlier camera broke and I needed to use manual settings on an unfamiliar SLR camera. I really do hope that new micro-SD memory card fixes the previous camera... because...


Anyway, the game.

Strategy: Break the Line with Wedge deployment

Schemes: Assassinate, Claim Jump, Outflank, Breakthrough, Vendetta

My list:

Molly & Necrotic Machine
Philip & Nanny
Forgotten Marshal with The Whisper
Hanged with Grave Spirit Touch
2x Crooligans
Night Terror
Rabble Riser

Pool:3
Schemes: Outflank, Breakthrough

Opponent:

Asami & Amanjaku
Ama No Zako
Fuhatsu
Lone Swordsman
Samurai with Trained Ninja (Claim Jump)
Akaname

Pool: 8
Schemes: Assassinate, Claim Jump

Turn 1:

As a fun fact, we had to flip for initiative four times because of even results. 

I was the defending player, so I placed my strategy markers on the furthest points of the middle line, right next to table edge. Along with Crooligans. Another two markers were in the middle where you'd expect.

Well then... there was this Obsidian grenade launcher called Asami on the other side of the Wedge deployment zone. With essentially three gatling gun attacks. 

So maybe I'll deploy as a hugeish blob in the middle of the board? What could possibly go wrong?

Looking back, I should have scrapped the idea of contesting middle of the board completely, and focused on the edges. But that's not what I did, and as a result Rabble Riser was at two health remaining, on fire. Philip and the Nanny at half hit points remaining, on fire. Night Terror and Molly, a couple of points in and Night Terror on fire, plus no soul stones remaining. Not to mention needing to waste three actions points to remove the Obsidian Oni before it activated.

Lone Swordsman was nearing my Crooligan on the left. Ama No Zako used double-walk and Dark Bargained itself to make an interact on a strategy marker on middle-right. Necrotic Machine ran towards marker on middle-left, because apparently there were no viable targets for Emergency Syrette and its heal...

Well, at least Molly had given Rabble Riser another activation, who charged Fuhatsu and Hanged managed to land its upgrade on Fuhatsu.

Turn 2:

Lone Swordsman butchers Crooligan with just one action point, and thus manages to lob strategy marker on the left towards my side of the board.

I jump at my chance to possibly kill Fuhatsu - Hanged places its anti-healing aura on, and lands a moderate wound to the henchman despite being on a negative damage flip. Fuhatsu is at three wounds now and unable to reliably heal!

Well, except that then the gunner hit Hanged with Daze trigger, and uses Scatter to place the aura well beyond 4" range. Fuhatsu is at five!

Rabble Riser (now at one health and burning) charged Fuhatsu and after attacking three times. After all the stones and whatnot, Fuhatsu is at three!

Molly then does a double walk and kills the henchman by telling him a real disturbing story.

All good, although Molly was now in the middle of board.

At least Ama No Zako had been busy with killing another Rabble Riser that Forgotten Marshal had summoned earlier, and Night Terror. 

Asami used her hair strike on Philip and Nanny, pulling them away from a strategy marker they were hugging. Then a gigantic arachnotaur appeared behind Molly and in-between the aforementioned strategy marker. 

Thus robbed of their meaningful target, Philip and Nanny charges Asami that had no Protected targets nearby. After all I had Red Joker in my hand, and while I had an inkling that I should have saved the card for something else, at least Asami was at five wounds remaining after Pram Ram.

Jorogumo then removes Philip & Nanny from the equation.

Both players score strategy, and Ten Thunders reveal Assassinate. Scores are 2-1 for Ten Thunders.

Turn 3:

Because I'm kind of worried Molly might soon kick the bucket, she has one last chance to start asking questions from Asami. Irreducible damage would have been nice, but opponent was at full hand. Asami gets to one health remaining from Molly's unending stream of questions, which incidentally was the same amount of health Molly had.

I still had one chance to kill Asami, and that was using By Your Side on Crooligan and delivering the killing blow. It was the heat of the moment that told me Asami would die to minimum damage. Yeah, sure, but that didn't count for soulstones...

Because of that miss-step I lost my chance to get a point off from Outflank this turn. 

Forgotten Marshal and Hanged were busy delivering strategy marker deeper into enemy lines, and because of that Resurrectionists scored their second point from strategy. Ten Thunders did, too, and revealed Claim Jump on Samurai.

Turn 4:

Starts with three models on my side, with Resurrectionists two points behind and opponent 100% scoring two end conditions, and 90% scoring full strategies. No point to continue. Victory for Ten Thunders.

I think it would have been a tough game for Molly even if I hadn't screwed up deployment so bad. My lack of hitting power didn't mesh well with an assortment of Armor +1-2, hard-to-would and hard-to-kill models.

In this particular game Grave Spirit Touch on Hanged was just dead weight - Fuhatsu didn't care about the Terrifying, and the thing didn't actually need regeneration either.

The Whisper on Forgotten Marshal was kind of dead weight too, but that was just because of pure chance - not once there was a high enough Crows coming up to do summoning.

Monday, October 25, 2021

Martyrs, martyrs everywhere

 A 50 soul stone game of Malifaux.

Turf War with Flank deployment. Scheme pool: Vendetta, Claim Jump, Hidden Martyrs, Let Them Bleed, Research Mission

My list was:

Seamus & Copycat Killer
Madame Sybelle
Grave Golem
Dead Doxy (Vendetta on Obsidian Oni)
Mourner with Grave Spirit Touch (Martyr)
Rotten Belle (Martyr)
Gravedigger

Pool: 6
Schemes: Hidden Martyrs, Vendetta

Opponent had:

Asami Tanaka & Amanjaku
Ama No Zako
Shadow Emissary
2x Yokai (Hidden martyrs)
Obsidian Oni
Akaname (Claim Jump)

Pool: 7
Schemes: Hidden Martyrs, Claim Jump

Turn 1:

Ten Thunders brought their both scary models on high vantage points. Obsidian Oni and Yokai near the middle, and one additional Obsidian Oni is summoned by Asami as a hand grenade. It sets up Dead Doxy, Grave Golem and Mourner on fire. Akaname interacts with closest marker to Ten Thunders. The second Yokai speeds up to charge Rotten Belle that had arrived in base contact with strategy marker on the bottom left. Amanjaku follows Yokai around. 

Gravedigger and Mourner both do Blasphemous Rituals, and hand out focus +2 to both Grave Golem and Madame Sybelle. Resurrectionists had made a nice little blob of three models in the middle. Grave Golem tried to look menacing and distract-ey, while Dead Doxy was aiming to get a strike at her vendetta target.

Gravedigger interacted with my closest strategy marker. Copycat Killer and Seamus do their movement shenanigans and interact with top-right strategy marker. Then Seamus thought it would be a good idea to draw the attention of Shadow Emissary by taking a random weak damage shot at it.

Turn 2:

Resurrectionists gain initiative, and first to activate is Madame Sybelle who goes to take a swing at Obsidian Oni. I had overestimated their durability, and she hit the thing for five points of damage in. That meant Dead Doxy might ruin my Vendetta with a moderate damage as Obsidian Oni had two health remaining. This was especially worrisome, as my lowest card in hand was 6. However, Doxy scores only weak damage and scores Vendetta.

Loud bang of the flintlock had indeed aroused the ire of Shadow Emissary. When the mauling ceased, Seamus was at around half of his health remaining, plus me having three stones less. Time to escape! Copycat Killer took a random shot at Yokai that did some damage in. Then he switched places with Seamus. 

And that's when Ama No Zako charged to my master. Great. What's even better - after the Ten Thunders henchman had activated, I had zero soul stones left and Seamus was down to one wound remaining. And that was only because Hard-to-Kill.

Seamus Terrorizes Ama No Zako away from him and heals a bit. Then he takes a shot at Yokai engaging Rotten Belle, killing the oni. 

Obsidian Oni takes a swing at at Dead Doxy and she dies. But it's notthe exotic axe/maul/mace-thingy that had hit her, oh no. It was the horrible stench caused by Akaname. Doxy was at two health remaining, burning, and then poisoned.

Asami summons Katashiro, which flaps furiously at Madame Sybelle.

Grave Golem interacts with marker in middle and tries to attack Yokai. Rotten Belle interacts with marker on bottom-left.

Then it's end of turn. Both players score strategy, and opponent reveals Hidden Martyrs on Yokai. I had done my Vendetta earlier, so scores go 2-2.

Turn 3:

Ten Thunders win the initiative. It's beyond me why opponent picked Ama No Zako to activate first. I mean... there was this 12" teleporting, four action point, Def 4 master two weak hits from being dead, and Ama No Zako had essentially 3 action points and stat 6 melee attack. It's beyond me.

Yeah. I lost my master turn 3 before he got to activate.

At least Shadow Emissary fails to kill Copycat Killer thanks to an untimely Black Joker.

Grave Golem kills the remaining Hidden Martyr Yokai.

Madame Sybelle removes the vendetta Obsidian Oni and Katashiro. Then Akaname, and a summoned Jorogume pile in on the undead lady in leather. Akaname would have only needed to land one weak damage on Sybelle for her to die to its stench, but in the end Sybelle was left alive with three health, burning and poisoned.

Mourner takes a couple lucky Feed on Griefs on Akaname, killing it.

Rotten Belle interacts with strategy marker on the bottom-left and charges Ama No Zako, failing right at the Terrifying check.

Resurrectionists score strategy, taking the lead at 3-2.

However, opponent concedes. After all, Ten Thunders had lost all key models for schemes and was behind in points, and likely to kill Rotten Belle.

Thursday, May 6, 2021

Baits and Switches

 Had a live game of Malifaux for a change.

Fifty soulstones, Flank deployment Break the Line with scheme pool: Detonate Charges, Hidden Martyrs, Let them bleed, Research Mission, Bait and Switch

My list was:

Dr. McMourning & Zombie Chihuahua
Sebastian
Rogue Necromancy (proxied with Snowstorm, because it's hard to check relevant mini containers when packing models)
Flesh Construct (Martyr)
Guild Autopsy (Martyr)
2x Kentauroi

Pool: 4

Schemes: Bait & Switch (Ama No Zako), Hidden Martyrs

Opponent had:

Asami & Amanjaku
Ama No Zako
Shadow Emissary
Wanyudo
Obsidian Oni
Tengu (Martyr)
Yokai (Martyr)

Pool: 6

Schemes: Bait & Switch (Rogue Necromancy), Hidden Martyrs

Turn 1: 

Both players go and interact with the outermost strategy markers; Ten Thunders with Ama No Zako and Resurrectionists with a Kentauroi who rode with Guild Autopsy. In the middle we have Shadow Emissary, Obsidian Oni and Asami versus Flesh Construct, Kentauroi, Rogue Necromancy and Dr. McMourning. 

Turn 2: 

Shadow Emissary charges Flesh Construct and brings it down to two hit points remaining. The construct, along with Rogue Necromancy and McMourning kill the dragon - thanks to me having Red Joker in my hand to cheat for damage. 

Ama No Zako finishes Flesh Construct, which would bring in a point for me. But little did I guess that when a Kentauroi in the middle charged and killed Tengu, I returned the favor for Ten Thunders. 

Before McMourning went to deal with Shadow Emissary, he interacted a scheme marker next to Ama No Zako.

Wanyudo and Sebastian were playing sort of a ball game with strategy markers.

Both players score strategy, both players reveal Hidden Martyrs and Resurrectionists reveal Bait and Switch for a total of 2-3 points.

Turn 3:

Wanyudo was started driving towards Guild Autopsy, but failed to kill my martyr. Same happened with Rogue Necromancy and Yokai, although Rogue Necromancy dealt some three points in. 

But then that blasted monkey started doing its thing again. It charged past Rogue Necromancy and Sebastian to interact with a strategy marker, and then leaped behind Obsidian Oni's back. 

Doctor's Orders brought McMourning within charge range of the martyr Yokai, but even after two attempts with Focused condition the minion was still standing. It took Kentauroi's activation to finally remove that nuisance off the board. Kentauroi itself was eventually removed after receiving violent attention for two rounds. 

Asami yanked Rogue Necromancy to herself, which I presumed was to prevent me from getting to strategy markers on the following round. Which, I guess, did that too.

By now Ten Thunders had dominated the strategy side of things, with three markers on my side of the table and me having one over 8" into enemy side. 

Both players scored strategy, and opponent reveals Bait & Switch on Rogue Necromancy. So that was the reason for that unexpected pull... 4-4 points-wise. 

Turn 4:

Unfortunately Wanyudo takes out my martyr, so we had both now lost a scheme end condition. Supporting Kentauroi shrugs its shoulders and takes a deep dive into middle of the board, charging Obsidian Oni that was holding mid-ground with Ama No Zako and Asami. 

Rogue Necromancy runs towards enemy deployment zone in an attempt to block a point from Bait & Switch. 

This, however, left Dr. McMourning pretty much all by himself after Kentauroi was wrapped up by Obsidian Oni and Asami, who also had the time and the stones to summon a well-placed 2" melee range Jorogumo to block Sebastian from tossing strategy marker anywhere. Sebastian then ran just to engage Ama No Zako, who in turn was pushed by Jorogumo's frightening reminder.

McMourning kills the Obsidian Oni and still had action point left to charge Ama No Zako, and casually flipped a Red Joker to damage. 

Ten Thunders score strategy and take the lead at 5-4.

Turn 5:

Asami pushes Dr. McMourning and Ama No Zako apart with her hairs, bringing Ama No Zako closer to denying me a point from Bait & Switch, but Sebastian comes charging in to the henchman. Ama No Zako then tries to disengage, by failing with first and succeeding with second try. But the flying goblin-thing was still within charge range of Dr. McMourning, who arrived at the scene and used Skull Saw on Ama No Zako to admirable effect, removing it from table. 

End result was a tough draw 5-5. 


Thursday, March 25, 2021

Reaching Tendrils


Had a game of Malifaux with 50 soulstones. Strategy: Corrupted Ley Lines. Deployment: Standard. Schemes: Breakthrough, Take Prisoner, Assassinate, Hidden Martyrs, Research Mission

My crew:

 Kirai & Ikiryo
Datsue Ba
Lost Love (martyr)
Drowned
Shikome + Killer Instinct
Seishin
Onryo (martyr)
Dead Doxy

Pool: 7

Schemes: Breakthrough, Hidden Martyrs

Opponent had:

Asami & Amanjaku
Ama No Zako
Ohaguro Bettari
Minako Rei
Kamaitachi
Shadow Emissary
Akaname

Pool: 6

Schemes: Breakthrough, Assassinate

Turn 1:

On first turn, Kirai summons a Shikome, who tries to navigate to get to enemy deployment zone soon enough. It is slowed down by a Minako Rei summoned Katashiro, which I try to charge with Seishin. For some reason Seishin failed to remove it.

Datsue Ba, Drowned and Ikiryo were closing in to the middle, while Ama No Zako, Shadow Emissary and Ohaguro Bettari were doing the same on the opposing side. Both masters were behind their respective frontlines. Ama No Zako already engaged Ikiryo and did some heavy damage in.

Asami summons an Obsidian Oni to engage my hidden martyr Onryo whom I had pushed to the front to hopefully get it killed.

Turn 2:

Summoned Shikome gets to enemy deployment zone after disengaging from Katashiro. 

A brawl in the middle ensued in its full. Lost Love soothed most of the apparently spiritual damage away from Ikiryo. Ohaguro Bettari lured Datsue Ba to forefront where Shadow Emissary charged the old judge and heaved her to Ama No Zako.

Duel of the lanterns burned through plenty of my soulstones, but the judge of souls survived. In turn, she (along with Drowned) brought Ama No Zako down to three or two hit points remaining. Ikiryo was still left to activate, but she was not the one who would kill Ama No Zako, thanks to slow from Akaname, and, well, the fact that when she activated, Ama No Zako was no longer there. 

I tried to take Ikiryo by the hand and lead her out of the melee, but there was this "drats" moment when I said that "now's the time for black joker since it hasn't come up yet." And there it was. 

Obsidian Oni bursts into bits and damages Onryo, but doesn't kill.

Katashiro isn't interested about Seishin engaging it, and instead flutters to my deployment zone and slaps a scheme marker on board. 

Both players score strategy, and opponent reveals Breakthrough. Ten Thunders leads 1-2.

Turn 3:

Either last turn or this turn there was a sudden explosion of Tengus everywhere. Two of them were summoned with one action. These were then trying to heal Ama No Zako with mediocre success. Ama No Zako didn't have the time to wait and charged Onryo instead, killing it. Your sacrifice was much appreciated.

Minako Rei charges Seishin, who had not been activated yet. She gained Fast from the deed and speeded to strategy marker on my left side.

I didn't want so many models there sowing scheme markers, so Kirai disengaged from Shadow Emissary or Ohaguro Bettari and shot Katashiro dead with spirit barrage. 

Summoned Shikome plots a scheme marker in the enemy deployment zone, and the other Shikome runs as fast as it can towards enemy strategy marker on the right. 

Both players score strategy, but Resurrectionists get to reveal two schemes, Breakthrough and Hidden Martyrs. Points go 4-3 for Ressers.

Turn 4:

My first activation is to bring Shikome to enemy strategy marker and put a scheme marker to enemy deployment zone.

Kirai has... some troubles. Namely, a dragon and Asami's mother look-a-like raining death on her for two rounds. Resurrectionist master was in a bad shape that even Lost Love couldn't fix to healthy levels. Certainly she drained action points away from opponent like Hamelin, but she was not able to hold on to her hit points - opponent would score assassinate reveal this turn.

Even Minako Rei had charged her, and to deny her from reaching my strategy marker on the right, Kirai summoned Onryo to block her. To my horror I realized then that I might actually kill Kirai with the two summon upgrades I had going on.

Opponent charges Ama No Zako to my point scoring Shikome and kills it. Then one of those pesky Tengus removes the essential scheme marker. Two victory points, gone.

Opponent reveals Assassinate, and points even out to 4-4.

Turn 5:

Since game was far from complete, we continued for fifth round. Ohaguro Bettari and Datsue Ba had died somewhere along the game, but Ikiryo was still in the game. Dead Doxy had received the lodestone from dying Shikome. 

After Shadow Emissary fails to kill Kirai, she is down to two hit points remaining and I had two models with summon upgrades. Doomed. Just for giggles Kirai then hit Minako Rei and got the karmic debt. Kirai had just one hit point since summoned Shikome had activated.

Minako Rei succeeds in one of the more stylish assassinations I've yet seen: she attacked Onryo, which procced vengeance, which killed Resurrectionist master.

Since reaching tendrils is a gun action, Ikiryo had engaged Asami, as well as Dead Doxy. Asami ends the game by killing Ikiryo with a random severe injury, and had used last stone to get Pulled here & there trigger. She pulled herself away, then pushed Minako Rei to corrupted ley line in the middle and pushed Dead Doxy away.

Opponent scored assassinate and strategy, and I had to suffice for only Hidden Martyrs. 

It was tough and exciting game where draw hinged on just one reaching tendrils.


Thursday, December 31, 2020

It just had to come


A couple of days ago I played the last game of the year. It was 50 soulstones worth of Malifaux, strategy beingSymbols of Authority with Corner Deployment.

My list:


Molly Squidpiddge + Necrotic Machine
Philip & Nanny
The Forgotten Marshal with The Whisper
Rogue Necromancy
2x Crooligan
Dead Dandy
Rabble Riser

Pool: 4
Schemes: Leave Your Mark, Take Prisoner (Dawn Serpent)

Take Prisoner, Assasinate, Claim Jump, Leave your mark, Runic binding

Opponent had:

Asami + Amanjaku
Ama No Zako
Shadow Emissary
Akaname
2x Tengu
Katashiro
Obsidian Oni

Pool: 7
Schemes: Leave Your Mark, Claim Jump


Turn 1:

Apparently my camera is starting to fail after 13 years or so. I clearly remember taking a picture at the end of turn 1, but there is none. 

Fortunately it's the corner deployment, so not much engagement happened. My two Crooligans had deployed in top-left corner to start scoring strategy as fast as possible. A Night Terror was summoned on the first round to aid them.

I had grand shenanigans in my mind with Philip & Nanny, summoned Night Terror and discarding a card for healing. However, I played far too aggressively with Premonition, discarding my hand left and right. Unfortunately this trend continued throughout the game. 

I think it was first turn when Molly re-activated Rabble Riser, who then charged a Katashiro dead. 

A big brawl was going to brew up in the middle. Opponent had laid a scheme marker near the center point, which I took for Leave Your Mark.


Turn 2:

Rogue Necromancy charges the Shadow Emissary and throws a high five for damage. 

Ama No Zako sped up towards my blob of Molly, Necrotic Construct and Forgotten Marshal. 

And oh boy did I do my best at removing the flying goblin. Molly, Necrotic Construct, a Crooligan and Philip & Nanny wasted all their action points in the attempt. And the thing was left alive with two hit points and two poison. There may have been some grinding of teeth involved. Especially when the one thing that eventually, sooner or later, would have come to pass. Red Joker and Black Joker coming up in the same flip. And to make it worse, a 13 in the middle too, when Philip pram rammed Ama No Zako with three cards in the duel.

Shadow Emissary heaved Rogue Necromancy away, and entered the immediate proximity of a strategy marker. 

Crooligan had no trouble in scoring one strategy marker from Ten Thunders either, so it'd be at least 1-1 after first turn. Just not in the way I anticipated.

Dead Dandy removed the enemy scheme marker from the middle and left my own there. But opponent somehow re-applied their own scheme marker and removed mine, so they managed to score Leave Your Mark. 

But when Tengu tried to Dark Bargain Shadow Emissary, a black joker came up.

Turn 3:

Even four action points from Night Terror and Crooligan are not enough to remove a pesky Amanjaku that was guarding a strategy marker. I was overconfident with that one, and was not able to remove the Insignificant totem. I could have probably advanced with Night Terror and Interact the point, but because I first charged with Crooligan, there was no space left for Night Terror where it wouldn't be engaged with Amanjaku.

I do finally remove both Ama No Zako and Shadow Emissary, but a wild Jorogumo appeared and foiled my plans of using Premonition on Philip & Nanny, then running fast forward and then teleporting a Crooligan in to score strategy.

By the way, Shadow Emissary was my model of choice for Take Prisoner. Clever thing I did there.

Removal of Rogue Necromancy was a creative one. As it was still standing with just one hit point remaining, Asami pushed the beast with her hair, causing Rogue Necromancy to fall 2" from a wooden platform it had earlier been heaved to. That equals exactly one point of damage.

I didn't get a point in strategy, opponent got the lead with 1-2, or even 1-3 if it was this turn when he revealed Claim Jump on a Tengu.

Turn 4:

At least we both had lost a whole lot of models from the board. Since Philip & Nanny couldn't deliver a sudden child delinquent to enemy strategy markers, they tried to somehow contest the middle and perhaps deny opponent from scoring Leave Your Mark end condition.

Another Tengu had escaped so that I had little chances of catching it before it'd score my entire board half. And thanks to extra survivable Amanjaku I was not able to do the same.

Situation was so hopeless for Resurrectionists that we did not continue for a fifth round.


Monday, August 31, 2020

Rats got no authority

 A few days ago I played a 50 soul stone game of Malifaux.

My list was:

Hamelin & Stolen
- Nix
- Obedient Wretch
- Rat King
- 2x Rat Catcher
- 3x Malifaux Rat

Pool: 5

Schemes: Catch & Release, Spread Them Out

Opponent had:

Asami Tanaka & Amanjaku
- Ama No Zako
- Shadow Emissary
- Wanyudo
- Yokai
- Katashiro
- Akaname

Pool: 8

Schemes: Hidden Martyrs, Breakthrough

Strategy was Symbols of Authority.

Turn 1:

Ama No Zako speeds on top of a black box near my deployment zone. Which was fortunate, at least kind of, since the creature was a henchman and Rat Catcher #1 was my Catch & Release model.

Asami summons an Obsidian Oni, who I suppose was about to blast all of my starting rats into oblivion right on turn 1, but instead Hamelin moved the rats to safer zones and ran to engage the Oni personally. 

Turn 2:

Ama No Zako comes to topple the first strategy marker, which gives me easy opportunity to score Catch & Release. Rat Catcher #2 interacts with enemy strategy marker.

Rat King attempted to dive deep into enemy territory, perhaps getting the chance to summon Rat Catcher (although both minions were alive at the time... blunder, yeah) or even score points later. None of that was to happen, when Asami summoned a Jorogumo, who was aided by the Katashiro and killed Rat King.

Nix ate Akaname, and Obedient Wretch bombarded Yokai with Bleeding Disease. By now it looked like Ten Thunders would have strong strategy presence, unless I somehow managed to kill some key pieces. 

Hamelin tried to beat Wanyudo with his black staff, but failed to do anything of consequence. Scores went 2 for Outcasts, 1 for Ten Thunders.

Turn 3:

Ama No Zako kills my scheme piece, and Hamelin fails all his attacks again, this time against Ama No Zako. Last Rat Catcher puts a scheme marker and moves closer to next enemy strategy marker.

While I manage to kill the Yokai who was sitting next to my strategy marker, opponent had no short supply of models that were able to score for turn 3. 

I thought opponent had Spread Them Out, and he didn't have that many qualifying scheme markers on board so I wasn't that afraid just yet, even if opponent evened the score to 2-2. 

Turn 4:

Rat Catcher was just millimetres out of reach of enemy strategy marker, which was a serious blow to me. On top of that, Hamelin wasn't able to get far enough to put a scheme marker 10" away from the one on the middle. Wanyudo rolled into my deployment zone, and Shadow Emissary kept the burning wheel company. Things crumbled apart. I couldn't score this round either, and opponent scored two points - one from revealing Breakthrough and one from strategy. 

It was clearly a game over for Hamelin, so we didn't play the last round. I had the potential to grab two points, and opponent had chances to deny those, while I could do little to stop opponent from gaining at least one point.


Sunday, July 19, 2020

Flying Exploding Super Rat

Had a 50 soulstone game of Malifaux.

My list:

Hamelin & Stolen
Nix
Johan Creedy
Obedient Wretch
Rat Catcher with Servant of Dark Powers
Rat King
5x Malifaux Rats

Schemes: Sabotage, Runic Binding

Pool: 5

Opponent had:

Asami & Amanjaku
Ama No Zako
Ohaguro Bettari
Shadow Emissary
Akaname
Yokai
Katashiro

Schemes: Breakthrough, something

Pool: 7

Strategy was Recover Evidence.

I forgot to take that many pictures, so my memory might be a bit hazy from the first rounds. I suppose I was so preoccupied with how my crew even worked.

Turn 1

But that much I remember that enemy Katashiro ran rather close to my side, close enough for Obedient Wretch to take a walk and throw a rat at it. And what a rat it was! Damage flip was a red joker, which killed the Katashiro instantly, which in turn dropped a strategy marker.

I transformed one Stolen into rats, and walked my five original rats and concentrated with them. Then the herald Rat Catcher walked a bit, did a scheme marker and pulled the bunch of rats closer.

Opponent summoned an Obsidian Oni, and while it did arrive in a nasty place I was able to use Hamelin's Unclean Influence to tie the golem up with three rats. That was three dead rats and a burning Rat Catcher.

Ama No Zako charged Hamelin and dealt three points of damage. Hamelin tried to remove the oni henchman with less than inspiring results.

Turn 2

My Rat Catcher was doomed, and in the end gave its strategy marker to opponent. Ama No Zako took a second round of beating from Johan Creedy, who managed to kill the thing. Nix gobbled up its strategy marker.

Due to some serious misjudging I double walked Hamelin deep into enemy side and put a scheme marker. Which in any case would only catch two enemy models into Runic Binding. Oh well.

Turn 3

I manage to bring the Shadow Emissary down to one hit point remaining.

Because of my "clever" use of scheme markers, I decided to ditch Runic Binding completely and use one of my schemes for Rat King to gnaw. It was then able to climb on top of a black box and killed an Akaname that was skulking there.

Hamelin had an impressive turn in surviving. Sure, I used four of my five soulstones in protecting him. But still he survived Jorogumo, Asami, Yokai and Ohaguro.

Obedient Wretch nibbles an enemy strategy marker, bringing points 2-1 to Outcasts favor.

Turn 4

Rat King consumes enemy strategy marker. With great toil and trouble Hamelin is finally killed enough to remove one Stolen from game. Nix succeeds to kill Shadow Emissary. Yokai and Ohaguro Bettari fail to remove Johan Creedy from board. After opponent ran out of activations we decided not to continue game as Ten Thunders had fallen so far behind that even draw was out of question.

I'm... quite certain that this is not how a game with Hamelin is supposed to go. I got to summon exactly one (1) extra Malifaux Rat (not counting the sacrificing of a Stolen), and there Hamelin was - personally involved in melee combat from turn two. Or one, if you count the charge from Ama No Zako.

The loss of Katashiro so early was a blow to Ten Thunders. But I think the game was decided by Hamelin soaking up majority of enemy activations against the odds. Although perhaps Coughing Fit gives Hamelin some surprising extra staying power. I don't know. I just hope that by this game's example I won't run Hamelin into middle of enemy crew because it happened to work so well this time in future games.

Saturday, July 4, 2020

Combo Breaker

Had a 50ss game of Malifaux.

My list was:

Molly & Necrotic Construct
Philip & Nanny + Grave Spirit Touch (Claim Jump)
Mortimer
Rogue Necromancy
2x Crooligans
Dead Doxy
Dead Dandy

Pool: 2

Schemes: Claim Jump, Spread Them Out

Opponent had:

Asami Tanaka & Amanjaku
Ama No Zako
Minako Rei (Claim Jump)
Shadow Emissary
Yokai
Obsidian Oni

Pool: 5

Schemes: Claim Jump, Hidden Martyrs


Strategy was Symbols of Authority.

Turn 1:
As Ama No Zako started speeding towards my nice line of strategy markers, I considered it my best option to reposition the Rogue Necromancy quickly to catch the flying oni.

Minako Rei did a Katashiro, who was able to charge Philip and the Nanny, scraping in some damage.

My two Crooligans were attempting to do secure Spread Them Out, as well as hopefully get to enemy strategy markers that were behind the black box.

I misplayed Molly's rule - I re-activated Dead Dandy, who would be gravely insulted if someone was to call him by the keyword Forgotten!

Turn 2:

Philip & Nanny get a bit scared of Shadow Emissary, and backs off. Emissary isn't afraid of Philip & Nanny, but still back off to block the enemy strategy markers being overrun by children.

Ama No Zako continued its race towards victory and bargained to remove my strategy marker. Ambushing Rogue Necromancy beat it down to two hit points remaining and with poison +1. To get that last point in, one of the Crooligans teleported to melee and tried to throw debris at the enemy. It failed twice to even get through Terrifying. Well. At least next turn dispatching Ama would be no problem. Right?

Molly asks endless questions from the Yokai, and succeeds in dropping a scheme marker next to it. Which it takes away immediately with Interact. Didn't remember that it was so easy to remove the markers. So I didn't score anything on second turn, and opponent got one from strategy.

Turn 3:

It was a jaw-dropping turn. Ama No Zako has one hit point left and is within the LoS to Molly, so taking multiple identical actions would kill it. Rogue Necromancy was uninjured, Terrifying (11), Hard to Wound, Hard to Kill, and had a healthy stack of five poison counters.Just how on Earth did I lose Rogue Necromancy to Ama No Zako?!

Here's how. Either opponent bought the proper suit to Ama No Zako's healing trigger or it accidentally came up and dealt moderate damage, healing itself back to four health with bought trigger. Then it takes a second swing, and during damage flip, a wild Red Joker appears, bringing Rogue Necromancy down to one hit point. Then it makes dark bargain and attacks a third time, removing my only hard hitting model from board. Absurd. Perhaps there was a reason the Crooligan was so afraid last turn - it saw this coming.

But it doesn't end there.

Yokai moves about 20" without making even a single move action and trashes a second strategy marker from me. Damn those monkeys! They're at it again, messing up my yard.

An obsidian oni comes to tie up Molly, Dead Doxy and Mortimer in melee and having the burning ground thing on. Molly disengages and gets to a total of three burning tokens.

Philip & Nanny take a flight from the thick of action, and a Crooligan teleports to them. I aim to get to the last strategy markers that are now mostly undefended. Sure there's a dragon nearby, but hey. I got baby carts.

At least Dead Dandy takes one enemy strategy marker away, and I get enough schemes on board to get Spread Them Out.

Necrotic Machine manages to kill Yokai. I reveal Spread Them Out, and opponent reveals Hidden Martyrs. Aw heck. I'm still behind in points with 2-3.

Turn 4:

Crooligan snatches enemy strategy marker from behind the black box. Ama No Zako takes it's second strategy marker.

There's an absurd brawl in the middle, where Mortimer assists Dead Doxy in putting out the flames on her, and getting burning +2 because of it, and then Dead Doxy assists Mortimer twice to do the same. Minako Rei reveals her Claim Jump, which was a harsh blow for my game. We went to 3-5.

Turn 5:

We didn't play the last round completely when it became apparent that even mathematically I could not get a draw. I could have realistically gained two points, and with luck Mortimer might have dealt enough damage to Minako Rei to make her ineligible for Claim Jump, but there was no way for me to block either Ama No Zako or some Asami hair-things from taking the last strategy marker.

It was fun and exciting game again even if my record of gaining the upper hand at the last possible moment is now broken.


Thursday, June 11, 2020

Pram Ram

Few days ago I played this 50ss game of Malifaux.

My list:

Molly + Necrotic Machine
Philip & Nanny
Mortimer
Rogue Necromancy
3x Crooligans
Rabble Riser

Pool: 6
Schemes: Claim Jump, Sabotage

Opponent had:

Asami + Amanjaku
Ama No Zako
Shadow Emissary
Akaname
Obsidian Oni
Jorogumo

Pool: 10

Schemes: Claim Jump, Vendetta

Strategy was Corrupted Leylines. I had forgotten to take my Rogue Necromancy with me, so I guess that plays right into it's keywords. Converted Corpse Cart takes its place instead.

Turn 1:
Ama No Zako goes and grabs one of my Crooligans I had deployed to the flanks to, perhaps, do some sabotage. Asami summons an Obsidian Oni, and launches that missile towards my crew. Rogue Necromancy and Molly eventually wear it down, but Molly and Rogue Necromancy receive some damage and are set on fire.

Rabble Riser runs to middle of the board to hopefully act as a deterrent for a wreckfest of Shadow Emissary, Jorogumo and Obsidian Oni in my deployment zone.


Turn 2:

Rabble Riser tied Jorogumo, but then Jorogumos started appearing out of thin air.

Mortimer's movement ability, Premonition and Ambush carried Rogue Necromancy to melee with the summoned Jorogumo, which gave an impressive stack of poison going on for Rogue Necromancy, but some trigger caused it to be unable to heal. However, it managed to trigger Pounce, which got it into melee range of Asami. Who than just transferred Rogue's attacks off to nearby Oni's. Whee.

Due to some good fortune, Rogue Necromancy did not die but was left alive with one wound remaining.

After many a movement shenanigans by both sides, two ley line markers were tagged by both players.


Turn 3:

Resurrectionists won initiative, which meant Rogue Necromancy had to activate while it still was able to do so. It did some impressive damage to Shadow Emissary.

Then it was promptly butchered.

All that resurrectionists could muster, then, went into removing the Shadow Emissary. And Mortimer's Decay finally did it.

My Crooligan on the right side of the board was challenged by Akaname, so it looked like zero points from Schemes to me.

Necrotic Machine lobbed the lodestone from another Crooligan back to Philip & Nanny, who then went and tagged the middle spot thanks to Deadly Pursuit.

Turn 4:

Philip & Nanny are tossed around by Asami's hair and Premonition, as well as their own movement. Crooligans teleports into the thick of the action and tries to stop Ama No Zako from getting to Philip & Nanny. However, Akaname removes itself from existence to bring the lodestone closer to untagged strategy markers.


Turn 5:

Ama No Zako tags the middle strategy location, and Philip & Nanny manage to Pram Ram with Accidental Roll Over trigger move past a summoned Jorogumo. Jorogumo then was not able to kill the carriage, mostly due to last soulstones being used to block damage.

Thanks to some good flips, Necrotic Machine was able to crack the final Obsidian Oni. Who had Vendetta against Philip & Nanny.

Again a really tough and exciting game that didn't resolve until the very last round.

Sunday, May 10, 2020

Into the Quarantine Zone

Had a 50 soul stone game of Malifaux. I'm not putting pictures this time, as we had makeshift terrain and I had forgotten to take my tokens with me, so board and the plethora of tokens is quite unsightly.

My list was:

Seamus + The Whisper
Copycat Killer
Rogue Necromancy
Bete Noire
2x Rotten Belle
Dead Doxy
Dead Dandy
Gravedigger

Pool: 3

Schemes: Let Them Bleed, Catch and Release

Opponent had

Asami Tanaka
Amanjaku
2x Akaname
Obsidian Oni
Jorogumo
Yokai
Shadow Emissary

Schemes: Claim Jump, Take a Prisoner
Pool: 10

Scenario was Public Enemies.

Gravedigger begins Resurrectionist turn with Blasphemous Rituals and drives its cart mid-field. Seamus takes a shot at Jorogumo and deals "minimum" damage that most of my other models have as their maximum. Bete Noire attempts some flanking business on Jorogumo, and the rest of my models are busy blocking the movement of Rogue Necromancy.

Asami summoned an Obsidian Oni, pushed it with her hair and then the thing charged Seamus who I thought was safe. The Oni flickered itself into nonexistence and set Gravedigger and Seamus on fire. This activation put Seamus effectively down to eight wounds, which isn't too bad but I used 2/3 of my soulstones on the very first turn of the game.

Turn 2

Bete Noire runs to engage Jorogumo. I wanted to at least make it a little more difficult for opponent to remove Gravedigger. Jorogumo had Bete bury herself, and Yokai did shenanigans and charged Gravedigger without scoring the kill. Dead Doxy charged Yokai in return, but didn't do much. Akaname charged Gravedigger and spilled some bile, and Gravedigger was at one hit point remaining with burning +2 and poison +1. Shadow Emissary eventually charged Gravedigger dead, and I replied by charging the dragon with Dead Dandy and Rogue Necromancy. They did a little something, although I got to taste a little bit of how annoying Terrifying can be.

Neither player scores points yet.

Turn 3

Seamus shoots the Yokai dead, and Dead Doxy climbs on top of the pitch black cube of darkest emptiness to pursue Shadow Emissary that had escaped there. Obsidian Oni was summoned on top of there, too, and soon Dead Doxy was extra dead. Oni decided to shoot Dead Dandy and burn him a little, but instead exploded the jolly dilettante off the board.

Rogue Necromancy comes to the cube, too, oblivious to the fact that it was about to be taken as a prisoner.

On the other hand, my Rotten Belle managed to dive to hug Asami for Catch & Release, so both players scored two points.

Turn 4

Rogue Necromancy swipes the Shadow Emissary dead and pounces on Obsidian Oni. Bete Noire tickles Jorogumo a little, and Seamus comes in for the kill now that the spider was engaged by Redchapel model. Only that, well, Jorogumo didn't die and slapped Bete dead with six damage when she was at four remaining. Then it charges Seamus and leaves him at two hit points remaining.

Unless I forget something, it must have been Copycat Killer who killed Jorogumo. Or maybe Seamus had not yet been activated? Oh yeah. It was probably so that Copycat Killer put Seamus to prepare his kill, but then Jorogumo activated, butchered Bete Noire and gave a scare for Seamus.

Asami and Obsidian Oni killed the Rotten Belle who had been designated for Catch & Release, so no points for me from there.

But both players had destroyed enough models to gain another point from strategy, so it was 3-3.

Turn 5

Seamus starts the turn, walks, teleports on top of the cube in the middle, shoots Obsidian Oni that was engaging Rogue Necromancy, and then teleports back to safety. I hadn't used the teleportation ability much earlier, because I had thought it required to move within 1" of the same terrain from where the ability was used, but now it really dawned on me how difficult it is to catch Seamus.

Anyway, I hadn't placed him safe enough, so Asami does double walk and summons Obsidian Oni to him. Copycat Killer walks double and places Seamus safe... again. This time actually safe.

Opponent moves Akaname next. This allowed for Rogue Necromancy to escape from being taken as a prisoner.

Theorycrafting here, had Obsidian Oni come and engage Rogue Necromancy, it could have ambushed itself away from melee and ran off anyway.

So in the end it was a close game with 4-3 victory for Resurrectionists. And as it hinged only on if opponent had juggled Jorogumo's flicker tokens differently, it was probably our closest game yet.