Monday, December 30, 2024

Screw You, Benny!

 A 50ss game of Malifaux on Vassal.

Strategy: Flank Break the Line

Schemes: Death Beds, Assassinate, Detonate Charges, Hidden Martyrs, Catch and Release

My list:

Piper Hamelin & 3x Stolen
Nix
Benny Wolcomb
Fumigator
Tunnel Rats
Malifaux Child
Rat King
Winged Plague
Malifaux Rat

Pool: 5
Schemes: Detonate Charges, Hidden Martyrs

Opponent had:

Lucas McCabe, Relic Hunter & Luna
Sidir Alchibal
Desper LaRaux
2x Rough Rider
2x Ruffian
Tanuki

Pool: 4
Schemes: Detonate Charges, Hidden Martyrs (Tanuki & Rough Rider, the one below)


Turn 1:

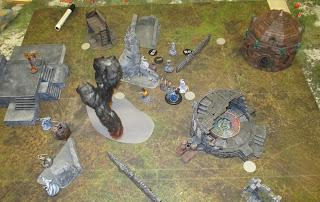
Nix started by planting a scheme marker for a new Rat King. He went hiding behind a wall. 

Opponent started shuffling about, slowly claiming both markers in the middle. Whenever wastrels had action points yo spare, they took small shots at Nix. And damage kept piling in, leaving me worried fur the pup's safety. 

Before Sidir had activated, Hamelin took his shot. He stunned Sidir and made Malifaux Child interact a scheme for Benny. Last action went to move away from easy range of Machine Gun.

However, Lucas dug up a Timeworn Blade for Sidir, took a couple of walks and rode Sidir closer to Nix, again.

Sacrifices needed to be made, so Fumigator walked and charged to engage Sidir. Sidir dodged, disengaged and began to shoot. After all attacks targeted against Nix, the dog was still at four health remaining. But it had cost me three soulstones. 

Stolen grind out activations from Ten Thunders. I realized I had spent all of my 8+ cards when protecting Nix, so Benny didn't have a guaranteed Rat King coming up. Fumigator that had been supposed to plant at least one scheme to the rat bomb had had to relocate.

To boost Benny's chances of getting an 8+ straight out of deck, Malifaux Child backtracked to place a fourth scheme marker. Thus, Benny was able to get Fast. After all enemy models had activated, Benny began to activate Loyal Rats with Tiny Hats. First one failed, second one failed and third one...

Failed.

Great job, Benny. 

Rat King had walked and charged Ruffian who was hugging center-left strategy marker without much of an effect. Looking back now, that turn was a hideous mess. The only good things were stunning Sidir and Tunnel Rats going to toss a strategy marker to enemy side. 

Bah.


Turn 2:

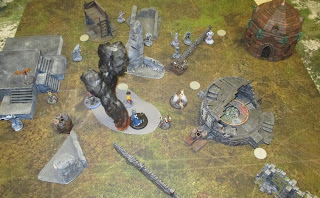
Tunnel Rats continued their success story by using Secret Passage to get to strategy marker and toss it out of Rough Rider's reach. They also planted some minefields to discourage trampling hooves. Unfortunately minefields did not discourage rifle shots, one of which dealt a couple of damage points in.

In the center, Sidir actually was the first model to activate, and started shooting Fumigator. Sidir softened up the target, gave the Timeworn Blade for Rough Rider. The horseman shot Fumigator dead with double severes with negative modifiers. He also interacted a strategy marker and threw Timeworn Blade for Lucas.

Looked like Nix would reach three models with Drink Spirit, so Nix walked and charged Lucas to complicate the middle. Attack dealt respectable damage, but then came time to drink some spirits. Nix's future suddenly appeared to not... exist. Black Joker. And Fast master about to activate. 

Sure enough, Lucas activated next and started whipping the ghostly dog. It took the remainder of my soulstones and high cards from hand, but Nix was still standing! Only that... he had just one hit point.

Hamelin tried to come to save the day and stun Ruffian closest to Nix and offer some TN 13 willpower duels for, like, six enemy models from Fumigator's corpse. However, all my good cards had already been spent, so Hamelin needed 8+ straight from the deck. Both actions failed, so Nix was... still... at one health remaining. 

Lucas had given Timeworn Blade for Ruffian, who activated next. He chainganged himself into melee with Nix, and... failed first attack. Nix healed to two remaining. Unfortunately second attack hit, and Nix was back to one health. And the last attack? Missed! Woo hoo, who's a good boy?

Rat King healed Nix for one, and Stolen that were spitting on Lucas healed Nix up to five health. I love it how messed up that survivability is. 

Since Desper had leaped to Nix to plant a scheme, that gentleman burglar was going nowhere else this turn. Benny ditched his sorry attempt to bring in more rats, and ate a scheme marker for Fast. He took a double walk to drop a scheme near Desper. Winged Plague removed Desper's blight tokens to drop another scheme marker for Detonate Charges.

One Ruffian below brought a strategy marker to my side.

Both crews scored a strategy point, and both got Detonate Charges for a 2-2 tie.


Turn 3:

Lucas started with a headlong charge against Nix. While the wastrel master didn't do a whole lot against Nix, he did dole out a Phantasmal Mask for Sidir before riding away from melee. I figured Nix with four health might be able to take a whopping from Sidir, so Tunnel Rats activated. Strategy Marker was thrown just over 8" away from centerline and walked over 6" away from Rough Rider. 

Sidir charged Nix and put it down with two strikes. He was buying Rams for critical strike, so there was at least that expenditure on Sidir's part. Last action point went into shooting down Malifaux Child with a machine gun. 

The kid had been my other hidden martyr, so I was looking at the real possibility of fully losing points from Hidden Martyrs if Rough Rider on top decided to land two weak damages on Tunnel Rats. That was too big of a risk after losing Nix and Malifaux Child before they had even activated.

Hamelin took a double walk near the center, and at first tried to stun threatening Rough Rider. Piper's Influence failed, but at least Obey worked. Rough Rider took a dip inside minefield before running 5.5" away from Tunnel Rats.

Rat King tried to gnaw Ruffian off the board, but their majesty was offended by Ruffian's manners. Benny Wolcomb had to come and stick a blade into the wastrel minion's last hit point.

Those were the most important developments of the turn. Rough Riders relocated to middle and tried to shoot Rat King, but not getting it below half of its health remaining. 

Sidir had tossed Phantasmal Mask for Desper, who had leaped to transform Winged Plague into a soulstone. He couldn't charge because of Hamelin's aura. 

Kids were spitting at Lucas, Tanuki was swiping those way.

Both players scored strategy point, but Malifaux Child was turned into a victory point for Outcasts, so they got the lead with 4-3.


Turn 4: 

Outcasts actually got the initiative for change. And what a beautiful activation Hamelin had! First he Obeyed Rat King to interact strategy marker. Marker went next to Rough Rider. Then, Hamelin landed both a stun and an Obey to Rough Rider to throw the strategy marker even further. I think the last action was Obey, too, but I'm not sure about the target. 

Opponent didn't prioritize the situation in middle. Instead, Tanuki healed Lucas for a bit and threw a strategy marker deep inside my territory.

Rat King charged the pipered Rough Rider, and missed. Second attack, however, hit and got masks from Piper's Influence. Two attacks later, Rough Rider was dead before it had activated. So yay for that.

However, Desper recognized the danger of Outcasts getting four strategy points, so he leaped and walked to throw the strategy marker a little closer.

This, however, put Desper in the range of Tunnel Rat's trench gun. Rats were above half of their health, so they didn't have too much trouble in landing a moderate damage - which was enough to kill Desper. How? Well, Stolen kid had almost killed Desper by spitting at him. Had it not been a full three for damage block with a stone, the kid would have scored a henchman kill.

Benny had... done... something, I guess? Maybe he tried to attack Rough Rider or Sidir? Anyway, he did engage both for some added nuisance and apparently placed a scheme marker at some point. 

Rough Rider rode away from Benny along with Sidir. Their combined efforts resulted in dead Rat King and dead Stolen, plus some damage in to Hamelin.

Another stolen brough Lucas down to three health remaining, while the last Stolen attempted to deny enemy fourth strategy point, maybe. He went frantically flailing to Ruffian coming from the right, but missed. Ruffien killed the kid and charged resulting Malifaux Rat so that it was in contact with strategy marker. Ah well. At least the kid tried.

Both players score strategy for a 5-4 lead for Outcasts.


Turn 5:

Lucas tried to tie down Benny Wolcomb, and soon enough the godfather was within 2" of two enemy scheme markers. 

Hamelin does another awesome activation. First, he Obeys Tunnel Rats to use Secret Passage to get closer now that Lucas was securely in place. Then he stuns Rough Rider with Piper's Influence - and obeys Tanuki away from fourth strategy point for Ten Thunders. Last Obey went to Benny in an attempt to disengage him, but that didn't amount to anything.

Lucas had difficult choice to make now. I had no idea, but both Rough Rider and Tanuki were enemy martyr's. He would be able to get fourth strategy point even with stunned Rough Rider, but that would leave Hidden Martyrs with zero points. 

In the end, Ten Thunders went to get their fourth strategy point. Benny beat up a few rats to get two schemes within 2" of Lucas, and Tunnel Rats just ran to get engaged with Lucas. 

A close fought 7-5 victory for Hamelin.


Sunday, December 15, 2024

My Teddy Wants To Tell You Something

 A 50ss game of Malifaux

Strategy: Standard Raid the Vaults

Schemes: Deliver a Message, Hold Up Their Forces, Death Beds, Espionage, Protected Territory

My list:

Molly with The Whisper & Necrotic Machine
Philip & Nanny
Rogue Necromancy
Keepside Strangers
Rabble Riser
Night Terror
Crooligan
Enslaved Spirit

Pool: 5
Schemes: Deliver a Message (Crooligan), Protected Territory

Opponent had:

Shenlong & 2x Aspiring Students
Sensei Yu
High River Monk
Thunder Archer
Fermented River Monk
2x Wandering River Monk
Low River Monk with Trained Ninja

Pool: 4
Schemes: Protected Territory, Espionage


Turn 1:

Monks started concentrating on their Chi, barely exiting their deployment zone. Except for that one Wandering River Monk that ended up less than five inches away from my deployment zone. Although Night Terror helped the guy a little. Presumably the flapping of bat wings inspire butterfly jumps. 

Early on Molly took a double walk to within 2" of center-left strategy marker and concentrated to spread some Lethe's Caress. I don't think anyone took the damage just yet, though, but at least it complicated Chi generation.

Monks had bunched up nicely. Stone pillar hides Shenlong himself and Aspiring Student from the picture. I was concerned about High River Monk and his ruthlessness, so that's where Keepside Strangers aimed their snakes at. Attack hit and dealt moderate damage, the blast splashing on Aspiring Student. 

I was tempted to try and finish off those two, but eventually walked Keepside Strangers away so that Thunder Archer would have to walk to get within range. And so it did, dealing two points through Shielded. 

It was probably Low River Monk that healed Aspiring Student so that it would not die to poison. Opponent was now wary of blasts, and moved Sensei Yu to contest top-right strategy marker instead of standing in the middle of everything.

And that was when Rogue Necromancy did Projectile Vomit on Yu, dealing three points to him and two blasts reached Low River Monk and Thunder Archer. 

For sure it was oppressive situation for Monks. Especially after Necrotic Machine went to heal the only damage Resurrectionists had taken. And High River Monk was at one health remaining, Sensei Yu had taken four, and some random points here and there. I also had a pass token.


Turn 2:

So I got the initiative easily enough. I had some options how to deal with High River Monk, and I decided to jam Rogue Necromancy in the middle of enemy crew. I figured I might lose Rogue Necromancy because of that, but at least it would considerably slow down Ten Thunders strategy options. 

Rogue ambushed, walked over the small wall section and charged High River Monk, using focus point. Stat 6, three cards, bonus to damage flips. Had a 13 in hand. Everything. 

Black Joker. Bad things happen, yeah.

Low River Monk did a double heal on High River Monk, healing it back up to five. 

Next Shenlong would have ample time to heal just about everyone, so Molly had to activate next and premonition her cards away. First she did two damage with Disturbing Story, and remaining three came from another Disturbing Story that needed a cheat. 

Shenlong probably healed Thunder Archer for a bit and switched his fighting style to that horrifying dragon kick thing. Two hits landed on Rogue Necromancy, some of which was healed by Necrotic Machine.

So, in the end, Rogue Necromancy died on turn two. But at least it took, uh, two actions from Shenlong, two actions from an insignificant totem and two actions from Fermented River Monk. Oh. Right. So nothing to write home about.

At least handful of snakes scored a big one again, damaging Thunder Archer and blasting Low River Monk dead. They even had time to place a scheme marker next to center-right strategy marker. 

Thunder Archer was no slouch either, removing Enslaved Spirit with a single shot and killing it again with target practice. 

A Wandering Monk leaped to bottom-left strategy marker and placed a scheme to my deployment. The other one did a scheme to centerline, too, so looked a bit like Espionage. Philip & Nanny was able to slow somebody with a question, and remove an enemy scheme marker, which by the time had been the one in Ten Thunders deployment zone. 

Rabble Riser redirected itself from centerline to attack the Monk that had jumped to bottom-left. I believe he missed his attack. 

However, Enslaved Spirit and Night Terror had procured Protected Territory for me, and Crooligan teleported to hand over a message to Shenlong. I was controlling at least one strategy marker, not sure about the one Yu is standing next to. 

That was a 3-1 lead to Resurrectionists.


Turn 3:

Aspiring Student started beating a kid in the face with the pointy end of a broom. That's how students aspire these days? Dragonfly kick even set her and her teddy bear on fire. She figured out her messages were not appreciated, teleported to Philip & Nanny and went to place a scheme marker and contest top-left strategy marker. One problem, though. She had Burning +2, one health remaining.

Necrotic Machine and Molly tied their best at taking down Sensei Yu. But damn those chi tokens. Not a single injector broke Yu's skin, and his mind was fazed only a little by Molly's disturbing stories. Juggernaut healed back whatever she managed to do. He was able to kill Keepside Strangers before they were able to activate.

Night Terror walked to assist Crooligan with her burning, but managed to smother only the teddy bear. Not the kid herself. It tried to take better cover with reposition from Negation Aura. 

However, Yu had given Fast to Thunder Archer. He walked back to Ten Thunders deployment and took two shots at the bat. One attack hit, and dealt weak damage, so Night Terror was down to two health remaining.

Philip & Nanny managed to kill an Aspiring Student that had charged them. As I didn't want Shenlong to come and engage top-left corner marker, they Pram-Rammed Shenlong.

That backfired, when Shenlong used four winds punch to push the prams away - and one of my scheme markers to centerline. Ten Thunders master gave an interact for Thunder Archer, andwalked to contest center-left marker instead. 

Rabble Riser didn't manage to finish off a Wandering River Monk. He needed a moderate for that. Didn't get. And instead, the duo kicked the Riser out of Rabble. 

Resurrectionists got a second strategy point, while Ten Thunders claimed their first. They also got Protected Territory, so they caught up a little, to 4-3 lead for Molly.


Turn 4:

Then, things went wrong for Resurrectionists. It took every damn action point I had on board to kill Yu. Finally it did happen, but I wasn't able to play for points... much.

Shenlong switches to the unpredictable river style, and, huh. YEAAH. Molly had graciously even gifted Shenlong Distracted beforehand so that she was pretty much doomed. After spending most of my soulstones, Molly was still standing with five health remaining. But another such barrage next turn... I didn't look forward to that.

Thunder Archer shot Night Terror dead, and Remaining monks just schemed as if their lives depended on it. 

Both players scored strategy, for a 5-4 lead for Resurrectionists.


Turn 5:

Thunder Archer's Target Practice was my biggest concern right now, so Necrotic Machine healed Molly for a couple of points and walked to charge Thunder Archer. The archer had one health remaining from all the Lethe's Caress procs. But that one health was too many - it might just disengage and shoot my scheme markers anyway.

Philip & Nanny was able to activate before Archer did and gave Slow for it. No damage though, since the damn thing had no melee range, so wasn't engaging anyone for the damage instance from One More Question.

Shenlong made a gambit and tried to hit Molly twice with four-winds punch to get my scheme marker away from where it should be. Second punch failed to connect - that style is far more predictable with Serene Countenance than the drunken swings Shenlong was doing earlier. 

Molly was able to spend pass tokens and wait until all the monks had done their things. She removed the only scheme marker opponent had on the centerline She was, however, both stunned and staggered, so she wasn't going to make it to top-right strategy marker with two actions even if she disengaged successfully.

Ten Thunders got third strategy point and Protected Territory.

Resurrectionists got either Deliver a Message or Protected Territory, but not both. So, it was a 6-6 draw.


Saturday, December 14, 2024

Handshake Against Torment

 Two 50ss games of Malifaux. These were played over a week ago during my Kuhmo visit, so details are likely gone from my memory. Both players were slowly getting a tad tired of Gaining Grounds 4, so we shook things up a little by playing gg1 strategies.


Game 1:

Strategy: Corner Public Enemies

Schemes: Let Them Bleed, Research Mission, Breakthrough, Take Prisoner, Claim Jump

My list:

Kirai & Ikiryo
Kari Zotiko
Jaakuna Ubume
The Ferryman
Lost Love
2x Drowned
2x Seishin

Pool: 6
Schemes: Let Them Bleed, Breakthrough

Opponent had:

Charles Hoffman & Mechanical Attendant
Melissa K.
Peacekeeper
Guild Steward
Guardian
Hunter
Watcher

Pool: 5
Schemes: Take Prisoner (Ferryman), Claim Jump (Peacekeeper)


Turn 1:

Scenario was such a killy one, but corner deployment made the first round mostly about closing in. Early on Hoffman have Fast to Peacekeeper, which made me a cautious. I overdid my defenses, slapping Twisting Mist for Jaakuna Ubume. Concealed Serene Countenance model should survive most shooting opponent might have at me. 

Sure enough, round boiled down with Peacekeeper running so close to center point that I was kind of scared of next turn. Ferryman and Kari were near enough to charge.

Kirai tries to save the day by summoning a Goryo that manages to charge Peacekeeper and land Adversary on it. 

All of my crew was coming from bottom-left quarter except for Ikiryo, who was hiding behind a dwarven house to perhaps launch a Lost Love to enemy deployment zone next turn.

Entirety of Augmented pretty much mirrored my movements, too, when all but Hunter were closing in from top-right quarter, sans Hunter that was hiding from Ikiryo on the opposite side of dwarven house.


Turn 2:

Hoffman activates first, gives Fast to Peacekeeper and punches Goryo off the board while also getting bounty tokens. Perhaps Kirai would have to reconsider her summonings, as giving enemy free points like that hurts.

But something would have to hold up Fast Peacekeeper. Kirai summoned an Onryo for the job. However, she was dubious about a single five point minion holding up a buffed up 10 point enforcer, so Kirai went into hiding.

Fortunately Onryo gave hard time for Augmented. Melissa didn't land even a single hit, so Peacekeeper had to kill Onryo before moving suspiciously close to center point. 

One of the Drowned managed to distract and poison Peacekeeper a little, while the other charged at the thing. Would I have to rush my models against the thing piecemeal, one by one?  How about my bounty tokens?

Well, Jaakuna Ubume charged Hunter so that it wouldn't go to engage Ikiryo. She did the drowning aura. Hunter was in for some bad time, as every action it failed gave a point of damage, and every attack that actually hit would deal two. It nearly scrapped itself in trying to remove Jaakuna. It did well enough, so Kari had to heal Jaakuna with her entire activation.

And then Guardian came to swing the greatsword at Jaakuna. She survived, and had caused seven or eight points of damage via vengeance and drowning aura in total.

Desperately trying to get bounties to score, Ferryman tried to wreck the Hunter. Ferryman managed to claw only a couple of damage points, which left Hunter with two. Looked like Ikiryo would have to delay her proceedings to not lose points from this round.

Lost Love teleported to Ikiryo and gave her Fast with a trigger. He tried to heal the damage he had caused, but didn't get it quite right. 

Ikiryo projected voice over Hunter. She had Focus +1 from last turn, and used that to get through friendly fire - and scored a severe wound! Yay, two bounty tokens and two action points to get as far from the action as possible. 

Both players scored strategy, but no schemes were revealed. It was a 1-1 tie, but situation on board looked miserable from my point of view.


Turn 3:

Jaakuna was able to activate to put up her drowning aura. This combination continued to plink and plonk Guardian, until Guardian halved Jaakuna. Before opponent would bring in the heals, Kari charged Hoffman to get Peacekeeper and Guardian within no-heal aura. This was a high risk move so early in turn, but I might be able to score Let Them Bleed this way.

And surely enough, Kari spent most of my soulstones. Lost Love had to teleport in to double-heal Kari, and so did Kirai. Without the teleport, of course. But, in the end phase, Kari was all alive and well. Same could not be said about Guardian and Peacekeeper that had been hitting themselves for quite a while. 

As situation in the middle had devolved into a gigantic melee, Ikiryo was able to walk and plant a scheme for Breakthrough. Yay. Kari had survived to give me Let Them Bleed. But no robots were dismantled this turn, while opponent had plenty enough bounties. 

Opponent did no reveals, so Urami took the lead with 3-2.


Turn 4:

Ikiryo and Lost Love went to spam scheme markers to enemy corner, so they were out of action.

And in the middle... uh. Huh. 

Kari died, which put heals back on the menu for Augmented. I needed to hurry to get kills. Guardian went down easily enough, but unfortunately that meant that Hoffman and Tanuki doubled up on heals for Peacekeeper. 

Drowned kept putting dents into Peacekeeper, and another Drowned charged Melissa, who was also near the middle by now. 

Opponent needed four tokens for a victory point, which wasn't available. Kirai had managed to kill Guardian and Watcher, so that was the three bounties required for a point. Scores went 4-2 for Resurrectionists.


Turn 5:

Opponent had a chance for a difficult draw. We played until it became impossible to achieve.

And the only proper way to get at that was to punch some damage in to Tanuki after it had activated. Let Them Bleed was secured. Breakthrough was, too. 

Oh, but Guild can't have Tanuki's, you say? Okay, okay, Guild Steward, then. Anyway.

Opponent also got both of their scheme end conditions for a 6-4 victory for Kirai. 


Game 2:

Strategy: Wedge Symbols of Authority

Schemes: Sabotage, Spread Them Out, Vendetta, Take Prisoner, Runic Binding

My list:

Jack Daw & Lady Ligeia
Montresor
Ferryman
Malifaux Child
2x Hanged
2x Guilty

Pool: 5
Schemes: Spread Them Out, Runic Binding

Opponent had:

Jakob Lynch & Hungering Darkness
Kitty Dumont
Soul Battery
Mr. Graves
Mr. Tannen
Illuminated
Beckoner
Tanuki

Pool: 6
Schemes: Take Prisoner (Ferryman), Sabotage (Fallen arch in bottom-left quarter)


Turn 1:

We were playing Wedge from left to right. 

I had two strike teams of Guilty and Hanged attempting to flank. Oh, and Malifaux Child, too, was flanken' at the bottom. Oh yeah. All the kid did was to pull Kitty Dumont to center line. What's this? This is no McCabe? Surely Lynch would not take children as prisoners?

Montresor, Lady Ligeia and Jack Daw guard one symbol of authority near my wedge corner. Montresor gives Ferryman a walk, so it was able to either go charge Kitty Dumont, or place first marker for my schemes. It decided to interact while still able. 

I don't remember who or what shot a severe damage to Ferryman. It was probably Lynch with his derringer. Suddenly no access to Kari's heals... felt. 

Hungering Darkness went to harass my second Guilty/Hanged team on top, but there were no exchanges just yet. 


Turn 2:

Ferryman charged into the thick of Honeypot crew. It dropped a second scheme marker. However, that half of a boat had been adept with flipping ones, and had somehow ended up with at least five brilliance tokens. A couple of damage points here and there, and Ferryman was looking at a real possibility of developing a crippling drug habit.

And surely enough, Jakob Lynch offered the figurehead a free sample. The undead mermaid shook off the ropes, descended down from the front and started doing brilliance right there. Lynch had convinced her to become Honeypot's new Beckoner. 

Jack Daw goes to place a third scheme marker for Runic Binding, and charged Mr. Graves. As a move it was... less than ideal because of Black Blood. But I needed Jack to stand on top of the scheme marker so that the multitude of as of yet unactivated models would not just go and pick it up. 

Montresor was in range to perma-stagger Mr. Graves. Lady Ligeia made a shout at Mr. Tannen, bursting the little man's ears with a shriek. Shriek blasted a nearby Beckoner, staggering her too. 

Guilty and Hanged below tried to engage and hold up people near the wreckage of Ferryman.Before Soul Battery had activated, Hanged gave him the psychotic upgrade when opponent no longer had any cards in hand. That was a 3" push towards the triangle of Runic Binding.

Jack Daw's valiant sacrifice paid off, but he wasn't in a good shape at all. This lead to a weird move by me. Guilty on top had charged Hungering Darkness to tie it up. Hungering Darkness didn't do too much damage, so Hanged gave the Forbidden Knowledge for Guilty and teleported next to it. Then he hit Guilty with the noose and walked away, healing Jack Daw for one. 

Beckoner, Mr. Tannen and Jakob Lynch in close proximity are a terrible bubble for Jack to be in. 

But, at least I scored Runic Binding, while opponent got nothing. A 1-0 lead for Tormented.

Oh, Malifaux Child had disengaged from Kitty, hopefully activating soon enough next turn to drop a scheme marker, until Kitty comes to claim the prisoner.


Turn 3:

Shock! Taking kids as prisoners is McCabe's business indeed. Kitty just went to drop a scheme marker to sabotage target. Malifaux Child walked and dropped a scheme marker. 

Shock and awe! Illuminated kills Guilty, Hungering Darkness kills Guilty. I'm not sure if I have ever had eight card hand, but next turn I would.

Shock and horror! After draining pretty much every resource at my disposal, Lynch is able to give Jack Daw a firm handshake. I suppose that's what Jack Daw's tormented spirit was looking for, because he disappeared after the fact. 

Montresor and Lady Ligeia are able to finish off Mr. Graves. 

Hanged on top places a scheme and walks towards the unknown.

The ultimate shock!

At the end of turn three, scores were still 1-0. Has it ever been so before? Not going to check, but it must be about as rare as having scores of 4-4 at the end of second turn.


Turn 4:

Hungering Darkness goes to pick up first ever Symbol of Authority. 

Hanged on top and kid below continue to walk and drop schemes. 

Montresor could have dropped a scheme marker and charged on top of it, trying to kill Mr. Tannen. But instead I chose violence, trying to remove Mr. Tannen with two attacks. Reason was Hanged below that had managed to drop two scheme markers next to Illuminated with lucky triggers. 

Too bad that Lynch turned Hanged into another Beckoner. Thus, Illuminated had all the time in the world to remove both scheme markers with just one action.

What a mess. I didn't get a point this turn, but fortunately opponent wasn't going that strong either. Perhaps because they had already killed their chosen prisoner. But, Ten Thunders took the lead at 2-1, when they finally had enough markers for Sabotage.


Turn 5:

Hopeless turn. Hopeless game.

Somehow I had failed in my scheme marker placement in such a way that I had the capability to get Spread Them Out or a strategy marker, but not both.

Two points for me throughout the game. Woohoo.

Kitty was able to pick up a strategy marker, and also go to place the required scheme marker for sabotage end condition.

A clear 4-2 victory for Jakob Lynch. And let me say, he deserved it. He killed Ferryman, Jack Daw and Hanged, plus managed to summon ten stones worth of extra models.

Jakob Lynch 1 is my #1 opponent in play count, and out of all of my masters that has played a game against him, Jack Daw1 is the only one that hasn't scored even a single victory. And this was third such game. 

But I guess black blood and all those cheat auras count for something if I have to park Jack Daw in the range of every one of them.